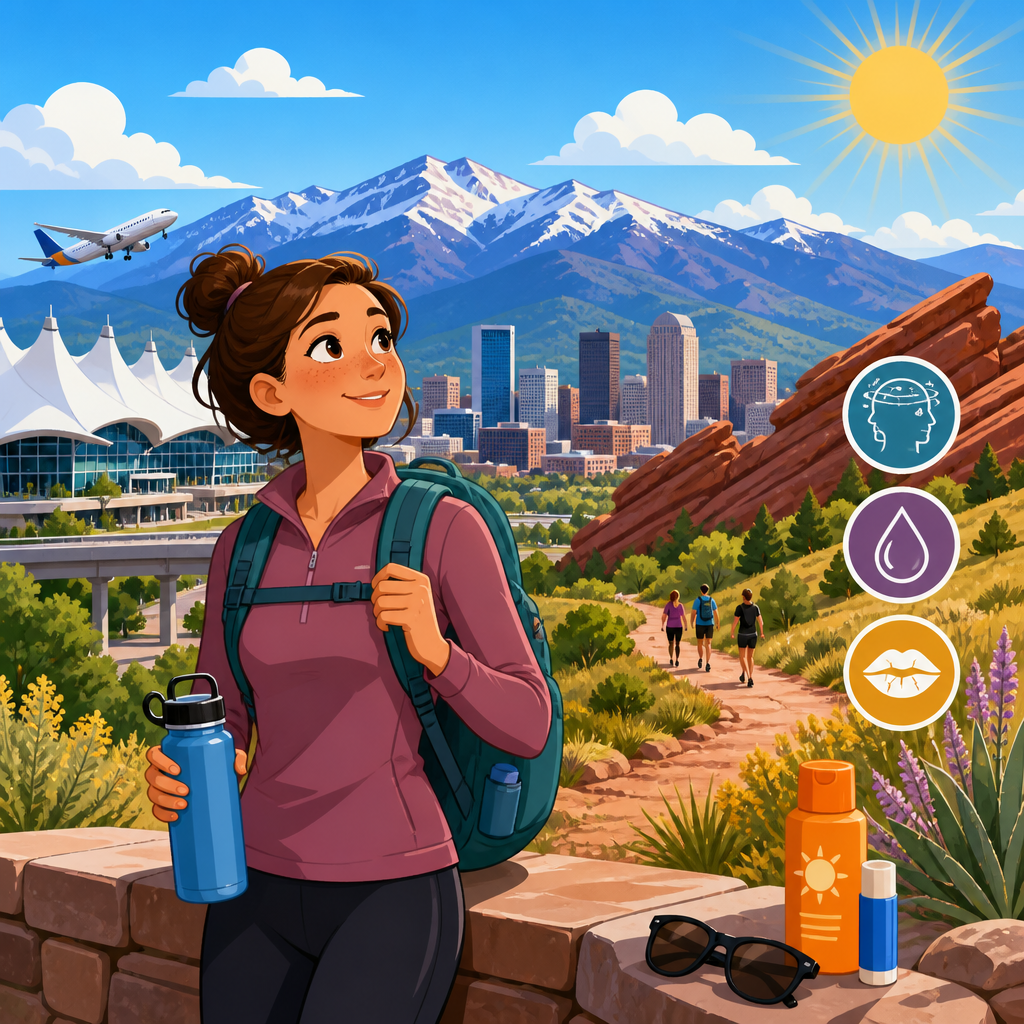
Planning a mountain trip is exciting until the packing list starts to sprawl. A high-altitude packing list for first-timers should do more than name jackets and boots; it should help you understand altitude, weather variability, safety margins, and the logistics that make a demanding trip feel manageable. In travel terms, high altitude usually starts around 8,000 feet or 2,400 meters, where thinner air, stronger sun, colder nights, and faster weather shifts begin changing what you need to carry. Above that level, small packing mistakes become bigger problems.
I learned this the hard way on an early trek in the Andes, when a perfectly reasonable lowland daypack setup left me underinsulated after sunset and overexposed at midday. Since then, I have planned and packed for routes in Colorado, Nepal, Peru, and the Alps, and the same lesson keeps proving true: packing for altitude is really trip planning in miniature. Every item reflects a decision about climate, exertion, remoteness, access to supplies, and how your body responds when oxygen is limited.
That is why this topic sits at the center of trip planning and logistics. Your packing list connects directly to transportation weight limits, baggage rules, local rental quality, itinerary pacing, hydration strategy, medication planning, and emergency readiness. First-timers often ask what they actually need, what they can skip, how to layer properly, and how to avoid overpacking. The best answer is not a generic checklist. It is a practical system that matches gear to conditions, explains tradeoffs clearly, and prepares you for the most common high-altitude travel scenarios without burdening you with unnecessary weight.
Understand altitude demands before you pack
The first step in building a high-altitude packing list for first-timers is defining the trip profile. A hut-to-hut walk in Switzerland requires different gear from a camping trek in Ladakh or a day hike above Cusco. Start with five variables: maximum sleeping altitude, daytime elevation, season, precipitation pattern, and resupply access. Sleeping altitude matters most because nights are when cold stress and altitude symptoms often become more noticeable. A destination with dry afternoons and freezing nights calls for a different clothing system than a wet equatorial mountain range where temperature swings are smaller but rain is relentless.
Altitude changes body function in ways that affect gear choices. Air is drier, so you lose water faster through breathing. Ultraviolet exposure increases with elevation, and snow or pale rock can intensify reflection. Appetite may drop, digestion can feel slower, and exertion becomes harder at a pace that feels easy at sea level. None of this means you need expedition equipment for a modest first trip. It means your list should prioritize layering, hydration, sun protection, sleep warmth, and simple medical contingencies before optional gadgets.
Weather forecasting also becomes less reliable in mountain terrain. Valleys may be warm while ridgelines are windy and near freezing. Afternoon thunderstorms are common in many ranges, including the Rockies and the Alps in summer. That is why experienced planners pack for likely conditions plus one credible weather downgrade. If the forecast says cool and dry, pack as if one cold, wet, windy period will still happen. That single principle prevents many first-timer mistakes.
Build a clothing system instead of packing outfits
The most effective high-altitude packing strategy is a modular layering system. Pack one moisture-managing base layer, one active midlayer, one insulating layer, and one weatherproof shell, then adjust fabric weight to the destination. Merino wool and synthetic base layers both work well because they move sweat away from skin. Cotton does not. Once wet, cotton dries slowly and accelerates heat loss in wind or after sunset. For active movement, a grid fleece or light synthetic jacket handles cool mornings. For stops and evenings, bring a warmer insulated jacket, usually down in dry climates and synthetic fill in persistently wet ones.
Shells deserve more scrutiny than first-timers usually give them. A waterproof breathable jacket with a functional hood matters more than an ultralight fashion shell. In practical terms, look for taped seams, pit zips if you run hot, and enough room to fit over your midlayer. Waterproof pants are optional on some dry trails but essential on trips with frequent rain, snow, or exposed ridgelines. Gloves, a beanie, and a buff weigh little but solve real problems when wind picks up. Even in destinations known for sunshine, these three accessories routinely earn their place.
Footwear should match terrain, load, and your own stability needs. Trail runners are common on well-maintained routes and help keep pack weight down, but they offer less protection in loose talus, mud, or snow. Mid-height hiking boots can be useful if you are carrying a heavier pack or want more ankle structure, though they do not prevent every twist. More important than boot style is break-in time and sock choice. I recommend bringing two to three pairs of wool or synthetic hiking socks and one dedicated sleep pair. Dry sleep socks feel like a luxury until your only other pair is damp at 12,000 feet.
Pack by category so nothing important gets missed
Once you understand conditions and layering, organize the rest of your list by function. This prevents duplicate packing and keeps essentials visible. Use the table below as a planning framework, then tailor quantities to trip length and resupply access.
| Category | Core items | Why they matter at altitude |
|---|---|---|
| Clothing | Base layer, fleece, insulated jacket, shell, hiking pants, hat, gloves, wool socks | Supports temperature control across large day-to-night swings |
| Footwear | Broken-in boots or trail runners, camp shoes if needed, blister kit | Protects mobility, which is critical when routes are uneven and remote |
| Sun and weather | SPF 30+ sunscreen, lip balm with SPF, sunglasses, sun hat, rain cover | High UV exposure and fast weather changes are standard mountain risks |
| Hydration and food | Water bottles or bladder, electrolytes, snacks, water treatment | Dry air increases fluid loss and dehydration worsens altitude symptoms |
| Health and safety | First-aid kit, personal medication, headlamp, emergency blanket, whistle | Small issues escalate faster when help is far away |
| Sleep and camp | Appropriate sleeping bag, insulated pad, earplugs, liner | Recovery depends on warmth and rest, especially during acclimatization |
| Documents and logistics | ID, permits, cash, offline maps, charger, power bank, insurance details | Remote areas often have patchy service and limited payment options |
This category method also works well for family travel, guided treks, and multi-stop itineraries. If you are connecting cities, trailheads, and lodges, keep one “cannot lose” pouch with passport, permits, emergency contacts, medication, and payment cards. I also advise downloading offline maps in Gaia GPS, AllTrails, or Maps.me before leaving major Wi-Fi. In many mountain regions, cell service disappears long before the trail does.
Hydration, nutrition, and health items are not optional extras
Many beginners focus on clothing and overlook the metabolic side of altitude. Hydration is the most common miss. Because respiratory water loss rises in dry, thin air, you may need more fluid than you expect even in cool weather. A practical baseline for active days is to carry capacity for at least two liters, then increase based on route length and refill points. Electrolyte tablets or powders are useful on long climbs because they encourage drinking and replace sodium lost through sweat. They are not magic, but they help many travelers maintain intake when plain water becomes unappealing.
Food should be easy to digest, calorie dense, and accessible without unpacking half your bag. Think nuts, dried fruit, jerky, energy bars, nut butter packets, crackers, and simple sandwiches. At altitude, waiting until you are ravenous usually backfires because appetite can drop. Eat small amounts often. If your itinerary includes remote lodges or tea houses, research meal patterns in advance. In Nepal, for example, dal bhat is reliable and filling, while on some Andean routes food variety can be narrower than visitors expect. Bringing familiar backup snacks smooths the gap.
Your health kit should cover blisters, headaches, stomach upset, minor cuts, and prescription needs. Include bandages, blister dressings such as Compeed or moleskin, tape, antiseptic wipes, pain relief you already tolerate, and any clinician-recommended altitude medication. Acetazolamide is commonly used for prevention in some travelers, but it is not for everyone and should be discussed before departure. A pulse oximeter can be interesting but should not replace symptom awareness. How you feel matters more than a single number. Seek medical help immediately for severe shortness of breath at rest, confusion, loss of coordination, or worsening cough.
Choose the right bag, then control weight ruthlessly
For most first-time high-altitude travelers, overpacking creates more discomfort than underpacking. The solution is not guessing lighter. It is choosing the right bag size and assigning every item a purpose. For day hikes, a 20 to 30 liter pack usually fits layers, water, food, first aid, and navigation. For multi-day trekking with porter or mule support, your duffel may hold the bulk of your clothing while a smaller daypack carries daily essentials. For unsupported trekking or camping, many travelers do well with a 40 to 60 liter backpack, though sleep system volume can push that upward.
Weight matters because energy cost rises with altitude. A pack that feels acceptable at home can feel punishing on switchbacks above 10,000 feet. I use a simple rule: if an item does not address warmth, water, safety, sleep, movement, or legal logistics, it must justify itself strongly. Full-size toiletries, extra jeans, multiple “just in case” outfits, and heavy electronics are common offenders. Compression sacks help organize soft goods, but packing cubes are often better for travel itineraries that alternate between hotels and trails because they speed access without overcompressing insulation.
Airline and local transport rules also shape packing. Small mountain flights, jeeps, and trekking agencies may enforce strict baggage limits. In Peru and Nepal, it is common to see weight caps for domestic or trail-transferred bags. Weigh your luggage before departure and again after a trial pack. If you plan to rent gear locally, verify brand quality and sizing in advance. Good rental shops exist in places like Chamonix and Kathmandu, but standards vary. Never assume critical items such as boots or technical rainwear will fit well if sourced at the last minute.
Plan for sleep, sanitation, and contingency logistics
Altitude magnifies the importance of recovery. If you sleep cold, your next day deteriorates fast. Match your sleeping bag or quilt to realistic overnight temperatures, not just daytime forecasts. Check whether temperature ratings follow ISO or EN standards, because comfort and lower-limit numbers are different. An insulated sleeping pad matters as much as the bag because ground conduction steals heat quickly. For lodge or tea house travel, bring earplugs, a sleep liner if hygiene is uncertain, and a small headlamp for nighttime bathroom trips when electricity is limited or intermittent.
Sanitation deserves attention because gastrointestinal problems are especially draining when you are acclimatizing. Pack hand sanitizer, toilet paper or tissues, a sealable waste bag, and water treatment if tap water safety is unclear. Treatment options include boiling, filters from brands like Sawyer or Katadyn, UV purifiers such as SteriPEN, and chlorine dioxide tablets. Each has tradeoffs in speed, virus coverage, and field reliability. In very cold conditions, protect filters from freezing after use, because internal damage can make them ineffective even when they look normal.
Finally, include contingency logistics on your high-altitude packing list for first-timers. That means printed or offline copies of reservations, evacuation insurance details, emergency contacts, spare cash in small denominations, and a charging plan. Cold weather drains batteries faster, so keep your phone and power bank insulated in an inner pocket overnight. Build one spare day into the itinerary when possible. Weather, road closures, and slower acclimatization regularly disrupt mountain schedules. A good packing list supports flexibility, and flexibility is often the difference between a stressful trip and a memorable one.
A smart high-altitude packing list for first-timers is really a decision framework for trip planning and logistics. Start with the route profile, sleeping elevation, season, and resupply access. Then build a clothing system, organize essentials by category, protect hydration and energy intake, keep your medical kit practical, and control pack weight with discipline. The goal is not to own the most gear. The goal is to stay warm, mobile, hydrated, protected from sun and weather, and ready for the realities of remote travel.
If you remember only one principle, make it this: pack for conditions, not for photos or wishful forecasts. Mountains reward preparation and punish assumptions. The most useful items are often the least glamorous ones, such as a shell that truly keeps rain out, dry socks for camp, sunscreen you will actually reapply, and offline maps that still work when signal disappears. These details are what turn a first high-altitude trip from uncertain to confident.
Use this guide as your hub for trip planning and logistics, then tailor your list to your destination, fitness, and support level. Review your itinerary, test-pack your bag, walk with it before departure, and cut whatever does not serve a clear purpose. If you do that well, you will arrive lighter, safer, and far better prepared to enjoy the altitude instead of merely enduring it.
Frequently Asked Questions
What should a high-altitude packing list for first-timers always include?
A smart high-altitude packing list starts with systems, not just individual items. First-timers should focus on layering, foot protection, hydration, sun defense, navigation, and emergency basics. For clothing, that usually means a moisture-wicking base layer, an insulating mid-layer such as fleece or lightweight down, and a waterproof or windproof outer shell. Weather can swing quickly at elevation, so the goal is to stay warm without sweating heavily, then be able to add or remove layers as conditions change. Good hiking pants, extra socks, warm gloves, and a beanie or buff also matter more than many beginners expect, especially when temperatures drop in the morning, evening, or during storms.
Footwear should match the terrain rather than the idea of the trip. Supportive trail shoes may be enough for well-maintained routes, while sturdier hiking boots make more sense on rocky, wet, or unstable trails. Beyond clothing and shoes, a first-timer should always pack enough water or a reliable filtration method, high-energy snacks, sunglasses with strong UV protection, sunscreen, lip balm, and a small first aid kit. A headlamp, map or downloaded offline navigation, power bank, trekking poles if preferred, and a compact emergency layer such as a puffy jacket round out the essentials. If the trip involves a long drive, remote access, or changing camps, it is also wise to organize gear in clearly separated stuff sacks or packing cubes so critical items are easy to find when conditions change fast.
How is packing for high altitude different from packing for a regular hiking or travel trip?
The biggest difference is that altitude changes the consequences of small mistakes. At lower elevations, forgetting sunscreen, extra water, or a warm layer may be uncomfortable. At high altitude, those same oversights can become serious because the air is drier, the sun is stronger, temperatures can drop abruptly, and fatigue tends to hit harder. That means your packing list needs more safety margin. You are not just packing for the forecast; you are packing for variability. A clear morning can become windy, cold, or stormy within hours, and because conditions often feel more intense above 8,000 feet, first-timers benefit from carrying gear that would seem optional on a casual day trip elsewhere.
Another key difference is recovery and effort. You will likely move more slowly, drink more water, and need more frequent calories than you expect. As a result, food planning and hydration become core parts of the packing list rather than afterthoughts. Altitude also increases exposure to sun and wind, so skin and eye protection deserve priority. Logistics matter more too. Battery life can feel more important when colder temperatures affect electronics, and remote mountain areas may have limited cell service, making offline maps, route notes, and emergency communication plans more important than on a standard trip. In short, packing for high altitude means building resilience into your gear choices so your trip remains manageable even when your body, the weather, and the terrain are all more demanding.
What clothing layers work best at high altitude for beginners?
The most reliable approach is a three-layer system with a few strategic extras. Start with a base layer that moves sweat away from your skin. Merino wool or quality synthetic fabrics are strong choices because they help regulate temperature and dry faster than cotton. Avoid cotton whenever possible, since it holds moisture and can leave you feeling chilled once temperatures drop or the wind picks up. Your mid-layer should provide warmth without too much bulk; fleece is breathable and easy to hike in, while a lightweight insulated jacket works well during colder starts, rest breaks, or higher camps.
Your outer layer should protect you from wind and precipitation. A waterproof shell is ideal if the forecast includes rain, wet snow, or highly changeable weather, while a wind-resistant jacket may be enough in drier conditions. Many first-timers underestimate how useful accessories are at altitude. A warm hat, neck gaiter, sun hat, liner gloves or insulated gloves, and extra socks can make a disproportionate difference in comfort. Lower-body layers matter too: quick-drying hiking pants are more versatile than jeans, and thermal leggings may be worth bringing if you expect cold mornings or overnight stays. The best layering system is one you can adjust often. At altitude, beginners tend to either overdress and sweat too much or underdress and get cold quickly during stops. Pack layers that let you fine-tune comfort throughout the day.
How much water, food, and altitude-related health gear should I bring?
Hydration needs typically increase at higher elevations because the air is drier, breathing is often heavier, and many people lose more fluids without realizing it. While exact amounts depend on the route, weather, effort, and water access, beginners should generally plan more conservatively than they would at lower elevations. Carry enough water capacity to get through long dry stretches, and if natural water sources are available, bring a filter, purifier, or treatment tablets rather than relying on untreated water. Electrolytes can also help, especially on long days or in very dry conditions, but they should support hydration rather than replace plain water. The key is not just carrying water, but drinking consistently before you feel depleted.
Food should emphasize easy access and steady energy. Pack snacks you know you will actually eat when tired, such as trail mix, bars, jerky, nut butter packets, dried fruit, or sandwiches. At altitude, appetite can sometimes dip, so foods that are simple, familiar, and calorie-dense usually work best. For altitude-related health, your kit should include any personal medications, blister care, pain relief if appropriate for you, and items for managing sun and dry air such as lip balm and sunscreen. If you have discussed altitude sickness prevention medication with a healthcare professional, pack it exactly as directed. It is also important to know that gear does not replace pacing, rest, and acclimatization. The most useful “health gear” for many first-timers is actually a realistic itinerary, an early turnaround time, and the willingness to descend if symptoms worsen.
What do first-timers most often forget on a high-altitude trip?
Beginners often remember the big-ticket items like jackets, boots, and backpacks, but forget the smaller pieces that make the trip safer and more comfortable. Sun protection is one of the most commonly overlooked categories. At altitude, UV exposure is stronger, and reflective surfaces such as rock, snow, or light-colored terrain can intensify it further. Quality sunglasses, sunscreen, and SPF lip balm are not optional extras. People also forget how cold it can feel when they stop moving, so an extra insulating layer for breaks, summit time, or unexpected delays is one of the best “just in case” additions to a first-timer’s pack.
Other commonly missed items include a headlamp, spare socks, gloves, offline maps, and a fully charged power bank. Small comfort and safety items such as blister treatment, snacks that can be reached without unpacking everything, and a rain cover or dry bag for protecting layers often end up being extremely useful. Another frequent mistake is forgetting the administrative side of mountain travel: permits, route details, emergency contact information, cash for remote stops, and a plan for poor cell service. Finally, first-timers often overpack heavy items they never use while underpacking practical essentials they need all day. The best solution is to review your list by category: weather protection, hydration, nutrition, navigation, health, and emergency backup. That keeps your packing focused on actual mountain demands rather than guesswork.