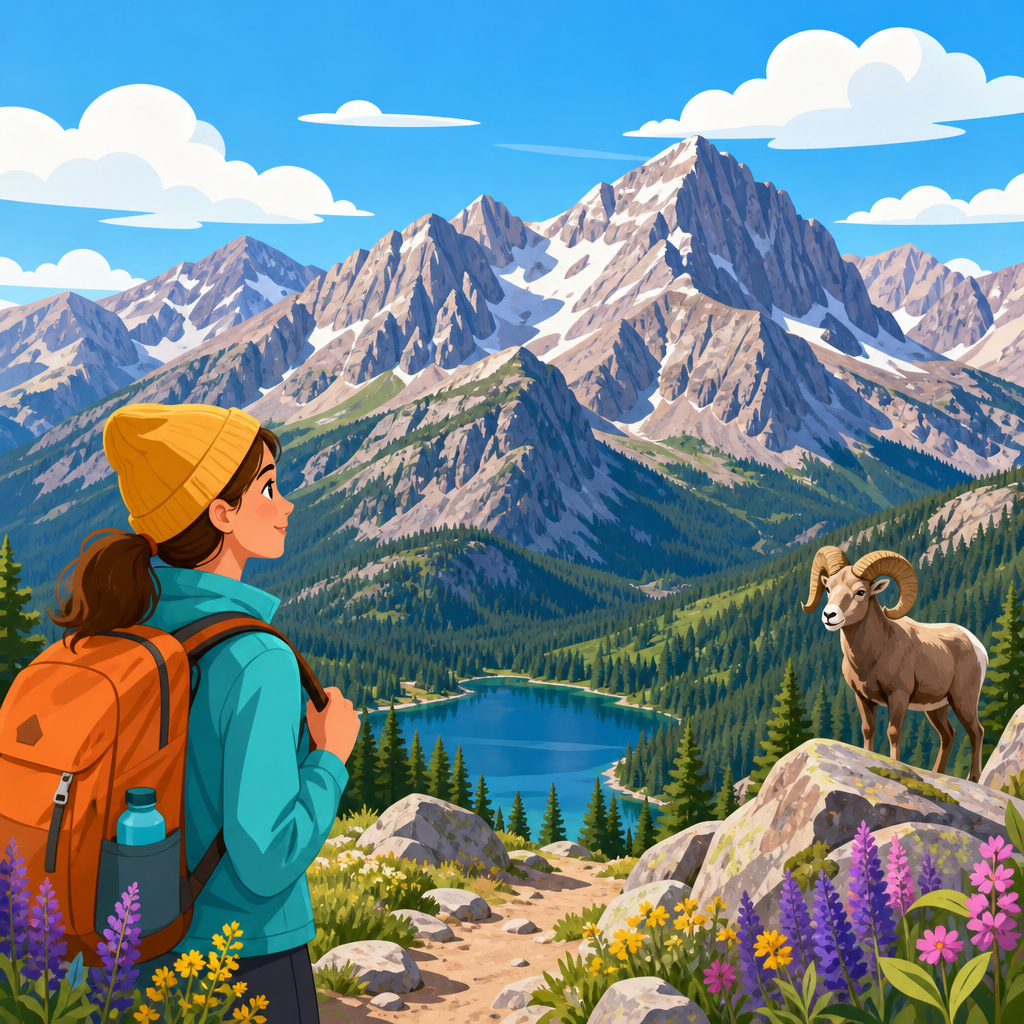
Rocky Mountain National Park altitude shapes every part of a first visit, from how you sleep in Estes Park to how long you can comfortably hike above treeline on Trail Ridge Road. For first-time visitors, understanding elevation is not a minor planning detail; it is the factor that most often determines energy levels, weather exposure, driving conditions, and even whether a dream itinerary feels thrilling or miserable. In Rocky Mountain National Park, common visitor areas sit between roughly 7,500 and 12,000 feet, and many iconic overlooks, lakes, and trails climb higher still. That range is enough to change breathing, hydration needs, sun exposure, and storm risk within a single day.
Altitude, or elevation above sea level, matters because air pressure drops as you go higher. The percentage of oxygen in the air stays about the same, but each breath delivers less usable oxygen. At 8,000 feet, many travelers notice faster breathing during simple walks. Above 10,000 feet, headaches, poor sleep, nausea, and unusual fatigue become much more common, especially for visitors arriving from low elevations. I have seen well-prepared hikers breeze through alpine routes after a gradual adjustment day, and I have also watched strong sea-level runners struggle on short uphill paths because they treated the park like any ordinary road trip stop.
This Rocky Mountain National Park altitude guide also works as a practical hub for national park guides more broadly, because the same planning principles apply across the mountain parks of the American West. Visitors comparing Rocky Mountain to Yosemite’s high country, Glacier’s Logan Pass, Mount Rainier’s Paradise, or Bryce Canyon’s rim quickly discover that elevation changes how you pack, pace, fuel, and recover. Learning these basics here will help you interpret trail descriptions, weather forecasts, shuttle systems, and ranger advisories in other parks as well. Altitude is not a reason to worry, but it is a reason to plan with precision.
Most first-time visitors ask the same questions: What is the altitude in Rocky Mountain National Park, what elevation causes symptoms, where should I stay, can I drive to the highest points without acclimating, and how can I avoid altitude sickness while still seeing the highlights? The short answer is that you can absolutely enjoy the park on a first trip if you match your plans to your body and the park’s geography. Lower valleys are usually easier on arrival day, higher scenic drives are best tackled after hydration and rest, and strenuous alpine hikes should come only after you know how you feel at elevation.
Key elevations first-time visitors should know
Rocky Mountain National Park spans a dramatic altitude range, and knowing the main numbers helps you judge the effort behind every plan. Estes Park, the east-side gateway town, sits around 7,522 feet. The Beaver Meadows Entrance is roughly 7,840 feet. Many popular east-side destinations, including Moraine Park and Bear Lake Road turnoffs, begin near or above 8,000 feet. Bear Lake itself is about 9,475 feet, meaning even a short family walk there happens at an elevation higher than many mountain summits elsewhere in the United States.
On the west side, Grand Lake sits near 8,369 feet, and the Kawuneeche Valley is generally a bit lower and gentler than the park’s exposed alpine spine. Trail Ridge Road, one of the defining scenic drives in the national park system, climbs above 12,000 feet and crosses the tundra zone where weather changes quickly and walking a few hundred yards can feel surprisingly strenuous. The road’s highest continuous paved elevation is often cited around 12,183 feet, with nearby overlooks and short walks exposing visitors to true high-altitude conditions.
The park’s highest summit, Longs Peak, reaches 14,259 feet, but first-time visitors should not let that famous number distort expectations. You do not need to climb a fourteener to be affected by elevation here. In practical terms, symptoms often begin for newcomers around 8,000 feet and intensify above 10,000 feet. That means lodging, dining, sightseeing, and easy trails can all occur in the same altitude band where your body is already adapting. When you read any Rocky Mountain National Park itinerary, always note both mileage and elevation. A two-mile walk at 9,500 feet is not equivalent to a two-mile walk at sea level.
| Location | Approximate Elevation | What It Means for Visitors |
|---|---|---|
| Estes Park | 7,522 feet | Good base for acclimating, but some visitors still notice poor sleep and mild headaches |
| Grand Lake | 8,369 feet | Higher overnight base; pace yourself on arrival day |
| Bear Lake | 9,475 feet | Even easy walks feel harder; hydrate before short hikes |
| Alpine Visitor Center area | 11,796 feet | Expect shortness of breath with stairs or brief walks |
| Trail Ridge Road high point area | About 12,183 feet | Best for sightseeing after some adjustment, especially for low-elevation travelers |
| Longs Peak summit | 14,259 feet | Technical, strenuous objective not suitable for most first-time park visitors |
How altitude affects your body in Rocky Mountain National Park
The most common first-day effects of Rocky Mountain National Park altitude are dry mouth, faster breathing, reduced appetite, interrupted sleep, and early fatigue on hills or stairs. These responses are normal. Your body is adjusting to lower air pressure by breathing more rapidly and increasing heart rate. Over time, kidneys help regulate blood chemistry to support acclimatization, but that process is not instant. For many people, the first night feels the worst, especially after flying into Denver and driving straight to a high lodging base without resting.
Altitude sickness, more accurately called acute mountain sickness, goes beyond ordinary breathlessness. Typical signs include headache, nausea, dizziness, unusual exhaustion, and a general sense that something is wrong even at rest. A useful rule is this: if you have a headache plus one other symptom after ascending, assume altitude is involved until proven otherwise. The Centers for Disease Control and Prevention and wilderness medicine guidance both emphasize that symptoms often improve with rest, hydration, lighter activity, and avoiding further ascent. If symptoms worsen, descending is the correct response.
Not everyone is affected equally. Age, fitness, and body type do not reliably predict who will struggle. I have watched ultramarathon runners develop headaches at Bear Lake while less athletic travelers felt fine. What matters more is recent altitude exposure, ascent rate, sleep quality, hydration, alcohol intake, and whether you push hard before acclimating. Children can be affected too, although they may simply seem cranky or unusually tired. Because altitude mimics dehydration and overexertion, visitors sometimes dismiss warning signs and continue upward. In this park, that mistake can turn a scenic day into a medical problem quickly.
Best arrival strategy and acclimation plan for a first visit
The smartest first-day plan is simple: sleep low if possible, drink water consistently, eat regular meals, and keep activity moderate. If you are flying into Colorado from near sea level, avoid making Trail Ridge Road or a hard hike your first major activity. A much better pattern is to arrive in Estes Park or Grand Lake, take a gentle walk in a lower valley, and save the highest viewpoints for day two or three. In practice, that one decision prevents most altitude-related misery I see among first-time visitors.
A reliable acclimation sequence looks like this. On arrival day, stroll around Sprague Lake, Moraine Park, Holzwarth Historic Site, or an easy meadow trail rather than chasing a summit. On the next day, try a modest lake hike such as Bear Lake to Nymph Lake, Dream Lake, or Alberta Falls, watching carefully for headache or nausea. After that, consider Trail Ridge Road stops, tundra overlooks, or longer hikes if you have slept well and feel strong. This gradual ascent strategy mirrors how experienced mountain travelers operate in parks worldwide, from Sequoia and Kings Canyon to North Cascades and Glacier.
If your schedule is short, you can still use altitude planning well. Front-load scenic driving and short overlooks, then place demanding hikes later in the trip. Book timed entry and shuttle plans around realistic energy, not idealized ambition. Many visitors overpack a single day with Bear Lake, Trail Ridge Road, and a sunset stop at high elevation. That often fails because cumulative altitude exposure matters. A measured plan, by contrast, lets you enjoy wildlife watching, lake scenery, and alpine views without spending the evening nursing a pounding headache in your hotel room.
Where to stay and what to do at different elevations
Choosing where to stay is partly about access and partly about altitude tolerance. Estes Park is the most common base for first-time visitors because it provides extensive lodging, restaurants, grocery stores, gear shops, and quick access to the east-side entrance stations and Bear Lake Road corridor. At just over 7,500 feet, it is still high enough for some symptoms, but it is often more manageable than sleeping higher in the park. Grand Lake offers a quieter atmosphere and great west-side access, yet its higher elevation can make the first night tougher for sensitive travelers.
Within the park, campgrounds vary in elevation and exposure. Moraine Park Campground sits around the 8,160-foot range, Glacier Basin is higher still, and Timber Creek on the west side is slightly lower than some east-side options. Campers should remember that sleeping in cold, dry air can intensify dehydration and poor rest. If you are new to altitude, a hotel or cabin with easy access to water, food, and a warm room may produce a better first night than a tent. Comfort is not a luxury here; it can be part of safe acclimation.
Match activities to sleeping elevation. Visitors based in Estes Park often do well with lower valley wildlife viewing at dawn, then moderate trails later in the morning. Those staying in Grand Lake can explore the Kawuneeche Valley, which is excellent for moose habitat, before crossing higher terrain. In either base, use high-altitude locations such as the Alpine Visitor Center, Forest Canyon Overlook, and tundra trails as controlled exposures rather than endurance contests. Ten minutes at 12,000 feet may be enough for photos and views if your body is still adjusting.
Safety, packing, and trip planning tips that prevent altitude problems
The most effective way to prevent altitude issues in Rocky Mountain National Park is to combine hydration, pacing, weather awareness, and conservative decision-making. Start drinking water the day before your mountain drive and continue steadily, but do not force extreme amounts. Eat carbohydrates regularly because appetite often drops at elevation while energy needs rise. Limit alcohol the first night, and be cautious with sleeping pills or sedating medications unless prescribed with altitude in mind. Dry air also increases fluid loss through breathing, so chapstick, sunscreen, and electrolyte drinks are more than convenience items.
Weather multiplies altitude stress. Above treeline, ultraviolet radiation is stronger, winds can be severe, and afternoon thunderstorms are a routine summer hazard. A visitor who feels only slightly tired at the trailhead can become cold, dizzy, or disoriented once wind, sun, and exertion stack together. Pack insulating layers, rain protection, sunglasses, and high-SPF sunscreen even for short outings. The National Park Service consistently advises hikers to start early and leave exposed high country before storms build. In my experience, visitors who respect turnaround times enjoy the park more than those fixated on completing every planned mile.
Trip logistics matter too. Timed entry reservations, seasonal shuttle operations, road construction, and snow closures all influence how long you will spend at elevation and how far you may need to walk from parking areas. Check current National Park Service alerts before departure, especially for Trail Ridge Road opening dates, Bear Lake corridor access, and wildfire or storm impacts. If anyone in your group develops a persistent headache, vomiting, confusion, or trouble walking straight, stop ascending and descend promptly. The mountain does not reward stubbornness. Good altitude planning turns Rocky Mountain National Park from an exhausting checklist into a memorable, repeat-worthy experience.
For first-time visitors, the central lesson is straightforward: Rocky Mountain National Park altitude is the framework around every smart itinerary decision. Know the park’s key elevations, expect your body to react, and build your trip around gradual exposure rather than maximum effort on day one. Lower gateway towns, easy valley walks, moderate lake hikes, and later high-country sightseeing create a sequence that works for most travelers. This approach is useful not only here but across national park guides for other elevated destinations, where the same mix of air pressure, weather, and exertion shapes outcomes.
The reward for planning around elevation is substantial. You sleep better, hike more comfortably, drive with more confidence, and notice more of what makes the park exceptional: elk in Moraine Park, sunrise light over Bear Lake Road, tundra wildflowers near Trail Ridge Road, and the immense scale of the Continental Divide. Altitude awareness does not limit your trip; it protects it. Use this guide as your starting point, then map each day by elevation, effort, and recovery time. If you do that before you arrive, your first Rocky Mountain National Park visit will feel far smoother and far more memorable.
Frequently Asked Questions
What altitude should first-time visitors expect in Rocky Mountain National Park?
First-time visitors are often surprised by how high Rocky Mountain National Park feels before they ever start a hike. Common gateway and visitor areas are already well above the elevations many people experience at home. Estes Park sits around 7,500 feet, and many popular areas on the east side of the park begin near 8,000 feet or higher. Bear Lake is roughly 9,475 feet, Trail Ridge Road climbs above 12,000 feet, and much of the alpine tundra zone is above treeline, where the air is thinner, the sun is stronger, and weather changes quickly. On the west side, Grand Lake is lower than the highest road and hiking areas but still high enough that some visitors notice the altitude.
That means altitude is not something reserved for summit hikes or serious backcountry trips. You can feel it while sleeping, walking from the parking lot, climbing a short trail, or simply carrying luggage up a flight of stairs. Even fit travelers can find themselves breathing harder than expected, tiring sooner, or feeling slightly off during the first day or two. For planning purposes, it helps to think in layers: your lodging may already be at a moderate high elevation, scenic pullouts and lakes may be significantly higher, and alpine drives or hikes can take you into a range where both physical effort and weather exposure increase quickly. Knowing those elevation bands in advance makes it much easier to build a realistic first itinerary.
How does altitude affect your body during a first visit?
Altitude affects the body because there is less available oxygen as elevation increases, so your heart and lungs have to work harder to do the same tasks. In Rocky Mountain National Park, that can show up as shortness of breath on mild inclines, a faster pulse, lower stamina, lightheadedness, poor sleep, mild headache, dehydration, or a general sense that everything takes more effort than it should. Many first-time visitors mistake this for being out of shape, but altitude can affect almost anyone, including active travelers who live near sea level.
The first 24 to 48 hours are often the most noticeable. Some people sleep poorly the first night, wake up with a mild headache, or feel unusually tired after an easy walk. Others may be fine at lodging elevation but feel the change quickly once they drive up to places near or above 10,000 feet. The combination of thinner air, strong sun, dry climate, and exertion can make symptoms appear faster than expected. This is one reason first-time visitors often do better with a gradual start rather than a packed arrival day followed immediately by a high-elevation hike.
Most altitude effects are manageable with smart pacing: drink water regularly, avoid overexerting yourself early in the trip, eat consistent meals, limit alcohol the first day or two, and build rest into your schedule. If symptoms become severe, such as intense headache, vomiting, confusion, chest tightness, or difficulty breathing at rest, the safest response is to stop exertion and move to a lower elevation. For most visitors, the key takeaway is simple: altitude is normal to notice here, and respecting it usually leads to a much better experience.
What is the best way to adjust to Rocky Mountain National Park altitude if it is your first time?
The best strategy is to ease into the trip instead of treating day one like your biggest adventure day. If possible, spend your first night at a lower nearby elevation before going higher, or at least plan a gentle first day in Estes Park or another base area rather than immediately heading for long hikes above treeline. A short lake walk, scenic drive with frequent stops, wildlife viewing, or easy lower-elevation trails can help your body start adjusting without adding too much stress.
Hydration matters a lot, but it is not just about drinking a huge amount of water all at once. Sip consistently throughout the day, and remember that the mountain climate is dry enough that you can become dehydrated faster than you realize. Eating regularly also helps. Many people feel worse at altitude when they skip meals, drink alcohol, rely only on coffee, or push through fatigue. Sleeping well the night before travel, pacing physical activity, and keeping expectations flexible are all part of acclimating successfully.
It also helps to structure your itinerary by elevation. Start with activities around your lodging elevation, then move to mid-elevation trailheads, and save your longest or most strenuous outing for after you have had time to adjust. If Trail Ridge Road or an alpine hike is high on your list, consider visiting those areas after you have already spent at least a day in the region. This approach does not guarantee you will feel perfect, but it greatly improves the odds that your first visit feels energizing instead of exhausting.
Is Trail Ridge Road safe for first-time visitors who are worried about altitude?
Yes, Trail Ridge Road is generally safe for first-time visitors, but it deserves respect because it combines very high elevation with rapidly changing mountain weather and a lot of exposure. Driving the road itself does not require major physical exertion, so many visitors can enjoy the views without serious problems. The biggest issue is often what happens after you stop. A short walk to a viewpoint at over 12,000 feet can feel much harder than expected, and visitors sometimes overdo it because the distance looks easy on paper.
If you are concerned about altitude, the smartest approach is to treat Trail Ridge Road as a scenic high-elevation experience, not automatically as a strenuous hiking day. Stop often, walk slowly, and pay attention to how you feel. If you notice headache, dizziness, unusual fatigue, or shortness of breath beyond what feels manageable, cut the stop short and return to a lower elevation. This is especially important if you arrived recently from low elevation and have not had time to adjust.
Weather is another major factor. Even in summer, temperatures can be much colder up high than in Estes Park, and wind can make exposed areas feel far harsher than visitors expect. Thunderstorms can build quickly, especially in the afternoon, and conditions above treeline offer very little shelter. Bring layers, sun protection, water, and realistic expectations. For first-time visitors, Trail Ridge Road is often one of the highlights of the park, but it is best enjoyed by combining scenic ambition with conservative decision-making.
How should first-time visitors plan hikes in Rocky Mountain National Park based on elevation?
The simplest rule is to judge hikes by both distance and starting altitude. A moderate trail at sea level can feel significantly harder when it begins around 9,000 to 10,000 feet, and any route that climbs higher can become much more demanding than the mileage suggests. First-time visitors should pay attention not just to total elevation gain, but also to how high the trailhead already is, whether the trail goes above treeline, and how exposed it will be to wind, sun, and afternoon storms.
A smart hiking plan often starts with easier walks or shorter trails near lower elevations, then builds toward longer or steeper hikes once you know how your body is responding. Popular first-visit mistakes include choosing a bucket-list trail too soon, underestimating the effort of stairs or rocky terrain at altitude, and staying out too long in exposed alpine areas. Above treeline, there is less protection from lightning, temperature drops, and sudden weather shifts, so an early start is usually essential. Many experienced mountain hikers aim to be heading down before storms build, and that is especially wise for first-timers.
It is also important to separate scenic value from physical difficulty. Rocky Mountain National Park offers outstanding views at many effort levels, so you do not need to push into misery to have a memorable day. Choose trails that match your energy, carry more water than you think you need, pack layers, and turn around earlier than you might at lower elevations. In this park, a successful hike is not defined only by reaching a destination. It is defined by finishing strong, staying safe, and still having energy to enjoy the rest of your trip.