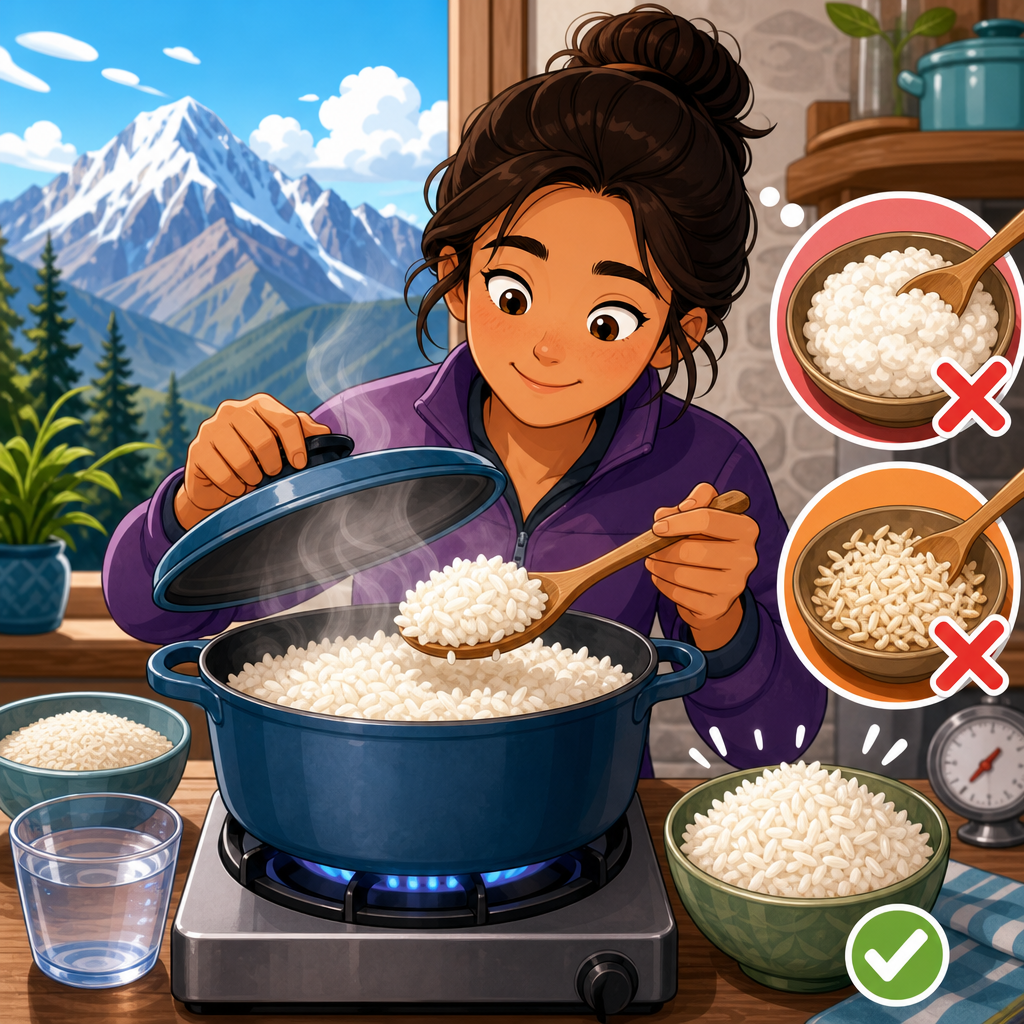
Cooking rice at altitude without mush or crunch starts with understanding why the same pot, water ratio, and timing that work at sea level often fail in mountain kitchens. At higher elevations, water boils at a lower temperature, evaporation happens faster, and grains hydrate more slowly, so rice can end up undercooked in the center, blown out on the outside, or gummy from desperate overcorrection. In practical terms, altitude cooking usually means anything above about 3,000 feet, with noticeable changes by 5,000 feet and major adjustments above 7,500 feet. This matters because rice is one of the most common side dishes and base ingredients in home cooking, yet it is also unforgiving when heat, moisture, and time fall out of balance. I have tested rice in gas and electric kitchens from near sea level to above 8,000 feet, and the consistent lesson is simple: good altitude rice depends less on fixed recipes and more on method. Once you know how boiling point, pot shape, lid seal, grain type, and resting time interact, you can cook white rice, brown rice, basmati, jasmine, sushi rice, and wild rice blends with repeatable results. This hub article explains the core cooking methods for rice at altitude, when to use each one, how to troubleshoot common problems, and what adjustments deliver tender, separate grains instead of mush or crunch.
Why rice behaves differently at altitude
The core science is straightforward. At sea level, water boils at 212 degrees Fahrenheit. As elevation increases, atmospheric pressure drops, and water boils at a lower temperature. A useful rule of thumb is about a 2 degree Fahrenheit drop for every 1,000 feet of elevation. At 5,000 feet, boiling water is roughly 202 degrees Fahrenheit. That sounds minor, but rice cookery depends on starch granules absorbing water and swelling within a narrow heat range. Lower boiling temperatures slow that process. At the same time, dry mountain air and vigorous surface evaporation mean you lose water faster, especially in a wide saucepan or a pot with a loose lid.
These two changes create the classic altitude paradox: rice can look wet but still taste hard. The outer layer softens while the center remains chalky because the grains have not had enough time or heat to fully gelatinize. Many cooks respond by stirring, adding too much water, or turning up the burner. That often ruptures the exterior starch, creating stickiness and mush before the center catches up. The fix is controlled compensation: slightly more water, lower and steadier heat, and longer covered cooking plus a mandatory rest off the heat. Resting is not optional. In my testing, a ten minute rest solved more texture issues than adding another quarter cup of water after the fact.
Choosing the right cooking method for your rice
There is no single best way to cook rice at altitude. The best method depends on the variety, the desired texture, and how much margin for error you want. The absorption method, where rice cooks in a measured amount of water until absorbed, is ideal for most long grain white rice, jasmine, and basmati because it preserves aroma and keeps grains distinct. The pasta method, where rice cooks in excess water and is drained, is forgiving at high elevation and works especially well for brown rice, wild rice blends, and batches where exact absorption is hard to control. Steaming after partial boiling is useful for sushi rice and some medium grain styles because it evens out hydration. Rice cookers and electric pressure cookers can outperform stovetop pans because they reduce evaporation variability, but they still need altitude adjustments.
As a hub for cooking methods, this page should help you decide quickly. If you want fluffy, separate white rice, start with absorption. If your rice often scorches before it softens, move to the pasta method. If you need consistency across different kitchens, use a rice cooker with calibrated water marks and keep notes by grain type. If you cook brown rice often, a pressure cooker can save time, but pressure release strategy matters. Matching method to grain matters more at altitude than at sea level because the margin between undercooked and overcooked narrows once the boiling point drops.
Absorption method: the most useful baseline
The absorption method remains the foundation for cooking rice at altitude without mush or crunch. Start by rinsing long grain white rice, jasmine, or basmati until the water runs mostly clear. Rinsing removes excess surface starch that can make rice sticky, especially when longer cooking times are needed. For most white rice at 5,000 to 7,500 feet, begin with 1 cup rice to 1.75 cups water instead of the common sea level ratio of 1 to 1.5 or 1 to 1.6. Add a pinch of salt and, if desired, 1 teaspoon of oil or butter to reduce foaming. Bring the pot just to a boil, stir once, cover tightly, and immediately reduce to the lowest possible simmer.
Timing is where altitude adjustments matter most. White rice that might cook in 15 to 18 minutes at sea level often needs 20 to 25 minutes around 5,000 feet, and 25 to 30 minutes above 7,500 feet. Avoid lifting the lid. Every peek dumps steam and extends the cooking time. When the heat is turned off, leave the pot covered for 10 minutes, then fluff with a fork. If the rice is still slightly firm, add 2 tablespoons hot water, cover again, and rest 5 more minutes off heat before returning to a very low burner. This gentle finish works better than blasting the pot with heat, which usually causes bottom scorching and top dryness.
Pasta method: the easiest way to avoid undercooked centers
The pasta method is underused for altitude cooking, but it is one of the most reliable techniques when rice repeatedly turns crunchy in the middle. Instead of depending on exact absorption, boil rice in a large volume of water, usually 6 to 8 cups per cup of rice, then drain it when the grains are tender. Because the rice is surrounded by abundant water, evaporation matters less and the grains hydrate more evenly. This is especially useful for brown rice, black rice, red rice, and wild rice blends, all of which have bran layers that soften slowly at lower boiling temperatures.
To use this method, bring salted water to a rolling boil, add rinsed rice, and cook uncovered until the grains are tender but not split. For white basmati at altitude, that may take 10 to 14 minutes. For brown rice, expect 28 to 40 minutes depending on elevation and brand. Drain well in a fine mesh strainer, return the rice to the warm pot, cover, and let it steam in its own residual heat for 10 minutes. That final covered rest is what gives you a drier, fluffier texture rather than waterlogged grains. In restaurant kitchens where I needed dependable batch results, this method outperformed absorption whenever line cooks were juggling multiple burners and could not babysit a perfect simmer.
Rice cookers and electric pressure cookers at altitude
Rice cookers are valuable at altitude because they create a closed environment and switch from cook to warm based on temperature change rather than visual cues. Even so, manufacturer water lines are often calibrated for sea level assumptions. In practice, many standard rice cookers need a small water increase at higher elevations, usually 1 to 3 tablespoons extra per cooker cup for white rice and more for brown rice. Start conservatively and record what works. Fuzzy logic models from brands such as Zojirushi and Tiger generally handle altitude better than basic on off cookers because they adjust heat cycles throughout cooking.
Electric pressure cookers change the equation by raising the boiling point inside the pot, which effectively cancels part of the altitude penalty. This makes them excellent for brown rice and wild rice. For example, long grain white rice may work well at high altitude with a 1 to 1 water ratio, 3 to 4 minutes at high pressure, and a 10 minute natural release, while brown rice may need 22 to 26 minutes at high pressure plus natural release. The tradeoff is narrower tolerance for excess water. If you overfill by even a small amount, the sealed environment can push rice toward softness faster than expected. Pressure cookers solve crunch more easily than they solve mush, so accurate measurement and grain specific timing are essential.
Method adjustments by rice type
Different rice varieties absorb water at different rates because of grain shape, surface area, amylose content, and whether the bran layer remains intact. Long grain white rice and basmati usually benefit from rinsing, modestly increased water, and a lower simmer to protect separate grains. Jasmine rice is more aromatic and slightly softer by nature, so too much extra water at altitude can erase its delicate texture. Short grain and sushi rice need enough water to become cohesive, but they are especially vulnerable to overworking; stirring after cooking can turn the surface pasty. Brown rice requires more water, more time, and often the most consistent results from the pasta or pressure method. Wild rice is not true rice at all, but an aquatic grass seed, so it behaves differently, often requiring significantly longer cooking.
| Rice type | Best altitude method | Starting ratio or approach | Typical altitude note |
|---|---|---|---|
| Long grain white | Absorption | 1 cup rice to 1.75 cups water | Cook gently, rest covered 10 minutes |
| Basmati | Absorption or pasta | 1 to 1.6 to 1.75, or boil and drain | Rinse well to keep grains separate |
| Jasmine | Absorption | 1 cup rice to 1.6 to 1.75 cups water | Use minimal extra water to avoid softness |
| Brown rice | Pasta or pressure cooker | Boil in excess water or pressure cook | Longer time matters more than harder boil |
| Sushi rice | Absorption plus steam rest | 1 cup rice to about 1.8 cups water | Do not stir aggressively after cooking |
| Wild rice blend | Pasta | Boil in excess water, then drain | Blend components may finish at different times |
Common mistakes that cause mush or crunch
The most common altitude mistake is using sea level timing with only a token water increase. That usually leaves a firm core. The second is compensating with too much water from the start, which gives you split exteriors and sticky clumps. A third is cooking over medium instead of low once the pot is covered. At altitude, a stronger simmer does not solve lower boiling temperature; it only drives faster evaporation and increases scorching. Pot choice also matters more than many cooks realize. A heavy pot with a tight lid creates stable heat and better steam retention. Thin pots create hot spots that overcook the bottom before the top layer finishes.
Other avoidable problems come from technique. Stirring rice repeatedly breaks grains and releases starch. Skipping the rinse for long grain rice can make texture gluey. Using cold water to rescue nearly done rice lowers the pot temperature too sharply; hot water works better in small additions. Failing to rest the rice after cooking is another major source of crunch because the center continues hydrating during carryover steaming. Finally, altitude cooks often forget that storage conditions affect results. Older rice tends to be drier and may need slightly more water or time. If a brand suddenly behaves differently, the issue may be crop age, not your method.
Troubleshooting and building a repeatable altitude rice routine
If your rice is crunchy, the cause is usually insufficient hydration, insufficient covered time, or excessive steam loss. Add 2 to 4 tablespoons hot water, cover tightly, and steam on the lowest heat for 5 minutes, then rest off heat. If your rice is mushy, spread it briefly on a sheet pan or wide plate to release steam, then return it to the pot uncovered for a minute over very low heat. For scorched bottoms with underdone tops, your burner is too high or your pot is too thin. Move to a smaller burner, use a heat diffuser, or choose the pasta method. If the top layer stays dry while the bottom is wet, the lid seal is poor; a pot with a heavier lid often fixes the problem immediately.
The most effective long term strategy is to create a rice log for your kitchen. Record elevation, pot size, burner level, rice brand, rinse time, water ratio, cook time, and rest time. Within three or four batches, patterns become obvious. In my own altitude tests, switching from a medium saucepan to a heavier Dutch oven reduced water loss enough to cut added water by about 2 tablespoons per cup. That kind of note is more useful than generic advice because altitude cooking is always local. Start with the method that suits your rice, make one change at a time, and keep the covered rest sacred. Do that, and cooking rice at altitude without mush or crunch becomes routine rather than frustrating. Use this hub as your starting point, then apply the method that matches your grain and stove tonight.
Frequently Asked Questions
Why does rice cook differently at high altitude?
Rice behaves differently at altitude because the cooking environment changes in several important ways. As elevation increases, water boils at a lower temperature, which means the rice is cooking in less heat than it would at sea level. At the same time, moisture evaporates faster, so the pot can lose liquid before the grains have fully hydrated. That combination is exactly why rice at altitude often turns out uneven: the outside may soften too quickly while the center stays firm, or the pot may dry out early and leave the rice crunchy on the bottom and underdone on top.
In most kitchens, these changes start to become noticeable around 3,000 feet and become more pronounced as you go higher. The practical effect is that a familiar recipe may suddenly need more water, a tighter lid, and more cooking time. Instead of relying on sea-level habits, think of altitude rice cooking as a balancing act between temperature, evaporation, and absorption. Once you adjust those three variables, the process becomes much more predictable and you can get tender, separate grains without mushiness or hard centers.
What should I change first when cooking rice above 3,000 feet?
The first and most reliable adjustment is to increase the liquid slightly and extend the cooking time. At altitude, rice usually needs more water than the standard package directions suggest because more moisture escapes during cooking. A modest increase is often enough to fix the problem without making the rice soggy. You do not want to flood the pot; the goal is to replace what is lost to faster evaporation and give the grain enough moisture to finish cooking all the way through.
The second change is to keep the lid tightly sealed and avoid lifting it during cooking. Every time the lid comes off, steam escapes, and at altitude that lost moisture matters even more. Lowering the heat once the pot comes to a boil also helps. A hard boil can drive off liquid too quickly and disturb the grains, increasing the chances of both mush and scorching. In many cases, the winning formula is simple: a little extra water, a little extra time, gentle heat, and a longer covered rest at the end so the remaining steam can finish the rice evenly.
How can I keep rice from turning mushy while still making sure it is fully cooked?
The key is to avoid overcorrecting. When rice comes out underdone at altitude, many cooks respond by adding too much extra water or turning up the heat, which often creates a new problem: blown-out, gummy grains on the outside and a sticky texture overall. Instead, make smaller adjustments and pay attention to the variety of rice you are using. Long-grain white rice, jasmine, basmati, brown rice, and sushi rice all absorb water differently, so one universal fix rarely works perfectly for every type.
For better texture, rinse the rice if the variety benefits from it, measure carefully, cook at a gentle simmer rather than an aggressive boil, and let the rice rest off the heat for 10 minutes before fluffing. That resting period is especially useful at altitude because it gives the moisture time to redistribute through the pot. If your rice is consistently mushy, your pot may be losing too little moisture for the amount of water you are using, or your simmer may be too low and too long. In that case, slightly reduce the liquid or shorten the cook time just a bit. Good altitude rice is usually the result of controlled, incremental changes rather than dramatic ones.
Is a rice cooker or pressure cooker better for cooking rice at altitude?
Both can work well, but a pressure cooker is often the most altitude-proof option. Because pressure cooking raises the boiling temperature inside the pot, it counteracts one of the biggest problems of high-elevation cooking: water that cannot get hot enough under normal conditions. That means rice cooks more efficiently, hydrates more evenly, and is less likely to end up crunchy in the center. For many mountain cooks, a pressure cooker delivers the most consistent results with the least guesswork.
A rice cooker can also be helpful, especially if it has reliable sensors and a snug lid, but performance varies by model. Some basic rice cookers are calibrated with sea-level assumptions in mind, so they may shut off before the rice is fully done at higher elevations. If you use a rice cooker, you may need a little extra water and, in some cases, an additional rest period after the cooking cycle ends. If consistency matters most and you cook rice often, a pressure cooker usually gives you the widest margin for error at altitude. If you prefer a standard saucepan or rice cooker, you can still get excellent results, but you will need to fine-tune your method more carefully.
What is the best troubleshooting approach if my rice is still crunchy, gummy, or uneven?
Start by identifying exactly what went wrong, because each texture problem points to a different cause. Crunchy or hard-centered rice usually means the grains did not absorb enough water or did not have enough time at heat to fully hydrate. The fix is usually a small splash of hot water, a tightly covered pot, and a few more minutes over low heat, followed by a rest. Gummy rice, on the other hand, often comes from too much water, too much agitation, cooking too hot, or repeatedly checking the pot. Uneven rice can mean the simmer was not steady, the pot was too thin, or evaporation outpaced absorption before the center of the pot finished cooking.
The best long-term troubleshooting method is to keep notes. Record the rice variety, elevation, water ratio, pot type, cooking time, and resting time. At altitude, a difference of a few tablespoons of water or a few extra minutes can matter more than people expect. Also make sure your equipment supports even cooking: a heavy-bottomed pot with a tight-fitting lid is far more forgiving than a thin pan that loses steam and creates hot spots. Once you treat altitude rice as a repeatable process instead of a one-size-fits-all recipe, it becomes much easier to dial in rice that is tender, fluffy, and fully cooked without turning mushy.


