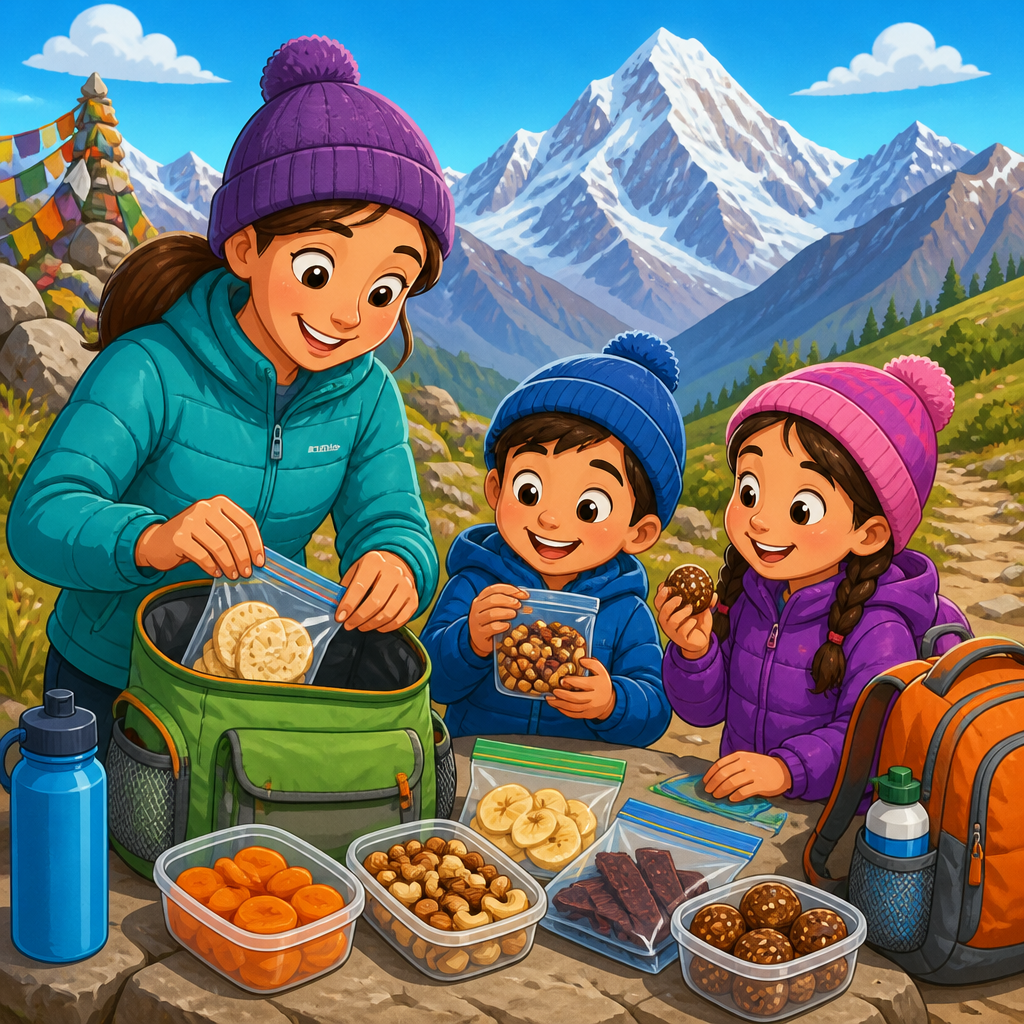
Packing altitude-friendly snacks for kids takes more than tossing crackers and juice boxes into a backpack. Higher elevations change appetite, hydration needs, digestion, and energy use, so practical meal planning matters on every ski trip, mountain road journey, hiking weekend, and family vacation in the mountains. In this guide, I will show you how to build a reliable snack system that supports steady energy, better hydration, and fewer meltdowns without overpacking or relying on sugary convenience foods.
Altitude generally refers to elevations above 5,000 feet, where thinner air contains less available oxygen. Even healthy children can feel the effects. Common responses include reduced appetite, faster breathing, dry air exposure, mild nausea, fatigue, headaches, and increased fluid loss. Kids may not describe these changes clearly. Instead, they often become irritable, suddenly refuse food, ask for sweets, or seem tired long before adults expect it. When parents understand those patterns, snack planning becomes a preventive tool rather than an afterthought.
Altitude-friendly snacks are foods that are easy to digest, moisture supportive, energy steadying, and practical to carry safely. The best choices combine carbohydrates for quick fuel, protein for staying power, and enough sodium or potassium to help replace what kids lose through respiration and activity. Texture matters too. Dry, crumbly foods can feel harder to eat in mountain air, especially when children are already underhydrated. I have found that snacks with some softness, salt, or natural moisture get eaten more consistently than perfectly balanced foods kids ignore.
This topic sits at the center of practical meal planning because snacks often make or break a day at altitude. Meals may shift, travel times may run long, and restaurant options can be unpredictable. A smart snack kit protects the rest of the schedule. It helps children arrive at lunch hungry rather than desperate, recover after exertion, and avoid the cycle of low intake followed by overtiredness. Good planning also reduces waste, lowers cost, and gives families a repeatable system they can use for airports, cars, chairlifts, lodges, and trailheads.
What kids need most when eating at altitude
At altitude, the immediate nutrition priorities are fluid balance, easy calories, and stomach-friendly foods. Children often need small amounts more frequently because big meals can feel unappealing. I plan around a simple rule: offer food before a child says they are starving and offer fluids before they say they are thirsty. That pattern works because thirst and hunger cues tend to lag behind actual needs in cold, dry, or exciting environments.
Carbohydrates should anchor most snack choices because they provide accessible energy during travel and activity. Think bananas, oat bars, pretzels, tortillas, applesauce pouches, cereal, dried fruit, or mini sandwiches. Protein should support those carbs, not dominate the snack. Cheese sticks, yogurt tubes, roasted chickpeas, nut butter packets, sunflower seed butter sandwiches, edamame, or turkey roll-ups work well. Fat is still useful, but very rich snacks can be less appealing when kids are queasy or adjusting to elevation. In practice, balance beats perfection.
Sodium deserves more attention than many parents give it. Dry mountain air increases water loss through breathing, and active children sweat under layers even in cold weather. A salty snack alongside water often lands better than plain water alone. Pretzels, crackers, cheese, broth in a thermos, or lightly salted trail mix can all help. Potassium-rich foods such as bananas, dried apricots, raisins, potatoes, and coconut water can also support fluid balance, though they should not replace regular water intake.
Digestibility matters just as much as nutrient content. During the first day or two at altitude, I avoid making snack bags heavy on greasy chips, oversized candy bars, or giant servings of high-fiber foods. Beans, cruciferous vegetables, and very dense protein bars may be nutritious, but they are not always the easiest fit during an acclimatization window. Gentle foods usually win: toast strips, rice cakes with nut butter, soft granola bars, fruit cups, oatmeal bites, and plain crackers with cheese.
How to build an altitude-friendly snack kit
The most reliable system is to pack by function, not by brand. Every snack kit should include quick energy, longer-lasting fuel, hydration support, and one familiar comfort food. I use four categories: fruit or simple carbs, protein or dairy, salty items, and emergency backups. This structure prevents overpacking one type of food, such as sweet bars, while forgetting what actually solves hunger an hour later.
Start with a base quantity. For a half day at altitude, pack two snacks per child plus one spare. For a full day, plan three to four snack opportunities per child, depending on age and activity. Young children often eat smaller portions but need them more frequently. Teenagers can burn through much more food than parents expect, especially while skiing or hiking. A practical benchmark is 150 to 250 snack calories for younger kids and 200 to 350 for older, active children per snack window.
Packaging can determine whether the plan works. Use easy-open pouches, small leakproof containers, and gloves-friendly wrappers if you will be outside in cold weather. Pre-open hard seals on cheese sticks, bars, or dried fruit before leaving. Label individual bags for morning, midday, and return-trip use so all the food does not disappear before noon. When I have worked with families on mountain travel routines, this one change alone cut down on crankiness dramatically because parents stopped negotiating every snack decision on the spot.
Temperature control matters. Some foods freeze in a daypack, melt in a car, or become unsafe after hours indoors. Insulated pouches help, but selection matters more. Choose items that tolerate range: shelf-stable milk boxes, applesauce pouches, seed butter packets, clementines, bagels, dry cereal, muffins, cheese in insulated sleeves, and hard-boiled eggs only if they stay cold. Save highly perishable foods for situations where you control refrigeration.
| Snack type | Best examples | Why it works at altitude | Watch-outs |
|---|---|---|---|
| Quick carbohydrate | Bananas, pretzels, applesauce pouches, mini bagels | Fast energy, easy to eat, useful when appetite is low | Can wear off quickly without protein |
| Protein support | Cheese sticks, yogurt tubes, turkey roll-ups, seed butter packets | Improves satiety and steadier energy | Some options need cooling |
| Hydration-supportive | Oranges, cucumber slices, broth, diluted electrolyte drink | Adds fluid and electrolytes through food | Bulky and sometimes messy |
| Salty backup | Crackers, popcorn, roasted edamame, trail mix | Encourages drinking and replaces some sodium losses | Very dry foods may be less appealing without water |
Best snack combinations for different mountain situations
Travel days call for stable blood sugar and low mess. In cars or airports, use pairings like banana plus peanut butter sandwich triangles, applesauce pouch plus cheddar crackers, or yogurt drink plus dry cereal. These combinations are familiar, portable, and less likely to trigger motion-related nausea than greasy fast food. If a child tends to feel carsick, keep portions smaller and offer them every 90 minutes instead of pushing a big meal before departure.
For ski days, chairlift snacks need to fit pockets, resist crushing, and be edible with cold hands. Good options include mini bagels, fig bars, fruit leather with nuts, soft granola bars, pretzels with cheese, or insulated smoothies if they will be consumed early. I usually avoid chocolate-heavy snacks in jacket pockets because they melt indoors and harden outdoors. Kids who stop for only a few minutes often eat best when a snack is already portioned into a single serving they can finish quickly.
For hikes, choose foods that balance weight and moisture. Clementines, tortillas with turkey, raisins, salted cashews, granola bites, and freeze-dried fruit all work, but every dry item should be matched with a hydration plan. On trail days, I prefer one “eat now” snack bag and one “later” reserve so children do not graze through everything in the first mile. If the route is strenuous, add a higher-carb option for the descent, when fatigue often shows up fast.
For lodge days or cabin stays, snack planning should bridge gaps between meals rather than replace them. A tray with cut fruit, popcorn, cheese cubes, soup, and muffins works better than an open bag of candy that leads to a crash before dinner. Evening snacks should be especially simple if sleep is a concern. Higher altitude can already disrupt sleep quality, and large sugar loads close to bedtime often make settling down harder.
Foods to limit, foods to prioritize, and common mistakes
The biggest mistake parents make is packing what looks convenient rather than what children will actually eat when dry, tired, or mildly nauseated. Tough jerky, super-dense protein bars, giant bags of gummy candy, and very fibrous snack packs often come home untouched. Another common mistake is relying only on sweet foods. Quick sugar can help in the short term, but kids usually need more than fruit snacks and cookies to maintain energy for several hours.
Prioritize foods with moderate familiarity. Travel is not the time to test a dozen “healthy” replacements your child has never tried. Known favorites with a solid nutrition profile beat ideal foods rejected after one bite. In families managing food allergies, this principle is even more important. Safe, accepted staples such as sunflower butter sandwiches, oat bars from trusted facilities, roasted broad beans, or dairy-free yogurt pouches reduce risk and stress.
Limit highly carbonated drinks, oversized sweets, and greasy packaged snacks during the first phase of altitude adjustment. Carbonation can worsen bloating for some children, while very rich foods may sit poorly when appetite is already blunted. Also watch caffeine in older kids and teens through energy drinks, bottled coffees, or highly caffeinated sodas. Caffeine can contribute to jitteriness, disrupt sleep, and complicate hydration habits.
Do not underestimate timing. A child who skipped breakfast may reject lunch simply because they crashed too hard midmorning. Offering a small snack before visible fatigue appears is one of the most effective tactics I have used. Keep the first snack of the day easy and salty, the second more balanced, and the last one strategic for the return trip or pre-dinner gap. That pacing supports energy without spoiling meals.
Practical meal planning for a full day or weekend
Because this page is the hub for practical meal planning, the broader goal is to create a repeatable template. Start by mapping the day: wake time, travel window, activity blocks, meal access, and likely delays. Then assign snack roles. One snack should rescue appetite, one should stabilize energy, and one should cover emergencies. This method scales from a single afternoon to a three-day mountain weekend and helps you coordinate snacks with hydration and sleep rather than treating them as separate issues.
A sample full-day plan for a school-age child might look like this: breakfast with oatmeal and berries before leaving, a midmorning pretzel-and-cheese snack, lunch with turkey wrap and orange slices, an afternoon applesauce-plus-muffin snack, and a return-drive backup of trail mix and water. For a toddler, reduce volume, increase frequency, and include softer textures such as yogurt, banana halves, mini pancakes, and pouch purées. For older kids in heavy activity, add another carb-forward pocket snack.
Weekend planning works best when you pre-stage food by day and setting. Pack a car bin, a lodge bag, and a room stash separately. The car bin should contain shelf-stable basics and extra water. The day bag should hold only what is needed for that outing. The room stash should support breakfast and bedtime snacks without another store run. This prevents the classic problem of burning through all portable foods on day one and having only random leftovers for day two.
Finally, review what came back uneaten. The best altitude-friendly snack strategy is iterative. Keep a simple note on what disappeared first, what came home untouched, and what caused spills or complaints. Over time, you will build a family-specific mountain snack list that is more useful than any generic packing checklist. Use that list on your next trip, refine portions, and link it mentally with your routines for hydration and sleep so the entire day runs more smoothly.
Altitude-friendly snacks for kids work best when they are simple, balanced, familiar, and planned around real mountain conditions. Children usually need more frequent eating opportunities, more hydration support, and easier-to-digest foods than parents expect. Carbohydrates provide immediate fuel, protein helps sustain energy, and salty or water-rich foods support fluid balance. Texture, packaging, temperature tolerance, and timing are not small details; they are the reasons a good plan succeeds when the day gets cold, busy, or delayed.
The core practical meal planning system is straightforward: pack by function, match snacks to the setting, and build in backups. Use quick carbs, protein support, salty items, and hydration-friendly foods in combinations your child already accepts. Adjust for age, activity level, and how recently your family arrived at elevation. Keep portions modest, offer food before fatigue peaks, and do not depend on candy or oversized convenience snacks to carry the day. A repeatable structure reduces stress and gives kids steadier energy from morning through bedtime.
If you want smoother travel, better moods, and fewer altitude-related eating struggles, create your family’s go-to mountain snack list before your next trip. Start with one day plan, test it, and refine it. Small improvements in snack planning can make the whole sleep, hydration, and nutrition routine work better.
Frequently Asked Questions
What makes a snack “altitude-friendly” for kids?
An altitude-friendly snack is one that helps a child handle the most common challenges that come with higher elevations: lower appetite, faster dehydration, changing energy demands, and occasional stomach sensitivity. At altitude, kids may feel full sooner, eat less at meals, and burn through energy quickly if they are skiing, hiking, walking around mountain towns, or simply adjusting to thinner air. That means the best snacks are easy to eat, easy to digest, and capable of delivering steady energy without a big sugar crash.
In practical terms, altitude-friendly snacks usually combine carbohydrates for quick fuel, protein for staying power, and some healthy fat for satisfaction. Good examples include cheese and whole-grain crackers, trail mix without too much candy, nut or seed butter packets with pretzels or apple slices, yogurt pouches, oatmeal bars, bananas, dried fruit, and mini sandwiches. Texture matters too. Many kids eat better when food is familiar and simple, so it is often smarter to pack reliable favorites than to experiment with unusual “healthy” foods during travel.
Hydration support is also part of what makes a snack altitude-friendly. Foods with a higher water content, such as oranges, grapes, cucumbers, applesauce pouches, and yogurt, can help alongside regular sips of water. The goal is not to create a perfect mountain menu. It is to build a snack setup that keeps kids drinking, nibbling, and refueling consistently throughout the day.
How should I balance hydration and food when packing snacks for higher elevations?
Hydration should be treated as part of the snack plan, not something separate. At higher elevations, the air is drier, kids lose moisture more quickly through breathing, and they may not notice thirst until they are already behind. That is why it helps to pack snacks that naturally encourage drinking or contain some fluid themselves. Instead of sending only dry, salty foods like crackers, chips, and granola bars, balance those with water-rich options such as fruit, yogurt, smoothies in insulated containers, applesauce pouches, or cut vegetables if your child likes them.
A smart approach is to think in pairs. If you pack a salty or dry snack, pair it with a drink and maybe a hydrating side. For example, pretzels can go with water and orange slices. Cheese crackers can go with a refillable bottle and grapes. Peanut butter sandwiches can go with milk, water, or a diluted electrolyte drink if your pediatrician is comfortable with that for your child. This keeps the snack from feeling heavy and helps reduce the chance of headaches, crankiness, or sluggishness that can show up when kids are slightly dehydrated.
It also helps to make hydration easy and visible. Use leak-proof bottles your child can open without help. Refill often. Offer small sips regularly instead of waiting for a full break. For long drives or ski days, keep drinks within reach and rotate snack choices throughout the day rather than offering one large snack all at once. In the mountains, kids often do better with frequent mini refueling sessions than with long gaps between eating and drinking.
What are the best snacks to pack for long mountain car rides, ski days, or hikes with kids?
The best snacks for mountain travel are portable, sturdy, mess-controlled, and satisfying enough to bridge the gap between meals. For car rides, it helps to pack a mix of shelf-stable and cooler-friendly items so you have flexibility. Shelf-stable options might include whole-grain crackers, dry cereal, unsweetened fruit pouches, trail mix, roasted chickpeas, oat bars, mini bagels, nut-free granola bars for school-style convenience, and single-serve seed butter packets. Cooler-friendly choices can include string cheese, yogurt tubes, hard-boiled eggs, turkey roll-ups, hummus cups, berries, and sliced apples.
For ski days, choose foods that can handle cold temperatures and still taste good. Sandwich halves, cheese, bagels, homemade muffins with oats and banana, energy bites, clementines, jerky for older kids, and hearty snack mixes usually work well. Kids often need fast, frequent fuel on the slopes, so it is useful to pack small portions they can eat during short breaks. For hikes, focus on lightweight, compact foods with a good energy return: dried fruit, crackers, mini wraps, applesauce pouches, nut or seed butter sandwiches, and simple homemade trail mixes with cereal, raisins, and pretzels.
The most reliable strategy is variety. Bring at least one familiar comfort snack, one protein-rich option, one fruit or hydrating item, and one quick-energy food. That way, if your child suddenly refuses one texture or flavor, you still have another option ready. Kids can be unpredictable at altitude, so snack flexibility often matters as much as nutrition itself.
Should I avoid sugary snacks at altitude, or is some sugar okay?
Some sugar is absolutely okay. The real issue is relying too heavily on sugary convenience foods as the main fuel source. Candy, frosted pastries, soda, and heavily sweetened snacks may give kids a short burst of energy, but they often wear off quickly and can leave them more irritable, thirsty, or hungry soon afterward. At altitude, where appetite and hydration are already less predictable, that up-and-down pattern can make the day harder for everyone.
A better approach is to use naturally sweet or moderately sweet foods as part of a more balanced system. Fruit, raisins, applesauce, lower-sugar granola bars, oatmeal muffins, yogurt, and homemade snack bites can all be useful because they provide carbohydrates kids often want while still bringing in other nutrients. If your child loves a sweet treat, pair it with something more substantial. For example, cookies can go with milk and fruit, or a granola bar can be paired with cheese. This helps stretch energy more evenly and keeps snacks from turning into pure sugar spikes.
There is also a practical side to this. At higher elevations or during active mountain days, kids may genuinely need fast energy at certain moments, especially after skiing for hours or hiking uphill. In those cases, a sweet snack can help, but it works best when it is not the only thing in the bag. Think of sugar as one tool, not the whole plan. The strongest altitude-friendly snack kit is built around balanced, repeatable choices that kids will actually eat.
How can I pack enough snacks without overpacking or ending up with a bag full of waste?
The easiest way to avoid overpacking is to build a simple snack system instead of throwing in random extras. Start by estimating the length and intensity of the day. A mellow scenic drive needs less food than a full ski day or a long family hike. Then pack by category: one quick-energy item, one protein-rich item, one produce or hydrating item, and one backup favorite per child. That creates balance without turning your backpack into a mobile pantry.
Portioning matters too. Pre-pack snacks into small reusable containers or bags so you can hand out one serving at a time. This reduces waste, helps kids see what they have, and prevents one child from eating an entire day’s supply in the first hour. It also lets you mix and match as the day changes. If lunch is delayed, you can combine two mini snacks into a more filling stop. If your child feels less hungry because of altitude, the smaller portions are less overwhelming and more likely to be eaten.
To keep waste low, prioritize reusable bottles, washable containers, and multipurpose foods the whole family can share. Pack items that can handle a little temperature change and won’t be ruined if plans shift. It is also smart to carry one emergency reserve snack per child that stays untouched unless needed, such as a bar, applesauce pouch, or nut-free trail mix. That gives you a safety net without encouraging overpacking. When you pack with structure, you can support steady energy and hydration while keeping your load lighter and your snack routine far more manageable.