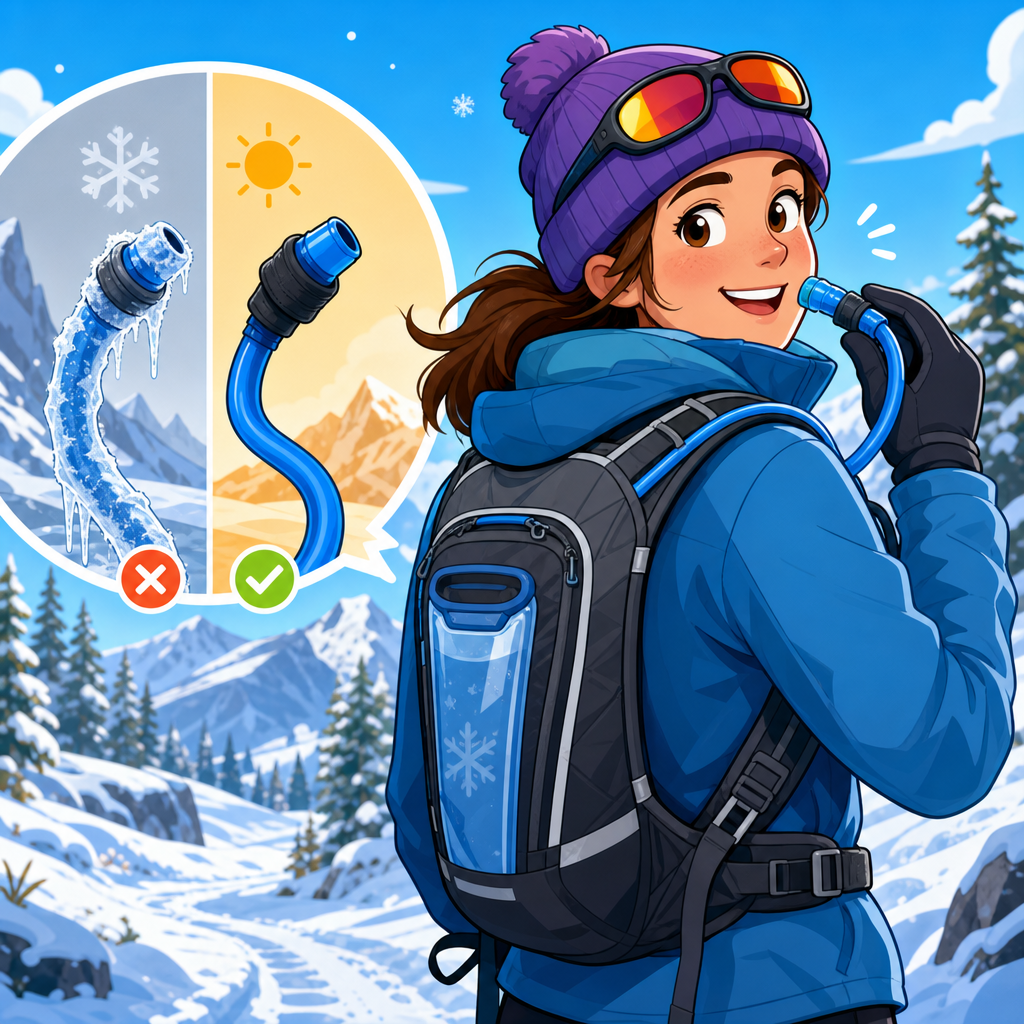
Hydration packs that resist frozen hoses in winter are not just a comfort upgrade; they are a core safety tool for anyone traveling in cold mountains where dehydration, poor monitoring, and low-oxygen stress can combine into a serious risk. In practical terms, a hydration pack is a wearable water-carry system with a reservoir, hose, and bite valve, while a winter-ready model adds insulation, smart routing, and cold-weather materials that help prevent freezing. A frozen hose usually happens first at the bite valve, then along exposed tubing, because small volumes of water lose heat rapidly in wind and subfreezing air. When that happens, people often stop drinking, and performance drops long before they notice obvious thirst.
This matters because winter travel changes hydration, monitoring, and oxygen management at the same time. Cold air is dry, hard breathing increases moisture loss, bulky layers make bottles inconvenient, and altitude raises fluid demand while reducing appetite and thirst signals. I have seen strong hikers and ski tourers make preventable mistakes here: they carried enough water but could not access it, forgot to track intake, ignored early headache and fatigue, and misread those symptoms as simply “being cold.” On snowshoe routes, alpine climbs, and lift-access sidecountry days, the best system is the one that keeps water flowing, lets you monitor status clearly, and supports safe decisions when oxygen availability is lower at elevation.
As the hub page for Monitoring & Oxygen within Gear, Monitoring & Safety, this guide connects the full topic. It covers how anti-freeze hydration packs work, what features matter most, how to monitor hydration and cold stress, how pulse oximeters fit into winter travel, when supplemental oxygen does and does not make sense, and how to build field routines that reduce small errors before they become emergencies. The goal is simple: choose gear that works in winter, understand the signals your body gives you, and use monitoring tools intelligently rather than as substitutes for judgment.
What makes a hydration pack resist frozen hoses in winter
A winter hydration pack resists freezing by slowing heat loss at three vulnerable points: the reservoir, the hose, and the bite valve. The best packs place the reservoir inside the warmest part of the pack, close to your back but separated enough to avoid icy pressure points. Hose insulation matters, but insulation alone is not enough. The tubing must also route under or through shoulder straps so less surface area is exposed to wind. Bite valves need covers, because that exposed tip freezes first after each sip when residual water remains in the valve.
In the field, the most reliable prevention method is a system, not a single feature. You sip, then blow the water back into the reservoir so the hose is mostly empty. You route the hose under a jacket or insulated harness section. You fill the reservoir with warm, not boiling, water before departure. You avoid sugary mixes in extreme cold unless the hose diameter and cleaning routine can handle residue. Brands such as CamelBak, Osprey, Gregory, USWE, and Source offer winter-capable designs, but the exact success depends more on hose path, insulation quality, and user habit than on logo alone.
Reservoir shape and materials also affect performance. A baffled reservoir can reduce sloshing and sit flatter against the back, but the critical factor is whether the closure seals reliably in cold conditions. Wide-mouth openings are easier to fill with warm water and easier to dry at home, which matters because microbial growth and leftover drink mix become bigger problems when winter users delay cleaning. TPU reservoirs generally stay more flexible than older stiff plastics in low temperatures, and magnetic hose clips are useful only if they still function with gloves and do not leave the valve flapping in wind.
Features that matter most when buying a winter hydration pack
Shoppers often focus on pack volume first, but winter performance depends on a short list of design details that have outsized effects on reliability. Capacity should match trip length and temperature. For many winter hikers, 1.5 to 2 liters is enough for half-day outings, while ski tourers and snowmobilers may want 2 to 3 liters. More water means more thermal mass, which slows freezing, but it also adds weight and can chill your back if the insulation is weak. A dedicated insulated sleeve is better than a generic hydration pocket, especially on packs built for snow sports.
Back-panel construction matters because sweat management affects freezing too. If the pack sits cold and wet against your shell, that moisture can pull heat away from the reservoir area. I prefer packs with structured foam channels and stable ski-compatible harnesses that keep the load close without crushing layers. Glove-friendly zippers, a hose route that does not interfere with chest straps, and enough space for goggles, shell layers, a repair kit, and emergency calories are equally important. This is why the best winter hydration packs often come from ski touring or mountaineering lines rather than summer trail-running catalogs.
| Feature | Why it matters in winter | Best use case |
|---|---|---|
| Insulated hose sleeve | Reduces freezing from wind exposure along tubing | Hiking, snowshoeing, ski touring |
| Bite valve cover | Protects the first point that usually freezes | All winter travel |
| Internal insulated reservoir sleeve | Keeps water warmer longer near body heat | Longer outings, colder climates |
| Under-strap hose routing | Limits exposure and improves access with layers | Mountaineering, resort sidecountry |
| Wide-mouth reservoir opening | Easier filling, cleaning, and adding warm water | Frequent use, mixed drink powders |
| Snow-specific pack layout | Improves carry for layers, tools, and winter essentials | Skiing, alpine climbing |
If you are comparing packs, ask direct questions. Can the hose be routed on either shoulder? Is the insulation removable for drying? Does the reservoir remain flexible below 20 degrees Fahrenheit? Can you operate the bite valve with liner gloves? Is there room for a compact first-aid kit and monitoring tools without overstuffing the hydration compartment? Those practical checks tell you more than marketing phrases like “cold weather compatible.”
Monitoring hydration, cold stress, and performance in winter travel
Hydration in winter is harder to self-monitor because thirst is a poor indicator in the cold. A practical baseline for active winter days is to start hydrated, drink small amounts every 15 to 20 minutes, and verify status with simple markers: urine color, frequency, headache, unusual fatigue, rising perceived effort, and declining coordination. None of those signs is perfect alone, but together they show a pattern early. In guided groups, I use timed prompts rather than waiting for people to ask for water. That one habit consistently reduces the late-day slowdown that many assume is only from temperature or altitude.
Weather and oxygen demand change the equation. At altitude, ventilation increases, which raises respiratory water loss. Cold dry air magnifies that loss. A person skinning uphill at 9,000 to 11,000 feet can fall behind even while moving at a moderate pace. Add caffeine, heavy layers, and low calorie intake, and symptoms blur together fast. Headache might reflect dehydration, altitude, poor sleep, or simple underfueling. That is why monitoring must be layered. Track intake, note symptoms, assess effort, and compare observations over time rather than making one quick guess.
Good winter packs support monitoring by making drinking frictionless. If opening a bottle requires removing mitts, stopping, and digging through layers, many people postpone drinking until they are already behind. A hose that still flows in cold weather solves that access problem. Some athletes also add a soft flask with electrolyte mix inside a jacket as backup, because sodium replacement can help on long or sweaty efforts. The point is not to drink excessively; it is to maintain consistent access and objective awareness.
Monitoring oxygen: pulse oximeters, altitude awareness, and realistic expectations
Pulse oximeters have become common in winter kits, but they need context. A pulse oximeter estimates peripheral oxygen saturation, usually called SpO2, by analyzing light absorption through a fingertip. In cold conditions, vasoconstriction, movement, dirty sensors, and low battery power can all produce misleading numbers. A reading that looks alarming may improve after warming the hand and resting for a minute. I treat the device as a trend tool, not a verdict. If someone at altitude has a headache, nausea, poor balance, or unusual shortness of breath, symptoms and trajectory matter more than a single digit.
For healthy travelers, oxygen saturation normally falls as altitude rises. That alone does not mean illness. What matters is whether the person is acclimatizing, functioning, and stable. On overnight winter trips, recording morning and evening readings can sometimes help confirm a pattern, especially when compared with resting heart rate, sleep quality, and symptom scores. But no one should use a pocket oximeter to justify pushing higher when their body is clearly deteriorating. Devices are assistants, not decision-makers.
The most useful oxygen monitoring questions are practical. Is this person becoming more breathless at the same workload? Are they thinking clearly? Are they keeping pace unusually poorly? Are lips, nail beds, and skin color changing in a concerning way? Is a persistent cough developing? Those observations, combined with hydration status and temperature management, are far more actionable than chasing a perfect saturation number in a windy parking lot.
Supplemental oxygen, training masks, and what actually helps in winter mountains
Many readers searching Monitoring & Oxygen want clarity on supplemental oxygen. For ordinary winter hiking, snowshoeing, ski touring, and resort sidecountry, carrying consumer oxygen canisters is rarely necessary and often misunderstood. They are short-duration tools, not substitutes for acclimatization, pacing, hydration, calories, insulation, or descent. In true altitude illness or severe distress, the priority is usually to stop ascent, protect from cold, descend, and activate rescue when needed. Medical-grade oxygen has clear roles in expedition, rescue, and clinical settings, but that is a different category from novelty boost cans sold at retail.
Training masks deserve a direct answer too: they do not simulate altitude in the way many people think. They can change breathing resistance, but they do not lower oxygen concentration. For winter performance and safety, better gains come from aerobic conditioning, efficient layering, hydration discipline, and time-based acclimatization. In my experience, clients who obsess over gadgets while neglecting pace control and drinking routines are the ones who fade first when conditions turn cold and windy.
If you need a simple framework, think in this order: prevention, monitoring, response. Prevention means a hydration pack that works in subfreezing weather, layered clothing, nutrition, route planning, and conservative ascent profiles. Monitoring means regular drinking, symptom checks, weather awareness, and selective use of tools like pulse oximeters. Response means warming, rest, adjusting effort, descending when symptoms worsen, and getting professional help early instead of debating gear trivia in the field.
Building a winter-ready Monitoring & Oxygen kit around your hydration pack
As the hub for this subtopic, this page should point you toward a complete system. Start with the hydration pack, because access to water influences every other monitoring decision. Then add a simple checklist: insulated reservoir and hose, backup bottle or flask, electrolyte option, watch or timer for drink prompts, compact pulse oximeter with fresh batteries, thermometer or weather app access, emergency blanket, headlamp, glucose-rich snacks, and a written emergency contact plan. None of these items is expensive compared with the cost of a bad decision made late in a cold day.
For day trips, keep the kit streamlined so you actually use it. For overnight routes, add notebook-style tracking for symptoms, intake, and morning condition if the group is adjusting to altitude. Guides often use standardized wellness check-ins because memory becomes unreliable when people are tired or mildly hypoxic. The same principle helps recreational users. A ten-second log of water consumed, headache level, and resting mood can reveal decline earlier than confidence or optimism will.
The main benefit of hydration packs that resist frozen hoses in winter is not convenience alone. They preserve consistent water access, support better monitoring, and reduce the chain reaction that turns minor dehydration into poor pacing, bad judgment, and increased altitude stress. If you are building out your Gear, Monitoring & Safety setup, start here: choose a true winter-capable pack, practice anti-freeze hose habits before a big trip, and pair your gear with simple monitoring routines you will follow every time.
That combination is what keeps winter travel safer and more efficient. Good gear prevents avoidable problems, good monitoring catches subtle changes, and good oxygen awareness helps you respond before symptoms escalate. Review your current pack, inspect the hose routing and insulation, and upgrade the weak link now so your next cold-weather outing starts with a system you can trust.
Frequently Asked Questions
Why do hydration pack hoses freeze first in winter, even when the water reservoir is still liquid?
The hose is usually the first part of a hydration system to freeze because it is narrow, exposed, and holds a small volume of water that cools much faster than the larger body of water inside the reservoir. In cold mountain conditions, the reservoir often sits against your back or inside a pack where it gets some protection from wind and can benefit from your body heat. The hose, by contrast, is routed outside that protected zone and is constantly hit by freezing air. After each sip, a little water often remains in the tube and bite valve. That small amount can freeze quickly, especially during descents, chairlift rides, windy ridgelines, or long pauses.
This matters because once ice forms in the hose or valve, water access can stop completely even though the reservoir still contains usable water. In winter travel, that is more than an inconvenience. Cold environments can reduce thirst cues, so people often drink less than they need without realizing it. Add altitude, exertion, dry air, and heavy breathing, and dehydration can build faster than expected. A winter-ready hydration pack helps address the real weak points by using insulated sleeves, better hose routing, valve covers, and pack layouts that keep more of the drinking system inside a warmer microclimate.
What features should I look for in a hydration pack that resists frozen hoses in winter?
The best winter hydration packs are built around freeze prevention rather than treating it as an afterthought. Start with hose insulation. A well-insulated sleeve slows heat loss from the tube and can make a noticeable difference in subfreezing temperatures. Next, look at hose routing. Packs that route the hose through shoulder straps or under protective fabric panels help reduce direct exposure to wind. Bite valve protection is also important because the valve is often the first tiny component to ice over. A valve cover or insulated mouthpiece guard can help keep that area functional longer.
Reservoir placement is another key design factor. In cold weather, a reservoir stored close to your back or inside a dedicated insulated compartment will generally perform better than one sitting against the outer face of the pack. Materials matter too. Cold-weather-friendly reservoirs, hoses, and valves tend to stay more flexible at low temperatures, which improves usability and reduces the chance of brittle failure. Ease of cleaning and drying is worth considering as well, because leftover moisture can create freeze points on the next outing.
Practical details should not be overlooked. Gloves-on usability is a real advantage in winter, so check whether zippers, clips, and bite valves are easy to handle with numb fingers or insulated gloves. A stable fit also matters. If a pack rides well while skiing, snowshoeing, or mountaineering, you are more likely to use it consistently and drink regularly. In short, the most effective winter hydration packs combine insulation, protected routing, cold-tolerant materials, and user-friendly design into a system that keeps water accessible when conditions turn harsh.
How can I keep my hydration hose from freezing while I am actually on the trail?
Even the best winter hydration pack works best when paired with good technique. One of the most effective habits is to clear the hose after each sip. Instead of letting water sit inside the tube, blow it back into the reservoir if your system allows it. That leaves less water exposed in the hose where it can freeze. Keep the bite valve tucked into a protected position, ideally under a jacket flap, inside a shoulder strap retainer, or in an insulated valve cover. The less direct cold air hits the valve, the better.
Starting warm also helps. Fill the reservoir with cool or lukewarm water rather than ice-cold water before heading out. Avoid boiling-hot liquids unless the reservoir manufacturer specifically says the system can handle them. Pack placement matters too. Keeping the reservoir close to your body and away from the outermost layer of the pack preserves warmth longer. On especially cold days, some users wear the hose under a shell or route part of it inside a jacket to reduce exposure. Frequent drinking is another smart strategy because moving water is less likely to freeze than water left standing for long periods.
Break management is important as well. During long stops, your hydration system is no longer benefiting as much from your movement and body heat, so freezing risk increases. If conditions are severe, keep the pack out of the wind and avoid leaving it on cold snow for extended periods. If you suspect a partial freeze, act early. Warm the bite valve with your hand, place the hose inside your jacket temporarily, or move to a more sheltered spot before the blockage becomes complete. In real winter mountain travel, preventing freeze-up is usually easier than reversing it once it happens.
Are hydration packs better than water bottles in freezing weather, or should I carry both?
Hydration packs and insulated bottles each have strengths in winter, and many experienced mountain travelers carry both. A hydration pack offers convenience and encourages more frequent drinking because water is accessible without stopping. That can be a major advantage in cold environments where thirst signals are weaker and removing gloves or opening a pack every time you want a sip can discourage proper hydration. For steady movement such as skiing, snowshoeing, hiking, or climbing approaches, easy access often leads to better intake over the course of the day.
However, bottles can be more reliable in extreme cold because they have fewer narrow components that can freeze shut. An insulated bottle stored upside down in a pack can be very effective, since water usually freezes from the top down and the drinking end may stay usable longer. Bottles are also simpler to troubleshoot if slush forms. For that reason, many people treat the hydration pack as the primary system and carry a bottle as backup. This approach balances convenience with redundancy.
From a safety perspective, redundancy makes sense in winter mountains. If your hose freezes, your reservoir leaks, or your bite valve stops working, a backup bottle can prevent a small equipment issue from becoming a hydration problem. That is especially important where cold stress, altitude, fatigue, and dry air can combine to increase dehydration risk. So the answer is not always one or the other. For many winter users, the strongest setup is a freeze-resistant hydration pack for regular sipping plus at least one insulated bottle as insurance.
What should I do if my hydration hose or bite valve freezes during a winter trip?
If your hose or bite valve freezes, address it early and methodically. First, confirm where the blockage is. In many cases, the bite valve freezes before the rest of the hose. Try warming the valve in your gloved hand, under your arm, or inside your jacket for a few minutes. If the hose itself is the problem, place as much of it as possible inside a warmer layer and allow body heat to work. Gentle flexing can sometimes help break up thin ice in a soft tube, but avoid forcing or sharply bending components, especially in very cold conditions when materials may be less flexible.
If your system supports it, blow-back prevention is the best long-term habit, but if you are already frozen up, focus on restoring access without damaging the gear. Do not use open flame or excessive heat from stoves or heaters. That can ruin the hose, valve, or reservoir and may create leaks. If conditions are severe and the hydration system cannot be restored quickly, switch to a backup bottle rather than wasting time or exposing yourself unnecessarily while trying to fix it. In winter mountain travel, staying hydrated matters, but so does staying warm and moving safely.
After the immediate issue is under control, adjust your routine so it does not happen again. Clear the hose after drinking, protect the valve from wind, drink more regularly, and keep the reservoir in the warmest practical location. If freeze-ups happen repeatedly despite careful use, the problem may be the pack design rather than your technique. In that case, upgrading to a model with better insulation, improved routing, and more effective valve protection can make a meaningful difference in both comfort and safety on future cold-weather outings.