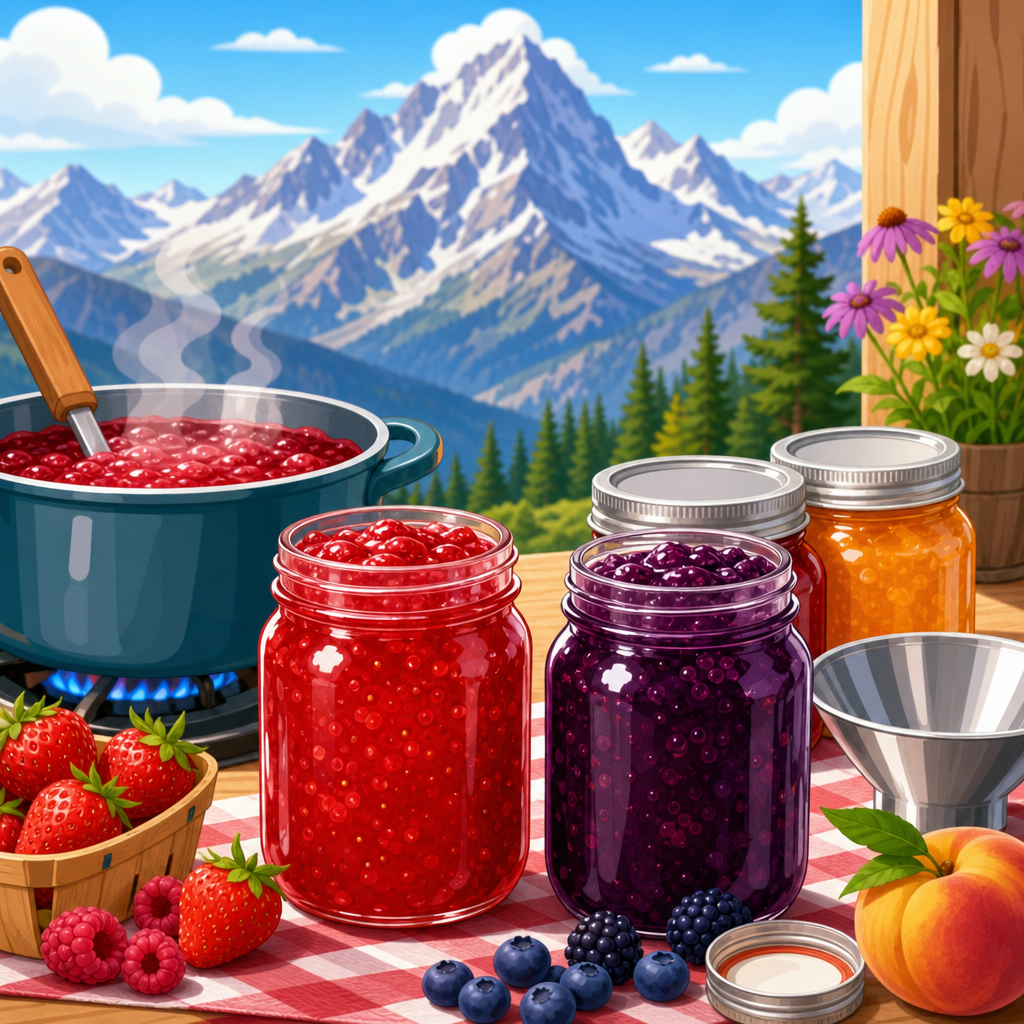
Jam and jelly at high elevation require different set points, timing, and handling because lower air pressure changes how water boils, how sugar concentrates, and how pectin forms a stable gel. In practical terms, preserves that set perfectly at sea level often stay runny, overcook, or lose fresh flavor in mountain kitchens unless you adjust your targets. This matters for anyone preserving fruit above roughly 1,000 feet, whether you are making strawberry jam, crabapple jelly, peach preserves, marmalade, fruit butter, or syrup for water-bath canning. In my own high-altitude test batches, the biggest mistake I see is chasing a sea-level temperature such as 220°F without accounting for local boiling point. That shortcut produces inconsistency because the true endpoint depends on elevation, fruit chemistry, sugar concentration, and pectin type. A safer approach is to think in terms of boiling point difference, sheet test, cold-plate wrinkles, and measured batch size. Understanding these controls makes preserves safer, more predictable, and easier to repeat, especially when you are building a broader candy, preserves, and canning workflow at altitude.
Key terms are worth defining at the start. Jam is made from crushed or chopped fruit cooked with sugar, acid, and often pectin until it reaches a spreadable gel. Jelly uses fruit juice rather than fruit pieces, producing a clear finished product. Preserves generally contain larger fruit pieces in syrup or light gel, while marmalade includes citrus peel suspended in jelly. A set point is the moment the mixture has concentrated enough soluble solids, acidity, and pectin structure to form a gel as it cools. Processing time is the time filled jars spend in a boiling-water canner to destroy spoilage organisms and create a shelf-stable vacuum seal. High elevation means a lower boiling point, so foods boil at lower temperatures and moisture evaporates differently. That single physical change affects candy stages, jam concentration, and canning times. If you treat these as separate skills, results suffer. They are linked, and the best home preservers manage all three together.
This hub page covers the full candy, preserves, and canning landscape for altitude cooks. It explains how to calculate safer set points, how to judge doneness without overcooking fruit, how altitude changes processing recommendations, and where the limits are for improvisation. It also points toward best practices that support more specialized articles on low-sugar jam, no-added-pectin jelly, marmalade, fruit butters, syrups, and confectionery cooked in the same kitchen. Throughout, the standard to follow is established extension guidance from sources such as the USDA Complete Guide to Home Canning, the National Center for Home Food Preservation, and land-grant university extension programs. Those references are clear on a crucial point: altitude changes processing recommendations and can affect quality outcomes substantially. Once you build your method around boiling point, pH, and validated canning times, high-elevation preserving becomes reliable instead of mysterious.
Why altitude changes jam, jelly, candy, and canning outcomes
At higher elevation, atmospheric pressure drops and water boils at a lower temperature. Near sea level, water boils at about 212°F, but in many mountain towns it may boil at 202°F to 208°F depending on altitude and weather. For jam and jelly, this means the mixture can look vigorous and “done” while still containing too much water for a stable gel. For candy, the classic temperature stages such as soft-ball or hard-crack shift downward by roughly 2°F for every 1,000 feet above sea level, which is why altitude candy charts are standard practice. Preserves behave similarly: the target is not a fixed universal temperature, but the correct relationship to your local boiling point and recipe composition.
The other major variable is evaporation rate over time. Because water boils sooner, some cooks assume products will always cook faster at altitude. In practice, jam may need careful but not necessarily longer cooking, because pan width, burner power, humidity, and batch size change concentration speed more than a simple clock does. A shallow, wide pan can drive off water quickly at 7,000 feet, while a deep stockpot may trap steam and produce a sluggish set. Sugar concentration also increases quickly near the end of cooking, so a delay of one or two minutes can push a bright berry jam into a dark, stiff mass. That is why experienced preservers rely on multiple signs of doneness instead of time alone.
Canning is affected for a different safety reason. Water-bath processing temperatures are limited by the boiling point of water, so at higher elevations the jars are processed at a lower effective temperature. To compensate, tested recipes increase processing time. Pressure canning, used for low-acid foods rather than standard fruit jams, requires pressure adjustments because the target sterilization temperature must still be reached. Even though most traditional jams and jellies are high-acid and water-bath canned, the wider candy, preserves, and canning category includes fruit sauces, tomato products, and mixed recipes that may not be safely improvized. The dependable rule is simple: use tested formulations, then apply altitude-specific processing guidance.
Safer set points: how to calculate endpoint instead of guessing
The most reliable temperature method for jam and jelly at altitude is to identify your local boiling point of water, then add 8°F. This reflects the standard gel-stage relationship used by extension services: a properly concentrated jam or jelly reaches a temperature about 8°F above the boiling point of water in your kitchen on that day. If water boils at 205°F, your approximate gel point is 213°F, not 220°F. That single adjustment prevents one of the most common high-elevation failures. It also matches what I have seen in repeated side-by-side batches: sea-level targets consistently overshoot texture and flavor above 4,000 feet.
Temperature is not enough by itself, because thermometer accuracy matters. A digital probe should be checked in boiling water before a preserving session. If it reads 204°F when your water actually boils at 206°F, you need to account for that offset. Pectin type matters too. Commercial regular pectin, low- or no-sugar pectin, liquid pectin, and natural pectin from underripe fruit each create a somewhat different endpoint feel. High-methoxyl pectin relies on sufficient sugar and acid, while low-methoxyl pectin sets with calcium and can gel at lower sugar levels. As sugar content drops, the set may depend less on classic gel temperature and more on the product-specific directions from the pectin manufacturer. Ball, Sure-Jell, Pomona’s Pectin, and Mrs. Wages all provide formula-specific instructions that should override folk wisdom.
| Elevation | Approximate boiling point of water | Approximate jam/jelly gel point | Water-bath time adjustment |
|---|---|---|---|
| Sea level | 212°F | 220°F | Use tested base time |
| 2,000 feet | 208°F | 216°F | Increase time per tested chart |
| 4,000 feet | 204°F | 212°F | Increase time per tested chart |
| 6,000 feet | 200°F | 208°F | Increase time per tested chart |
| 8,000 feet | 196°F | 204°F | Increase time per tested chart |
Use sensory tests alongside temperature. The sheet test looks for syrup that falls from a spoon in a broad sheet rather than separate drops. The cold-plate test places a small sample on a chilled plate; after a brief rest, pushing it with a finger should create a wrinkle. These tests work well for altitude because they measure actual gel behavior as the product cools. They are especially useful for no-added-pectin jams, fruit butters, and marmalades with variable peel content, where temperature alone may not tell the whole story.
Timing, batch size, and method: what to change in real kitchens
For most jam and jelly recipes, the smartest timing adjustment is not “cook longer” but “cook in smaller, controlled batches and judge faster.” Extension services commonly recommend batches no larger than about 4 to 6 cups of prepared fruit for many home jam recipes because oversized batches set poorly and cook unevenly. At altitude, that advice becomes even more important. Large batches spend too long on heat before enough water evaporates, which weakens fruit flavor and darkens color. A half-flat of peaches may seem efficient, but splitting it into several validated batches usually gives a brighter set and more predictable yields.
Pan choice matters. A broad, heavy saucepan or preserving pan increases evaporation and helps you hit gel stage before flavor dulls. Thin pots scorch sugar on hot burners, while very deep pots trap steam and slow concentration. Stirring should be steady enough to prevent scorching, but not so constant that you drop the boil for long periods. Skim foam only if the recipe or pectin directions call for it; excess skimming can waste product, and many modern pectins reduce foaming. Butter as an anti-foam agent is sometimes used in tiny amounts, but it can slightly affect flavor and is not necessary if the recipe performs well without it.
Fruit preparation also affects timing. Slightly underripe fruit contains more natural pectin than dead-ripe fruit, so mixed-ripeness batches often set more reliably than all-soft fruit. Acid balance is just as important. Lemon juice in tested recipes is usually there for pH control as much as flavor. Cutting it because fruit tastes tart enough is risky for both set and safety. If you want lower sweetness, use a pectin designed for low-sugar formulas rather than reducing sugar in a standard recipe. In my experience, the worst mountain jam failures come from stacking substitutions: overripe fruit, less sugar, no bottled lemon juice, and an oversized pot. Each change erodes the margin of success.
Canning safety at altitude for preserves and fruit spreads
For high-acid jams, jellies, preserves, and marmalades made from tested recipes, boiling-water canning remains the standard method. The crucial altitude adjustment is processing time. Because water boils at a lower temperature as elevation rises, jars must stay in the canner longer to achieve the same microbial kill and sealing reliability. The exact increase depends on the tested recipe, jar size, and your elevation range. USDA and extension charts provide the correct increments, and those charts should be followed exactly. Starting a timer before the water returns to a full boil is a common error that shortens the true process.
Headspace, jar condition, and fill temperature matter too. Most jams and jellies call for 1/4-inch headspace. Too much headspace can weaken seals and discolor the top layer; too little can force product under the lid. Use standard Mason jars free of nicks, apply new lids according to manufacturer directions, and tighten bands fingertip tight. After processing, let jars cool undisturbed for 12 to 24 hours, then remove bands for storage. A good seal is shown by a concave lid that does not flex when pressed in the center. Any unsealed jar should be refrigerated and used promptly or reprocessed within the window recommended by the recipe source.
Open-kettle canning, paraffin wax seals, and inversion methods are not recommended. They do not provide the same margin of safety or shelf stability as proper water-bath processing. This is especially important in a mountain environment where boiling behavior already differs from sea-level assumptions. If a preserve recipe includes low-acid ingredients such as peppers, onions, or reduced-sugar modifications outside a tested formula, do not assume it can be canned safely just because traditional jam can. Refrigerate or freeze it unless a validated recipe says otherwise. The benefit of a hub approach to candy, preserves, and canning is that it keeps safety decisions connected to recipe design, not just to tradition.
Common high-elevation problems and how to fix them
Runny jam usually traces back to undercooking, inaccurate temperature readings, too-large batches, overripe fruit low in pectin, or altered sugar ratios. If the product was made from a tested recipe, many batches can be remade with a measured recook method using added pectin or additional boiling. The best fix depends on the original formula, so use guidance from the pectin brand or extension source rather than guessing. Overly stiff jam usually means it was cooked past the gel point or the sugar-to-fruit ratio was too high for the moisture level. It is safe in many cases but less pleasant to spread; warming before serving can help, and future batches should stop earlier based on local boiling point.
Crystals, cloudiness, floating fruit, siphoning, and color loss each have specific causes. Sugar crystals often form when undissolved sugar remains on the pan side or when a syrup is overconcentrated. Cloudy jelly can come from pressing the juice bag, using immature straining methods, or incorporating pulp and air. Floating fruit happens when pieces are too large, syrup is too thin, or jars cool too slowly. Siphoning during canning is often caused by fluctuating boil intensity, incorrect headspace, or rushing jars out of the canner without a brief rest. Color fades fastest in warm storage or clear light. Store finished jars in a cool, dark place and aim to use them within a year for best quality.
These troubleshooting patterns link directly to future subtopic articles. Fruit butters require different endpoint cues because they are concentrated purees, not pectin gels. Syrups depend on soluble solids more than wrinkle tests. Candies like fondant, divinity, and brittles need altitude-adjusted sugar stages, often lowered by about 2°F per 1,000 feet. Once you understand why boiling point changes outcomes, you can transfer that logic across the entire category instead of relearning each recipe from scratch.
High-elevation preserving becomes dependable when you stop treating sea-level temperatures and timing as universal truths. Measure your local boiling point, target a gel stage about 8°F higher for standard jam and jelly formulas, use cold-plate or sheet tests to confirm doneness, and keep batches small enough to cook quickly and evenly. Follow tested recipes from trusted canning authorities, retain the specified sugar, acid, and pectin relationships unless a validated low-sugar formula says otherwise, and apply the proper altitude-based water-bath processing time. Those steps protect both quality and safety.
As the hub for candy, preserves, and canning in the broader cooking and baking at altitude topic, this page gives you the framework that all specialized recipes should fit into. Whether you move next to marmalade, fruit butter, pepper jelly, or altitude candy stages, the same principles apply: lower boiling point, adjusted endpoint, validated processing, and respect for ingredient chemistry. Master those fundamentals and your jars will set better, taste fresher, and store more reliably. Use this guide as your baseline, then build each preserving session around tested formulas and your actual elevation.
Frequently Asked Questions
Why do jam and jelly recipes behave differently at high elevation?
At higher elevations, air pressure is lower, and that changes the way water boils and evaporates. A pot of jam or jelly will reach a vigorous boil at a lower temperature than it would at sea level, which means the usual visual cues and standard finishing temperatures can become misleading. In practical terms, preserves may look finished before enough water has cooked off, leaving the final product runny. On the other hand, if you keep cooking to force the same texture using sea-level assumptions, you can overshoot the ideal point, causing a stiff gel, darker color, flatter fruit flavor, or even scorching.
High elevation also affects the balance among sugar, acid, and pectin, which is what creates a proper gel. Jam and jelly are not simply “boiled fruit”; they are structured systems that depend on concentration and temperature lining up at the right moment. Because boiling happens earlier in mountain kitchens, you often need to rely less on a fixed sea-level number and more on adjusted targets, observation, and testing. That is why preserves made above about 1,000 feet often benefit from altitude-aware temperature goals, careful timing, and smaller batch sizes for better control.
What set point should I use for jam and jelly at high elevation?
A reliable rule is to base your target on the actual boiling point of water in your kitchen that day rather than assuming the standard sea-level gel point. Traditionally, many cooks use about 220°F as a finishing temperature for high-sugar jams and jellies at sea level, but that benchmark only works because it is roughly 8°F above water’s boiling point there. At higher elevations, water boils at a lower temperature, so your gel target should also be lower. A practical method is to measure the boiling point of plain water with an accurate thermometer, then add about 8°F to estimate your finishing point for a full-sugar preserve.
For example, if water boils at 210°F in your location, a jam or jelly may set closer to 218°F than 220°F. This approach is more dependable than blindly following a printed number. It is also smart to confirm doneness with a second method, such as the sheet test, spoon test, refrigerated plate test, or watching how the bubbles change from loose and watery to thicker and glossier. Thermometers are extremely useful, but fruit type, sugar ratio, pectin level, and batch size all influence the exact endpoint, so the best results usually come from combining an adjusted temperature target with visual and texture checks.
Does cooking time need to change when making preserves above 1,000 feet?
Yes, but not in the simple sense of always cooking much longer or always cooking less. What changes is the relationship between time, evaporation, and temperature. Since water boils at a lower temperature at higher elevations, mixtures may need more time to reach the correct concentration of sugar and reduced moisture, even though they appear to be boiling strongly. That can tempt cooks to keep the pot on the heat too long, which risks overcooking the fruit, breaking down pectin, and dulling the fresh taste. So the goal is not to chase a longer time; it is to cook efficiently and stop as soon as the preserve reaches the proper gel stage.
In practice, shorter, faster cooking often gives the best quality, especially in smaller batches with a wide pot that encourages evaporation. If you are using added commercial pectin, follow the product directions closely because those formulas are designed around specific boil sequences and ingredient ratios. If you are making a traditional long-boiled preserve, expect timing to vary more by fruit and pan shape than by a single altitude rule. Rather than relying on the clock alone, pay attention to thickening behavior, the appearance of the bubbles, the way the mixture sheets from a spoon, and an altitude-adjusted thermometer reading. Those indicators are more trustworthy than minutes alone in a mountain kitchen.
How can I tell whether my jam or jelly is set properly if the usual sea-level signs are unreliable?
The most dependable approach is to use several tests together. Start with temperature, but make sure it is altitude-adjusted by checking the local boiling point of water first. Then use a physical gel test. The chilled plate test is especially useful: place a small spoonful of hot jam or jelly on a cold plate, let it sit briefly, and push it with your finger. If the surface wrinkles and the mixture holds its shape instead of flowing back immediately, it is likely near the set point. The spoon or sheet test is another classic method; when the preserve falls from a spoon in a thicker sheet rather than separate thin drips, it is usually ready.
Visual cues in the pot also matter. As preserves approach the set stage, the bubbles often become slower, shinier, and more concentrated, and the foam pattern changes. The mixture may look glossier and slightly heavier. For jelly, clarity and the way the liquid coats the spoon can tell you a great deal. For jam, fruit suspension and thickness are additional clues. If you are uncertain, it is usually better to stop slightly early than to push too far, especially at high elevation. A preserve that is a little loose can often still be delicious and usable, while an overcooked batch may become tough, sugary, or lose its bright fruit character. Good high-elevation preserving is really about reading the whole batch, not trusting one sign in isolation.
What are the best practices for getting safe, flavorful, well-set jam and jelly at high elevation?
Start with a tested recipe, accurate measurements, and the right equipment. High elevation is not the place for casual ratio changes, especially when you are preserving fruit for shelf storage. Sugar, acid, and pectin each do a specific job in both safety and texture, so reducing sugar or altering fruit proportions without a tested formula can produce inconsistent or poor results. Use a broad, heavy pot for better evaporation, avoid oversized batches, and have a dependable thermometer on hand. Before you begin, determine your local boiling point so your finishing target is grounded in actual conditions rather than sea-level assumptions.
To protect flavor, cook the fruit as efficiently as possible and avoid extended simmering after the preserve has already reached the gel stage. Fresh flavor fades quickly when fruit is overcooked. Skim foam only as needed, stir enough to prevent sticking, and remove the batch from the heat as soon as it tests done. For processing filled jars, remember that altitude also affects water-bath canning times because lower temperatures in boiling water require time adjustments for safe processing. That means the cooking stage and the canning stage both need altitude awareness. If you preserve regularly in the mountains, keeping notes on fruit type, batch size, boiling point, finishing temperature, and final texture will help you refine your method. That recordkeeping is one of the most practical ways to achieve jams and jellies that are safe, consistent, and beautifully set year after year.


