Pie fillings bubble differently at altitude because lower air pressure changes how water boils, how starches thicken, and how steam moves through fruit, sugar, and crust. In practical baking terms, the same apple, cherry, or blueberry pie that sets beautifully at sea level can look thin, foam aggressively, leak through vents, or finish with a runny center in Denver, Santa Fe, or Flagstaff. For bakers working through baking troubleshooting and workflow, this matters because bubbling is not just a visual cue; it is a signal that temperature, thickening, evaporation, and doneness are lining up correctly. I have tested fruit pies in both low and high elevations, and the pattern is consistent: at altitude, fillings often begin visibly boiling sooner, yet still need careful timing to fully activate starch and concentrate juices.
This hub article explains why pie fillings bubble differently at altitude and how that single symptom connects to the wider workflow of altitude baking troubleshooting. You will see how pressure affects boiling point, why fruit variety matters, when bubbling indicates a properly set filling, and how to adjust crust, oven management, pan choice, venting, cooling, and scheduling. The goal is not merely to fix one pie, but to give you a reliable system for diagnosing common problems across the full cooking and baking at altitude process. If you understand the mechanics behind bubbling, you can make smarter decisions about thickener choice, bake time, rack placement, and post-bake cooling instead of relying on guesswork.
What changes at altitude, and why bubbling looks more dramatic
At higher elevations, atmospheric pressure drops. That lower pressure reduces the boiling point of water, which means moisture in fruit fillings can turn to steam at a lower temperature than it would near sea level. Around sea level, water boils at 212 degrees Fahrenheit or 100 degrees Celsius. In mountain locations, the boiling point falls as elevation rises, so juices in a pie can begin active bubbling before the filling has reached the same heat concentration you expect at lower elevations. Bakers often interpret that early bubbling as a green light to pull the pie, but that is exactly where many runny fillings begin.
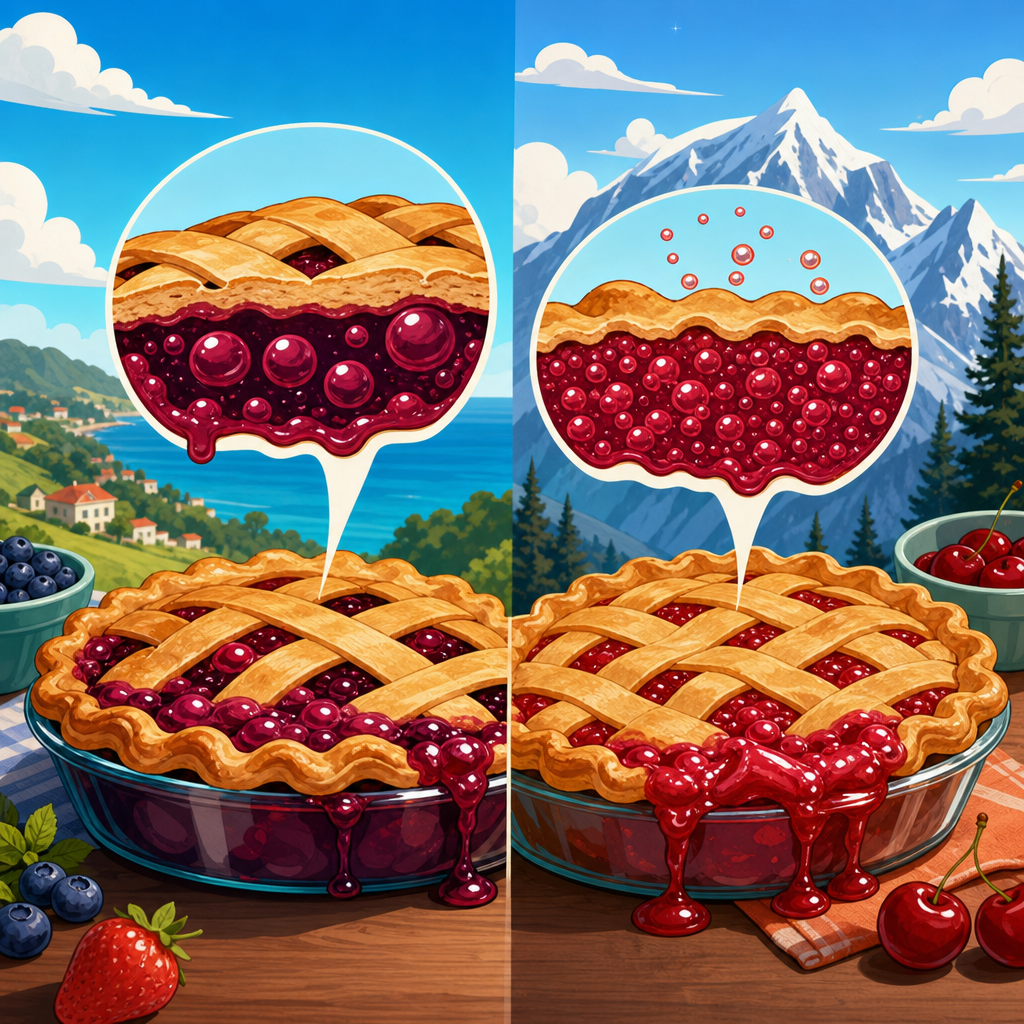
Lower pressure also affects how gases expand and how quickly moisture escapes. When fruit releases liquid and sugar dissolves, steam forms more readily and moves upward more aggressively through the filling. That can create large, energetic bubbles around vents or lattice openings, especially in high-sugar berry pies. In my own tests, cherry pies at altitude often show fast, frothy bubbling at the edges while the center still lags behind. The surface looks active, but the thickener has not always had enough sustained heat to gel fully. The visual drama is real; the implication of doneness is less reliable unless you understand the filling chemistry.
Another shift is evaporation. Because water boils sooner, moisture leaves the filling more readily, but not always evenly. Edge zones near the pan heat up first, so the perimeter can over-reduce while the middle remains loose. This is why many altitude bakers report a pie that looks thick at the rim, then spills juice when sliced. Bubbling is therefore a map of heat distribution as much as a sign of boiling. Reading that map correctly is part of efficient baking troubleshooting and workflow.
How starch, sugar, and fruit structure determine whether a bubbling pie will set
Fruit pie filling sets when released juices, dissolved sugar, acid, and a thickener reach the right concentration and temperature for long enough to stabilize. The most common thickeners are cornstarch, tapioca starch, instant tapioca, flour, and modified starch products such as ClearJel. Each behaves differently. Cornstarch thickens relatively quickly and gives a glossy finish, but it can break down if the filling is undercooked, over-acidified, or reheated repeatedly. Tapioca tends to hold up well in juicy fruit pies and can produce a clear, slightly elastic set. Flour is more forgiving but less powerful and often leaves a cloudier appearance.
At altitude, this matters because visible bubbling alone does not confirm that the starch granules have fully swelled and stabilized the fruit juices. A blueberry pie may boil vigorously through the lattice yet still need several more minutes for the center to reach the temperature required for a dependable slice. Sugar complicates the picture further. High sugar concentrations raise the temperature needed for gelling and pull water from fruit through osmosis, creating more liquid before the filling thickens. Peaches, sweet cherries, and very ripe strawberries can release dramatically different amounts of juice from batch to batch, so your workflow should account for fruit ripeness, variety, and whether the fruit was fresh or frozen.
Fruit structure contributes another variable. Apples contain pectin and hold shape if the variety is suited to baking, such as Granny Smith, Honeycrisp, Braeburn, or Pink Lady. Soft berries collapse faster, releasing liquid quickly and encouraging rapid bubbling. Frozen fruit often sheds even more juice because ice crystals rupture cell walls. For altitude bakers, pre-macerating fruit, measuring the accumulated juices, and deciding whether to reduce them on the stovetop is often more reliable than adding extra starch blindly. Better workflow begins before the pie enters the oven.
How to tell when bubbling means the filling is actually done
The best rule is simple: the center must bubble, not just the edges. For most fruit pies, you want sustained bubbling in the middle for several minutes so the thickener fully activates and the filling reaches an even set. If you see bubbling only near the crust or at one vent, the pie is not necessarily finished. At altitude, where the boiling point is lower, I recommend using bubbling plus time plus appearance rather than one cue alone. Look for thick, slower bubbles in the center, a less watery sheen, and juices that no longer surge rapidly from one side of the pie.
An instant-read thermometer can make this more precise. Depending on the thickener and sugar level, many fruit fillings set best when the center approaches roughly 200 to 212 degrees Fahrenheit. The exact number is less important than consistency: if your pies repeatedly run loose, temperature tracking will show whether you are pulling them too early. This is especially helpful in deep-dish pies, pies baked in ceramic dishes that heat more slowly, or pies loaded with frozen fruit. Thermometers reduce guesswork and shorten the troubleshooting cycle.
Cooling is part of doneness too. Even a properly baked pie will seem loose if cut too early because starch gels continue to set as the filling cools. Berry pies often need at least four hours; apple pies may need longer depending on thickness and fruit load. At altitude, where bakers are tempted to overcompensate for vigorous bubbling by slicing early to “check,” patience is a better tool. The pie should cool until just barely warm or fully room temperature if you want clean slices.
Common altitude pie problems and the most effective fixes
Most pie failures at altitude can be traced to a small set of repeat issues: under-thickened filling, over-reduced edges, soggy bottom crust, boilovers, collapsed top crust, or poor timing in cooling and serving. The workflow fix is to diagnose by symptom rather than by recipe category alone. If the center is soupy but the edges are jammy, you likely need longer bake time, better center heat penetration, or partial pre-cooking of the filling. If the crust browns before the center bubbles, shield the rim and continue baking rather than stopping early. If juices leak heavily, revisit venting, fruit preparation, and pan depth.
| Problem | Likely cause at altitude | Most effective fix |
|---|---|---|
| Runny center | Center never sustained a full bubble; too little thickener | Bake longer until center bubbles several minutes; increase thickener modestly |
| Thick edges, loose middle | Uneven heat distribution | Use metal pie pan, bake on preheated sheet, extend time |
| Boilover through vents | Early vigorous steam release; overfilled pie | Reduce fruit slightly, use wider vents, place pie on lined sheet |
| Soggy bottom crust | Excess juice; insufficient bottom heat | Preheat baking steel or sheet, use glass or metal wisely, avoid underbaking |
| Gummy thickener texture | Too much starch or poor dispersion | Whisk dry thickener thoroughly with sugar; avoid overcorrection |
| Fruit tunnels under top crust | Gas expansion and uneven settling | Mound filling evenly, vent adequately, avoid oversized top crust gaps |
In repeated tests, the most dependable single upgrade for altitude pie baking is disciplined note-taking. Record fruit weight, thickener type, sugar amount, pan material, oven rack position, start temperature, total bake time, and cooling time. Patterns emerge quickly. Two extra tablespoons of tapioca may solve one blueberry pie and ruin the next if the fruit was drier. Data makes troubleshooting cumulative instead of random.
Ingredient and equipment choices that improve altitude baking workflow
A strong altitude workflow starts with choosing ingredients that behave predictably. Weigh fruit instead of relying on cup measures, because slice thickness and berry size create huge variability. If using frozen fruit, thaw in a colander over a bowl, then decide whether to reincorporate, reduce, or discard part of the juice. Standardizing this step eliminates one of the biggest sources of inconsistency. For thickener, many professional bakers prefer tapioca starch or instant tapioca for berry pies and a starch-flour combination for apples, where texture and opacity are less of a concern. Modified starches can perform very well, but they should be used according to manufacturer guidance.
Pan material matters more than many home bakers realize. Metal pans conduct heat quickly and help bottom crusts set faster, which is useful at altitude when fillings can appear done before the base is baked through. Glass pans let you see bottom crust color, though they heat more gradually and can encourage over-browning at the edges if the bake runs long. Ceramic dishes retain heat well but are often the slowest to bring the center of a full fruit pie to sustained bubbling. If your recurring issue is a pale, soggy bottom, try a heavy-gauge metal pan on a preheated sheet or steel.
Oven management is equally important. Use an oven thermometer; many household ovens run 15 to 25 degrees off target, and that error compounds in pies. For some altitude bakers, starting a fruit pie at a slightly higher temperature for the first 15 to 20 minutes helps set crust structure, followed by a reduction to finish the filling without burning the rim. That is not a universal rule, but it is a useful troubleshooting pattern when top crust color races ahead of center doneness. Keep the pie on the lower-middle rack for stronger bottom heat, and rotate only if your oven has a documented hot spot.
Workflow from prep to cooling: a reliable system for fruit pies at altitude
Efficient pie baking at altitude depends on sequence. Start by evaluating the fruit: ripe but not collapsing, evenly cut, and weighed. Toss it with sugar and thickener, then let it stand briefly so you can see how much liquid develops. If the fruit is exceptionally juicy, pre-cook part of the filling or reduce the drained juices until syrupy before combining. This concentrates flavor and controls free water without turning the pie gluey. For apples, partial stovetop cooking can also reduce the gap that forms under top crusts as slices soften and settle during baking.
Next, manage the crust with temperature discipline. Chill the dough thoroughly, line the pan without stretching, and if your bottom crust tends to slump or soften, return the lined pan to the refrigerator before filling. Assemble quickly so butter stays cold. Vent the top crust generously enough to let steam escape, but not so widely that juices erupt unchecked. Lattice tops naturally release moisture well, while fully enclosed tops need deliberate slits placed near the center, where you want visual confirmation of bubbling.
During baking, avoid opening the oven early. The most common workflow mistake I see is checking too often, which drops temperature and slows the center. Watch for the stages: crust setting, edge bubbling, then center bubbling. Once the middle is actively bubbling, give it additional time based on fruit type and depth. Shield overbrowning edges with foil or a pie shield rather than sacrificing filling doneness. After baking, cool on a rack with full airflow beneath the pan. Do not move the pie to the refrigerator immediately; rapid chilling can trap steam and affect texture before the starch gel settles naturally.
How this hub connects to broader baking troubleshooting at altitude
Pie filling behavior is a model for altitude baking as a whole. The same lower-pressure environment that changes bubbling in fruit pies also changes how cakes rise, how custards set, how cookies spread, and how yeasted doughs proof. Learning to troubleshoot pies teaches a transferable method: identify the physical change caused by altitude, connect it to an ingredient system, then adjust process before changing the formula drastically. In practical terms, that means checking boiling behavior before adding starch, checking center temperature before adding more bake time, and checking pan conductivity before blaming the recipe.
As a hub for baking troubleshooting and workflow, this topic also points to useful companion subjects: how to prevent soggy bottom crusts, how to choose thickeners for fruit pies, how to adapt frozen fruit recipes, how to manage oven spring in pastries, and how to build a repeatable altitude baking log. Bakers who improve their note-taking and sequencing usually solve more problems than bakers who chase one-off ingredient hacks. Altitude does require adaptation, but it rewards precision quickly. Once you understand why pie fillings bubble differently at altitude, you can read the signs in your oven with much greater confidence.
The central takeaway is straightforward: at altitude, pie fillings bubble earlier and often more dramatically because lower air pressure lowers the boiling point and changes steam behavior, but that does not automatically mean the pie is done. A dependable slice comes from matching bubbling with correct thickener choice, center heat, even bake time, proper venting, and a full cooling period. If you treat bubbling as one diagnostic signal within a complete baking workflow, you will produce better pies and troubleshoot faster across the entire cooking and baking at altitude category. Use this hub as your starting point, keep detailed notes, and apply one controlled adjustment at a time on your next pie.
Frequently Asked Questions
Why do pie fillings bubble more aggressively at high altitude?
At high altitude, air pressure is lower, and that changes the way moisture behaves inside a pie. Water reaches its boiling point at a lower temperature, so fruit fillings can begin simmering and steaming sooner than they would at sea level. That earlier boiling often creates faster, more visible bubbling, especially in fillings made with juicy fruits like cherries, blueberries, peaches, or apples. The filling may look very active in the oven, with foam rising quickly and juices pushing toward vents or the edge of the crust.
What makes this confusing for bakers is that more bubbling does not automatically mean the pie is fully set. A filling can boil vigorously while the thickener still has not finished doing its job. Lower pressure also affects how steam expands and moves through the pie, which can force liquid upward or outward before the starch network has stabilized. In practical terms, a pie in Denver or Flagstaff may appear dramatically more done than the same pie at sea level, yet still cool into a runny center if it is pulled too early.
That is why high-altitude bakers need to judge doneness with more than surface bubbling alone. You want to see sustained bubbling in the center area, not just around the edges, and you want to pair that visual cue with a formula that accounts for altitude. The goal is controlled thickening, not just dramatic oven activity.
How does altitude affect starch thickeners in pie fillings?
Altitude changes the environment in which starch thickeners have to work. Common pie thickeners such as cornstarch, tapioca, flour, or clear gel rely on enough heat and the right amount of available moisture to swell, gelatinize, and form a stable structure. Because liquids boil at lower temperatures at altitude, the filling may be actively bubbling before the starch has fully reached its ideal thickening performance. That can leave the pie looking finished on top while the interior remains looser than expected.
Fruit pies are especially sensitive because fruit naturally releases water as it heats. At altitude, that water may move and evaporate differently, and steam pressure can disturb the filling as it thickens. If the ratio of sugar, acid, fruit juice, and starch is not balanced well, the filling can become thin, weepy, or unevenly set. Some bakers also notice that overworking a filling, using too much sugar, or skipping a pre-cook step makes high-altitude bubbling even harder to control.
The best adjustment depends on the recipe, but many bakers succeed by slightly increasing thickener, reducing excess liquid, or partially cooking the filling before baking. Pre-cooking is particularly helpful because it lets you activate and assess the thickener before the pie goes into the crust. Instead of relying entirely on oven bubbling as the signal, you start with a filling that already has structure. That usually leads to cleaner slices, less leakage, and more predictable results across different elevations.
Why does my pie look done in the oven but turn runny after it cools?
This is one of the most common high-altitude pie problems. The filling often appears fully cooked because it is bubbling vigorously, pushing steam through the vents, and browning the crust beautifully. But at altitude, that visible bubbling can happen before the filling has thickened enough to hold its shape after cooling. In other words, the pie can look dramatic and active without actually being structurally finished.
Another reason is that the thickening process does not end the moment the pie comes out of the oven. The starch needs enough heat to activate properly, and then the filling needs uninterrupted cooling time to set. If the pie is removed too soon, or sliced while still warm, the liquid in the fruit has not had time to stabilize. At altitude, where steam movement is more aggressive and boiling starts earlier, the filling is even more likely to seem ready before it really is.
To solve this, bake until the filling bubbles in the center, not only at the edges. Then let the pie cool completely, often for several hours, before slicing. If you routinely get runny pies, consider a stronger thickening strategy, a longer bake at an adjusted temperature, or a pre-cooked filling. Those changes help ensure that what you see in the oven matches what you get on the plate.
Do different fruits react differently to altitude when used in pie filling?
Yes, and the differences can be significant. Each fruit brings its own water content, pectin level, acidity, sugar concentration, and structural integrity. Apples tend to release moisture more gradually and can hold shape well, but they may still produce a thin filling if the variety is especially juicy or if the slices are packed raw without enough thickener. Cherries and blueberries often create more free-flowing juices, so at altitude they can foam heavily, boil fast, and leak before the filling fully sets. Peaches, blackberries, and mixed berry fillings can be even trickier because their liquid output varies widely depending on ripeness and season.
Acidity matters too. Acid affects how some thickeners perform, and fruits with a brighter acid profile may need more careful balancing. Sugar also plays a role because it draws moisture out of fruit. At altitude, where boiling behavior is already altered, a high-sugar filling can become especially active and messy in the oven. That is why a one-size-fits-all fruit pie formula often works poorly in mountain baking conditions.
The most reliable approach is to treat each fruit as its own system. Pay attention to how juicy the fruit is, whether the recipe is raw-filled or pre-cooked, and how much thickener is being used relative to the fruit weight. For consistently good results at altitude, many bakers test and adjust by fruit type rather than simply applying the same sea-level method to every pie.
What are the best practical adjustments for baking pie at high altitude?
Start by recognizing that bubbling is a baking signal, but not the only one. At altitude, the most effective pie adjustments usually combine formula changes with process changes. You may need a little more thickener, slightly less added liquid, or a modest reduction in sugar if the fruit is already very juicy. A pre-cooked filling is one of the strongest troubleshooting tools because it lets you control moisture release and thickening before the crust enters the equation.
Crust and oven management matter as well. Because filling can boil aggressively and vent more forcefully at altitude, a sturdy bottom crust, proper venting, and good oven preheat are important. Some bakers find that a slightly longer bake helps the center reach a more reliable set, while others benefit from starting hot to establish the crust and then lowering the temperature to finish without overbrowning. The exact strategy depends on the fruit, pan type, and your elevation, but consistency in method is essential if you want repeatable results.
Finally, cool the pie completely before judging the outcome. Many high-altitude pie problems are really a combination of under-thickened filling and under-cooled pie. Keep notes on fruit type, thickener amount, bake time, and how the filling behaved in the center versus at the edges. That kind of structured troubleshooting turns altitude baking from guesswork into a manageable workflow, and it helps you produce pies that bubble appropriately, slice cleanly, and hold their texture from oven to table.


