Altitude-safe fruit preserving for mountain home cooks starts with one nonnegotiable truth: elevation changes how heat moves, how water boils, how sugar concentrates, and how safely jars seal. For cooks in mountain towns, fruit preserving is not simply a farmhouse tradition scaled upward. It is a technical process that must be adjusted for local conditions if you want bright flavor, proper gel, stable texture, and food safety. In the preserving work I have done in high-country kitchens, the batches that failed were rarely caused by bad fruit. They failed because altitude was treated as a detail instead of the central variable.
Fruit preserving includes jam, jelly, marmalade, fruit butter, preserves, syrup, candied fruit, pie filling, and home-canned whole or sliced fruit. Candy work belongs in the same conversation because sugar concentration is measured by temperature, and temperature targets shift as boiling points drop. Canning belongs here too because lower air pressure at higher elevations reduces the temperature of boiling water, which changes the time required to destroy spoilage organisms. When people ask why the same peach jam recipe works in Portland but turns runny in Leadville, or why jars that sealed on the counter later fermented, the answer is usually altitude interacting with sugar, acid, pectin, and heat.
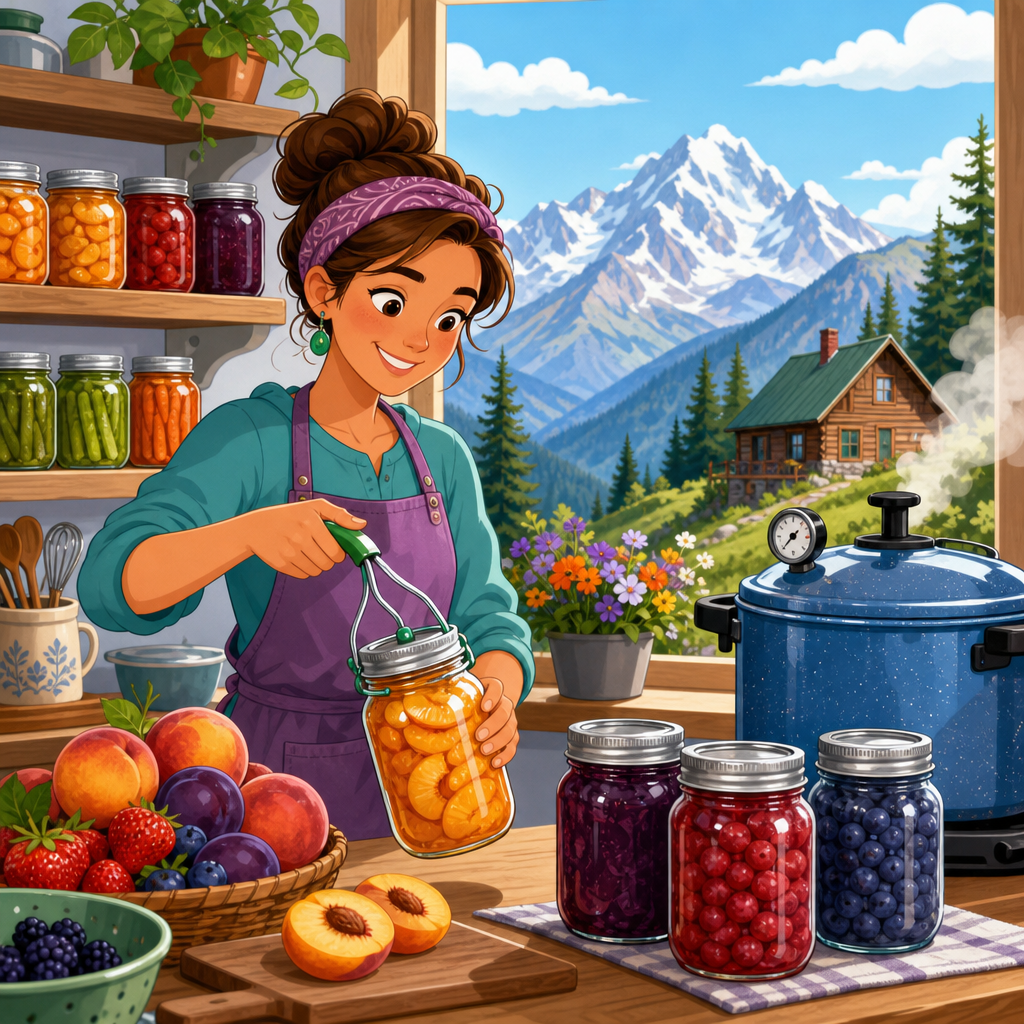
This hub covers the mountain-specific fundamentals behind candy, preserves, and canning so you can move confidently between recipes and methods. It explains which products can be processed in a boiling-water canner, when pressure canning enters the picture, how to adjust temperatures for syrups and confections, and why tested formulas matter more at 7,000 feet than they do near sea level. It also points to the practical decisions that define success for home cooks: choosing fruit at the right ripeness, using proper headspace, correcting gel problems, preventing sugar crystallization, and knowing when freezer storage is smarter than shelf storage. Master these principles, and your fruit preserving becomes predictable, efficient, and safe.
How altitude changes fruit preserving
Altitude affects fruit preserving through two linked mechanisms: lower atmospheric pressure and a lower boiling point of water. At sea level, water boils at 212 degrees Fahrenheit. As elevation rises, that boiling point falls by roughly 2 degrees for every 1,000 feet, though exact values vary slightly. In practical kitchen terms, a boil at 8,000 feet is visibly vigorous but objectively cooler than a boil at sea level. That changes concentration speed, cooking times, evaporation rates, and the highest temperature a boiling-water canner can deliver.
For preserves, a lower boiling point means jellies and jams may need more time to reach the proper concentration of sugar, acid, and dissolved pectin. Yet longer cooking can also dull fresh fruit flavor and darken color, especially in berries and apricots. For candy and syrups, target temperatures must be reduced to match local boiling conditions; otherwise soft-ball and thread stages will be overshot. For canning, longer processing times compensate for reduced heat lethality in boiling water. This is why USDA guidance and the National Center for Home Food Preservation specify altitude adjustments for many fruit products.
The other effect is often overlooked: lower humidity in many mountain climates accelerates moisture loss during prep and cooling. Sliced apples brown faster on dry days, uncovered jams skin over quickly, and sugar can both absorb and lose moisture unpredictably depending on storage conditions. I treat mise en place more strictly at altitude than I do at lower elevations. Fruit is washed and cut in smaller batches, jars are staged before cooking starts, and measured sugar is kept covered. These workflow choices reduce quality drift before the preserve ever reaches the pot.
Choosing the right preservation method for each fruit
Not every fruit wants the same treatment, and altitude magnifies the cost of a poor match. High-acid fruits such as peaches, plums, cherries, berries, apples, apricots, and most citrus products are generally suitable for boiling-water canning when prepared using tested formulas. Tomatoes are often discussed alongside fruit because they are botanically fruit, but their acidity can be borderline, so they require added acid in many canning recipes. Low-acid foods, by contrast, require pressure canning; that category matters when fruit is blended with vegetables, meats, or dairy in chutneys, salsas, or dessert sauces.
Texture is the second filter. Strawberries make flavorful jam but mediocre canned halves because they soften dramatically. Peaches hold shape better in light syrup or juice pack. Apples excel as butter, sauce, jelly, slices, and pie filling because their pectin and structure are useful in multiple formats. Pears can be canned beautifully, but underripe fruit often gives the best result because fully ripe pears break down. Mountain cooks also need to weigh storage goals. If a recipe is highly reduced, low in yield, or fussy about texture, freezing may be the better preservation method even when canning is technically possible.
Use this quick framework when deciding what to make from a ripe harvest.
| Fruit | Best altitude-friendly formats | Common risk | Best correction |
|---|---|---|---|
| Peaches | Slices in syrup, jam, butter | Floating fruit, mushy texture | Use hot pack and firm-ripe fruit |
| Strawberries | Jam, freezer jam, syrup | Weak set, faded flavor | Small batches, measured acid |
| Apples | Butter, jelly, slices, pie filling | Browning before cooking | Acidulated water and fast prep |
| Pears | Halves, preserves, butter | Grainy or collapsing fruit | Can slightly underripe fruit |
| Cherries | Whole, preserves, syrup | Split skins, cloudy syrup | Gentle heating and proper headspace |
Safe canning rules mountain cooks should never skip
The basic rule is simple: use tested recipes from current, recognized sources and apply the altitude adjustment exactly as written. Reliable sources include the USDA Complete Guide to Home Canning, the National Center for Home Food Preservation, Ball publications that reflect current guidance, and state extension services such as Colorado State University Extension and Utah State University Extension. Old family formulas can be excellent for flavor, but unless they match a tested process, they should not be treated as shelf-stable canning instructions.
For most fruit, boiling-water canning is appropriate because acidity controls the growth of Clostridium botulinum. Even so, yeasts, molds, and other spoilage organisms still matter, and inadequate processing can lead to fermentation, leakage, or mold growth under the lid. At altitude, processing time usually increases as elevation rises. The exact adjustment depends on jar size, product style, and whether the recipe already includes a higher-elevation schedule. Headspace also matters. Too little headspace can force siphoning; too much can weaken the vacuum seal and discolor fruit.
Jar preparation should be disciplined. Start with clean jars, use new lids as directed by the manufacturer, remove trapped air with a nonmetal tool, wipe rims carefully, and maintain the canner at a full rolling boil for the entire processing time. Do not tip jars, tighten bands after processing, or judge safety by whether the lid popped. After cooling for twelve to twenty-four hours, remove bands, check seals, wash jars, label them, and store them in a cool, dark place. If a jar did not seal, refrigerate it and use it promptly or reprocess within the recommended window using a full tested method.
Jam, jelly, and marmalade at elevation
Altitude-safe jam making is mainly a matter of controlling soluble solids, acid balance, and pectin behavior without overcooking the fruit. Traditional full-sugar jams rely on a concentration point near 65 percent soluble solids for gel strength and preservation. At higher elevations, cooks often chase this endpoint by extending the boil, but doing so can break down pectin and mute flavor. A better method is to use a tested formula, cook in small batches, and verify the endpoint with a thermometer adjusted to your local boiling point, the sheet test, or freezer plate testing.
Because water boils at a lower temperature in the mountains, the classic “jam sets at 8 degrees above the boiling point of water” rule is more useful than a fixed sea-level setting. If water boils at 198 degrees where you live, a gel point near 206 degrees is the practical target, not 220. The same principle helps with marmalade, where peel softening and syrup concentration must finish together. I also recommend weighing prepared fruit when possible instead of relying entirely on volume; weight reduces variation, especially with chopped berries and stone fruit.
Low-sugar and no-sugar-needed pectin products are helpful tools, but they are not interchangeable with regular pectin. They create structure differently, often using calcium activation or alternative pectin chemistry, and they must be paired with the formula intended for them. Honey, maple syrup, and agave also change set, flavor, and water activity. They can be excellent in freezer jams, but for shelf-stable preserves I stay inside tested limits. If jam turns out runny, it is usually still safe if processed correctly; quality can often be fixed in a later batch, but safety cannot be improvised after the jar is on the shelf.
Candy, syrups, and fruit butters in mountain kitchens
Mountain candy making requires temperature correction. Sugar stages such as thread, soft-ball, firm-ball, and hard-crack are defined by sugar concentration, but most recipes express them as temperatures measured at sea level. Since water boils lower at altitude, your target temperatures should typically be reduced by about 2 degrees Fahrenheit for every 1,000 feet above sea level. The exact correction depends on your thermometer and local conditions, so calibrating the thermometer in boiling water before a batch is the most dependable habit. This single step prevents more failed caramels, fondants, and fruit syrups than any other adjustment.
Fruit syrups and butters sit between candy and preserves. Syrups need enough concentration for body without crossing into crystallization or becoming too thick when cooled. Fruit butters require long reduction, which can be challenging in dry mountain air because the line between concentrated and scorched arrives fast. Wide pots help evaporation, but they also raise burn risk if stirring is inconsistent. Slow cookers can work for butters, yet the lid often needs to be vented and the product still finished on the stove for final viscosity. Color should deepen gradually, not jump from amber to brown in the last fifteen minutes.
Crystallization is another altitude-sensitive issue because fast evaporation can concentrate sugar on the pot walls. Washing down crystals with a wet pastry brush, using glucose or corn syrup where the recipe calls for it, and avoiding unnecessary stirring after boiling begins are practical controls. For candied citrus peel or glacé fruit, complete drying is as important as the syrup stage. Pieces that remain tacky in the center may mold during storage. When in doubt, refrigerate high-moisture candy and treat it as a short-term product rather than assuming pantry stability.
Troubleshooting and building a reliable mountain preserving workflow
Most preserving failures fall into a few repeat categories: runny jam, tough jelly, floating fruit, shriveled fruit, siphoned liquid, unsealed jars, and off flavors from overcooking. Runny jam usually means insufficient concentration, incorrect pectin use, or undermeasured acid. Tough jelly often means overconcentration. Floating fruit happens when raw-pack fruit traps air or when syrup is too light for the fruit density. Shriveled fruit is common when very sugary syrup pulls water from the fruit too quickly. None of these problems are random. They are process signals, and a good notebook can turn them into repeatable corrections.
My standard mountain workflow is deliberately boring, which is why it works. I confirm elevation, print or bookmark the tested recipe, calibrate thermometers, inspect jars, and set up a clean landing zone for hot jars before I wash fruit. I process modest batch sizes because doubling jam formulas often weakens set and complicates timing. I label experimental batches for refrigeration or freezing, never the pantry. During harvest season, I preserve in the morning when kitchens are cooler and fruit is firmer. Those choices reduce stress, but more importantly they reduce variation, which is the real enemy of preserving at altitude.
For mountain home cooks, the payoff is independence and quality. You can turn a case of Palisade peaches, wild chokecherries, or backyard apples into products that taste like the fruit you started with, not generic sweetness in a jar. More importantly, you can do it safely. Build your preserving practice on tested canning methods, altitude-adjusted temperatures, and disciplined batch records. Then expand into marmalades, fruit butters, syrups, candies, and pie fillings with confidence. Use this hub as your starting point, then move deeper into each preserving method and fruit type so every jar on your shelf earns its place.
Frequently Asked Questions
Why does altitude change the way fruit preserving works?
Altitude affects preserving because water boils at a lower temperature as elevation increases. In practical terms, that means jars, syrup, and fruit mixtures may be boiling vigorously but still not reaching the same temperature they would at sea level. That lower boiling point changes several important parts of the process at once: heat penetrates jars differently, microorganisms are destroyed less efficiently unless processing is adjusted, evaporation happens in a different pattern, and sugar concentration can shift faster than many home cooks expect. For mountain home cooks, this is why a recipe that seems perfectly reliable at low elevation can produce runny jam, over-thick preserves, floating fruit, weak seals, or unsafe storage if followed without changes.
Altitude also influences texture and flavor. Because moisture can evaporate more quickly while the boiling temperature remains lower, fruit preserves may thicken unpredictably if you rely only on visual cues. Delicate fruit can break down faster, while pectin may set differently depending on sugar balance, cooking time, and acidity. The safest approach is to treat altitude as a core preserving variable, not a minor detail. Use a tested recipe from a reliable canning authority, confirm your elevation, and apply the exact processing-time adjustment recommended for your altitude range. That is what protects both quality and safety.
How should I adjust water-bath canning times for high-altitude fruit preserves?
For water-bath canning, the standard altitude correction is to increase processing time as elevation rises. The reason is straightforward: at higher elevations, boiling water is cooler, so it takes longer to deliver the same heat treatment that a recipe assumes at sea level. If you do not add time, the contents of the jar may not receive adequate processing, which can shorten shelf life and create safety problems. The exact increase depends on the tested recipe and your elevation band, so the best practice is to use current guidance from trusted sources such as the USDA, National Center for Home Food Preservation, or your extension service.
As a general rule, many boiling-water canning recipes call for adding processing time once you are above 1,000 feet. A common pattern is increasing time in steps as elevation climbs, but you should never guess. Look up your local altitude and apply the adjustment specified for that exact product and jar size. Also remember that the processing clock starts only when the canner reaches a full rolling boil. Keep the water at least the recommended depth over the jar tops, maintain a steady boil the entire time, and let jars rest as directed after processing if the recipe specifies it. Those details matter just as much as the added minutes. High-altitude canning is absolutely manageable, but precision is what makes it dependable.
Why does my jam or jelly turn out too runny or too stiff in the mountains?
In mountain kitchens, inconsistent set is one of the most common frustrations. The main reasons are altitude-related evaporation, temperature differences, fruit variability, and pectin balance. Because boiling happens at a lower temperature, cooks sometimes boil longer to chase the familiar look of doneness. That can drive off too much moisture and lead to overly stiff jam, darkened flavor, or a sticky, candy-like texture. On the other hand, if you stop too early because the boil looks dramatic, the preserve may not reach the concentration needed for a proper set, especially if the fruit is low in natural pectin or the sugar-acid balance is off.
The best way to improve consistency is to use tested recipes, measured ingredients, and reliable doneness cues. If you are using commercial pectin, follow the recipe exactly rather than reducing sugar or increasing fruit casually, because those changes affect gel formation. If you are making a long-cooked preserve without added pectin, understand that visual thickness alone can mislead at high altitude. Small-batch cooking often gives better control than large kettles, especially with delicate fruit. It also helps to avoid overripe fruit for jelly or jam, because pectin declines as fruit matures. In short, if your preserves are inconsistent, altitude may be part of the problem, but so are ingredient ratios and cooking technique. Precision solves most of it.
Do I need different equipment or sealing methods to preserve fruit safely at high elevation?
You usually do not need entirely different equipment, but you do need to use standard equipment more carefully. A proper boiling-water canner or a deep stockpot fitted with a rack, clean two-piece lids, tested jars without chips or cracks, a jar lifter, and accurate measuring tools are still the basics. What changes at altitude is the need for stricter process control. You need to know your elevation, maintain a full rolling boil throughout processing, avoid overcrowding jars, and follow jar headspace directions exactly. Those steps help ensure heat distribution and a strong vacuum seal as jars cool.
It is also important not to rely on outdated sealing habits. Open-kettle canning, paraffin wax on jams and jellies, oven canning, and “just flipping jars upside down” are not considered safe methods. A jar that appears sealed is not automatically safe if it was not processed correctly. The seal only tells you a vacuum formed; it does not prove the contents received an adequate heat treatment. For mountain home cooks, that distinction is crucial. If you preserve fruit products that are meant for shelf storage, use a tested canning process and proper altitude adjustment. If a recipe is not tested for canning, refrigerate or freeze it instead. Safe preserving is less about special mountain gadgets and more about disciplined, modern technique.
What are the most important food safety rules for preserving fruit in mountain home kitchens?
The first rule is to use only tested recipes designed for home canning. Fruit is naturally acidic, which makes many jams, jellies, preserves, and properly acidified fruit products suitable for boiling-water canning, but not every fruit recipe is automatically safe for pantry storage. Added low-acid ingredients, unusual thickeners, reduced sugar, or altered proportions can change how heat moves through the jar and whether the product remains safe over time. At altitude, those risks become more significant because underprocessing is easier if time adjustments are skipped or guessed.
The next essentials are to verify your elevation, apply the correct processing-time adjustment, use the recommended jar size, and leave the exact headspace the recipe specifies. After processing, let jars cool undisturbed, then check seals after 12 to 24 hours. Any jar that did not seal should be refrigerated and used promptly or reprocessed according to safe guidelines. Before serving stored preserves, inspect every jar for leakage, mold, spurting liquid, off odors, or unusual discoloration. If anything seems wrong, discard it without tasting. Finally, remember that “traditional” and “safe” are not always the same thing. In mountain home kitchens, the safest preserves come from tested methods, careful timing, clean handling, and respect for altitude as a real scientific factor, not just a local quirk.


