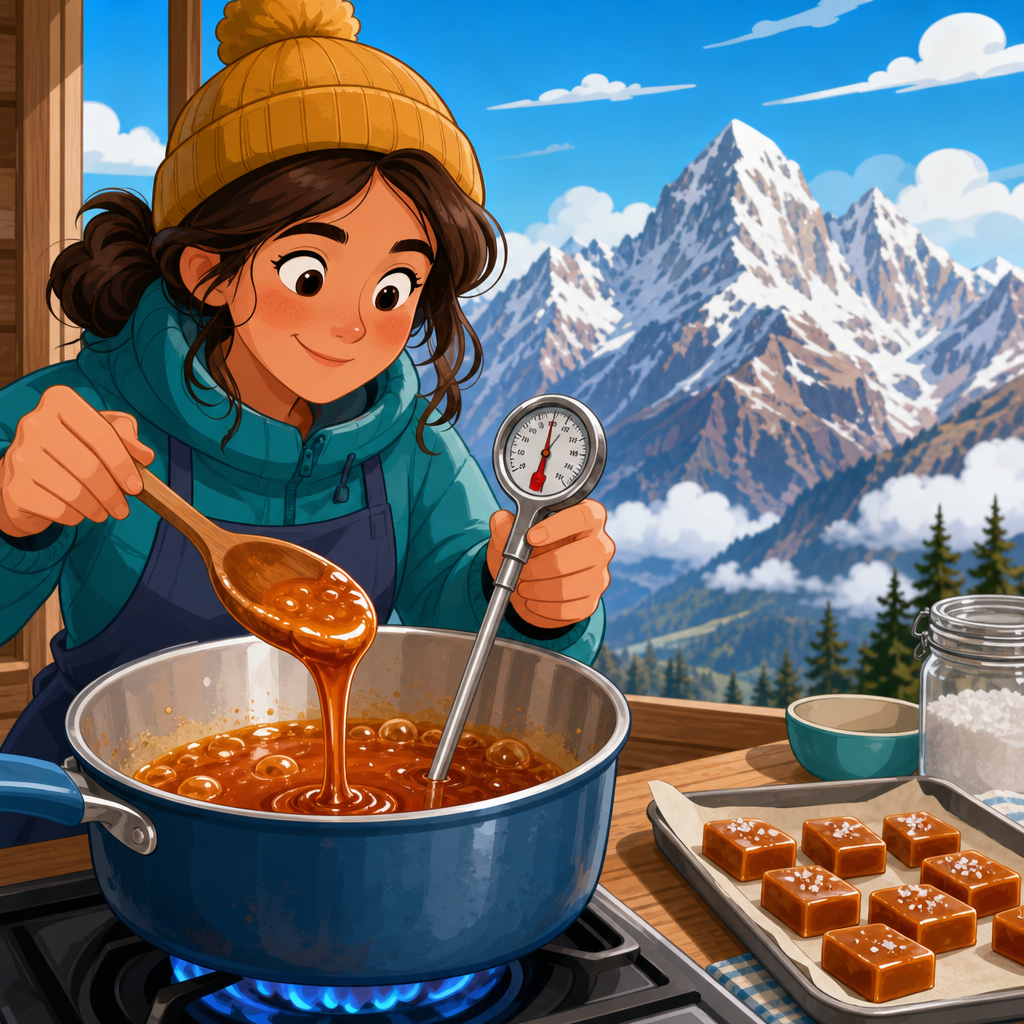
Caramel at altitude behaves differently because boiling points drop as elevation rises, and that single physical change alters sugar concentration, water evaporation, texture, set point, and food safety across candy making, preserves, and canning. In practical kitchen terms, a thermometer matters more at altitude because visual cues such as bubble size, color, and timing become less reliable, while a calibrated temperature reading gives you the control needed to hit the right stage. This matters for anyone working within the wider topic of cooking and baking at altitude, but it is especially critical in the candy, preserves, and canning category, where a few degrees can separate glossy caramel from grainy syrup, spreadable jam from runny sauce, and shelf-stable preserves from unsafe jars. I have tested batches in lowland and mountain kitchens, and the consistent lesson is simple: altitude changes your targets, not just your technique. If you understand how elevation affects heat, evaporation, and pressure, you can make dependable adjustments instead of guessing.
At sea level, water boils at 212°F, or 100°C. As altitude increases, atmospheric pressure decreases, so water boils at a lower temperature. A common rule of thumb is that the boiling point drops by about 1°F for every 500 feet above sea level, though exact values vary with weather and barometric pressure. That sounds minor until you are cooking sugar. Caramel, fudge, toffee, marshmallows, fruit preserves, and syrups all depend on concentration: how much water remains in the mixture at a given temperature. Since many classic temperature targets were developed for sea-level kitchens, using them unchanged in Denver, Santa Fe, Flagstaff, or mountain towns above 7,000 feet can lead to undercooked or overcooked results. Pressure canning has its own altitude adjustments for safety, but even boiling-water canning requires time changes because the lower boiling temperature delivers less heat to the jar. This hub article explains the why behind those changes and gives you a framework for handling candy, preserves, and canning with confidence.
Why altitude changes caramel, sugar work, and preserving
Altitude affects three linked variables: boiling point, evaporation rate, and final concentration. In caramel making, the sugar syrup goes through predictable stages—thread, soft ball, firm ball, hard ball, soft crack, and hard crack—based on temperature and water content. At higher elevations, because water boils at a lower temperature, standard stage temperatures must usually be reduced by about the same amount as your local boiling point depression. If water boils at 202°F in your kitchen instead of 212°F, your candy stage targets are roughly 10°F lower than standard charts. That means caramel sauce intended to finish around 236°F at sea level may need to finish near 226°F for a similar consistency in your mountain kitchen. Ignore that shift and the sauce may seize, turn too thick, or overshoot into a chewy texture.
The same principle governs jams, jellies, fruit butters, and syrups. Pectin gels form within a narrow balance of sugar, acid, and concentration. Traditional recipes often say “cook until thick” or “sheet from a spoon,” but these visual markers become less trustworthy at altitude because water leaves the pan differently and foam behavior changes. A thermometer offers objective feedback. For no-added-pectin jam, the common sea-level gel point is 220°F, which is roughly 8°F above the boiling point of water. At altitude, the more accurate rule is to target about 8°F above your local boiling point rather than blindly aiming for 220°F. The National Center for Home Food Preservation and many extension services teach this relationship because it reflects actual concentration better than a fixed number.
Canning adds another layer. In boiling-water canning, altitude adjustments account for the fact that boiling water may be 203°F or 206°F instead of 212°F, so jars receive less heat unless processing time is extended. In pressure canning, the internal temperature depends on pressure, so you raise pressure as altitude increases to maintain a safe processing temperature for low-acid foods. These are not quality tweaks; they are food-safety requirements grounded in microbiology. Clostridium botulinum spores survive ordinary boiling temperatures, which is why pressure canning is mandatory for low-acid foods such as plain vegetables, meat, and many soups. High-acid jams and fruit preserves are usually water-bath canning products, but altitude still changes the time and heat delivery. Understanding these principles turns a hub topic that feels intimidating into a set of measurable adjustments.
How to use a thermometer correctly at altitude
The best thermometer for sugar and preserves is one you verify before every serious batch. In my kitchens, I use a fast digital probe for calibration checks and either a clip-on candy thermometer or an instant-read digital with high heat tolerance for active cooking. Start by measuring your local boiling point. Bring plain water to a full rolling boil in a pot deep enough to avoid false readings from steam pockets, then place the thermometer tip in the water without touching the metal sides or bottom. Record the temperature after it stabilizes. If your thermometer reads 205°F and you know your elevation suggests 204°F to 205°F, you can trust it; if it is off by 2°F, note the correction and apply it. This step matters because cheap thermometers drift, and a two-degree error is enough to ruin caramel or prevent a proper jam set.
Placement is just as important as calibration. In caramel, the sensor must sit in the syrup, not above it, and it should not rest against the pan where conductive heat skews the reading upward. Stir only as the recipe requires. Excess agitation after sugar dissolves can encourage crystallization, especially if stray sugar remains on the pan walls. A wet pastry brush helps wash down crystals. For fruit preserves, stir frequently enough to prevent scorching, but still read the temperature in the thickest liquid area, not the foamy top. During canning, do not use a candy thermometer as a substitute for tested pressure or dial-gauge canner procedures; rely on the canner’s own gauge, a weighted gauge, and published altitude charts from USDA sources or extension services.
| Task | Sea-level reference | Altitude adjustment principle | Why it matters |
|---|---|---|---|
| Caramel sauce finish | Recipe target, often 230°F–240°F | Lower target by the drop in your local boiling point | Controls thickness and prevents overcooking |
| No-added-pectin jam gel point | 220°F | Aim for about 8°F above your local boiling point | Improves set accuracy |
| Boiling-water canning | Standard process time | Increase time as elevation rises, per tested charts | Maintains heat treatment |
| Pressure canning | Standard pressure at sea level | Increase pressure at higher elevation, per canner type | Maintains safe internal temperature |
Good thermometry also means knowing the limits of numbers. Humidity, pan shape, batch size, sugar type, and ingredient temperature can all shift cooking speed. A thermometer tells you where you are, but it does not replace technique. I still watch color development in dry caramel, listen for the foam pattern in butter toffee, and check whether jam passes a chilled-plate wrinkle test before filling jars. The point is not to abandon sensory judgment; it is to anchor it to a calibrated baseline. Once you cook several batches in your own kitchen, your notes become more valuable than generic internet advice.
Altitude strategy for caramel, candy, and confections
Caramel is often the first recipe that exposes altitude problems because it combines sugar concentration with browning. There are two main forms: wet caramel, made by dissolving sugar in water before cooking, and dry caramel, made by melting sugar directly. Wet caramel is easier to control for many cooks, but at altitude it can take longer to evaporate excess water while still reaching color. That delay tempts people to turn up the heat, which can create uneven browning or scorching around hot spots. A better approach is moderate heat, a verified thermometer, and a target adjusted for your local boiling point. If a sea-level caramel sauce recipe tells you to stop at 238°F and your boiling point is 207°F, begin testing texture closer to 233°F or 234°F rather than forcing the original number.
Crystallization is another common issue in mountain kitchens. Faster evaporation at lower pressure can leave sugar crystals on the pan walls, and once those crystals seed the syrup, the whole batch can turn grainy. Add a small interfering sugar such as corn syrup, glucose syrup, or invert sugar when the recipe allows it. Acid also helps inversion; a little lemon juice or cream of tartar can reduce crystallization in certain formulas. Use a heavy saucepan with even heat, avoid stirring after the syrup clears unless the method says otherwise, and keep the lid on briefly at the start to create steam that washes down the sides. In confectionery work, these small controls matter more than dramatic recipe rewrites.
For fudge, fondant, divinity, marshmallows, and toffee, temperature adjustment by local boiling point remains the foundation. Classic fudge may call for 234°F to 240°F at sea level, depending on texture, but the working target should be lowered to reflect your kitchen’s actual boiling point depression. Divinity is especially sensitive because egg white foam and syrup concentration must align. In dry climates common at altitude, moisture loss can happen quickly, so mise en place is essential. Have pans lined, nuts toasted, butter measured, and a timer ready before the syrup approaches finish temperature. If you stop to search for tools, a two-minute delay can shift a syrup from soft-ball to hard-ball territory. Professional candy makers rely on discipline because sugar does not wait.
Preserves, jam, jelly, and fruit butter at elevation
Preserve making at altitude is less about secret recipes and more about tested ratios. Pectin, acid, sugar, and soluble solids must line up for a stable gel. Commercial pectin products such as Sure-Jell and Ball pectin are designed around specific formulas, and their instructions should be followed exactly, especially when you are learning. Reducing sugar, doubling batches, or swapping sweeteners changes set behavior and can compromise processing. In high-altitude kitchens, a thermometer helps you judge concentration, but it cannot rescue an unbalanced formula. For no-added-pectin recipes, measure your local boiling point and use the “boiling point plus 8°F” rule as a guide, then confirm with a sheet test, freezer test, or wrinkle test. This combination is far more reliable than cooking “until thick.”
Fruit choice matters too. Apples, quinces, citrus peel, cranberries, currants, and underripe stone fruit contain more natural pectin than overripe strawberries or cherries. If you are making peach butter at 6,500 feet, the challenge is often excess water and slow concentration, not a lack of flavor. A wide, shallow pan speeds evaporation, but it also increases scorching risk, so stir with a flat-edged spatula and scrape the pan bottom regularly. For jelly, clarity comes from gentle handling: avoid squeezing the jelly bag hard, which pushes pulp through and clouds the finished product. At altitude, cooks sometimes overcook jelly trying to reach a sea-level number; the result is dark color, cooked flavor, and a rubbery set. Using the adjusted gel point protects both texture and fresh fruit character.
Syrups, curds, and dessert sauces sit adjacent to preserves and deserve equal care. A raspberry syrup for pancakes may remain pourable at a lower final temperature than a canning-safe fruit topping. Lemon curd depends on egg coagulation and butter emulsification rather than pectin, so it should be handled according to tested recipes if it will be canned, because not all curds are suitable for shelf storage. Fruit butters, including apple butter and pear butter, need enough reduction for flavor concentration, but safe canning still depends on tested acidity and process times. This hub is best understood as a map: candy is about sugar stages, preserves are about gel and concentration, and canning is about validated heat treatment. The thermometer helps in all three, but each has its own rules.
Canning safety, altitude charts, and common mistakes
The most important rule in canning at altitude is to use tested recipes from trusted sources such as the USDA Complete Guide to Home Canning, the National Center for Home Food Preservation, Ball, and university extension programs. Blogs, family recipes, and social videos often miss altitude adjustments or use outdated methods like open-kettle canning, paraffin seals, or oven canning. These are not minor differences. Safe canning depends on acidity, jar size, headspace, venting, process time, and altitude correction. In boiling-water canning, higher elevation requires longer processing times. In pressure canning, higher elevation requires higher pressure, with exact numbers depending on whether your canner uses a dial gauge or weighted gauge. Those details are fixed by tested process design, not personal preference.
Common mistakes repeat across kitchens. One is assuming a sealed jar is a safe jar. A lid can seal even when processing was inadequate. Another is thickening pie fillings, salsa, or jam beyond the tested formula; thicker products heat more slowly, which changes the safety margin. A third is skipping thermometer checks and relying on color alone for caramelized preserves such as fig jam or dulce de leche spread. I have seen mountain cooks blame bad ingredients when the real problem was a thermometer that read 4°F low. I have also seen excellent jam ruined by doubling a batch, which slows evaporation and changes gel behavior. Small-batch preserving is usually more consistent, especially with delicate fruit.
Storage and post-processing matter as well. Let jars cool undisturbed for 12 to 24 hours, remove screw bands for storage, label with product and date, and keep jars in a cool, dark place. Any jar with leakage, mold, spurting liquid on opening, or off odors should be discarded according to extension guidance. For candy and caramel, storage conditions affect texture: hygroscopic sweets absorb moisture from the air, while dry climates can harden soft caramels quickly. Wrap pieces well, use airtight containers, and note that altitude kitchens often have lower humidity, which can be an advantage for brittles and toffees but a challenge for marshmallows and chewy candies.
Caramel at altitude teaches a broader lesson for candy, preserves, and canning: precision beats guesswork. Because boiling points fall as elevation rises, standard sea-level temperatures are only starting points. A calibrated thermometer tells you your real baseline, and from that one number you can adjust caramel finishes, candy stages, and jam gel points with confidence. For canning, temperature awareness must be paired with tested altitude processing charts, because safety depends on validated heat delivery, not intuition. The practical payoff is substantial: smoother caramel, better-setting jams, clearer jellies, fewer failed batches, and safer jars on the shelf.
If you remember one rule, make it this: first find your local boiling point, then adjust targets and process decisions from there. Keep notes on elevation, weather, thermometer accuracy, recipe source, batch size, and final results. Over time, your mountain-kitchen log becomes a reliable operating manual tailored to your stove, pans, and ingredients. As you build out your knowledge within cooking and baking at altitude, treat this page as your hub for candy, preserves, and canning fundamentals, then apply those principles to specific recipes and methods. Calibrate your thermometer, choose tested formulas, and cook your next batch with numbers you can trust.
Frequently Asked Questions
Why does caramel behave differently at higher altitude?
Caramel changes at altitude because water boils at a lower temperature as elevation increases. That one shift affects nearly everything happening in the pan. In caramel making, the relationship between heat, water evaporation, and sugar concentration determines whether you end up with a pourable sauce, a chewy caramel, or a brittle, overcooked batch. At sea level, recipes are built around predictable boiling and evaporation patterns. At higher elevations, water leaves the mixture sooner and the boiling point is lower, so the syrup can reach a given concentration at a different temperature and on a different timeline than the recipe expects.
This is why altitude throws off familiar visual signals. Bubble size, bubbling intensity, steam production, color development, and cooking time can all look different from what you are used to. A batch may appear to be “not ready” because the color is lighter, even while the sugar concentration is already high enough to push it past the ideal stage. Or it may seem to be moving quickly because the boil looks vigorous, even though the actual internal temperature is lower than a sea-level recipe assumes. In short, caramel at altitude is not just a faster or slower version of sea-level caramel; it is a process operating under different physical rules. That is exactly why precise temperature measurement becomes much more important than relying on sight alone.
Why does a thermometer matter more than visual cues when making caramel at altitude?
A thermometer matters more at altitude because the usual kitchen clues become less dependable when boiling points change. Many home cooks are taught to judge sugar work by color, aroma, bubble pattern, thickness, and timing. Those cues can still help, but at altitude they are less consistent because the syrup is losing water differently and boiling under altered pressure. The same bubbling pattern that would signal one stage at sea level may indicate something else entirely in a mountain kitchen. Likewise, color can lag behind concentration, especially in dairy-based caramels where milk solids and sugars brown gradually while moisture is evaporating at a different rate.
A calibrated thermometer gives you a direct reading of what the sugar syrup is actually doing instead of asking you to interpret changing appearances. That matters because small temperature differences can mean major texture differences. A few degrees can separate a soft caramel sauce from a firm chewy caramel, or a smooth batch from one that becomes grainy or too hard after cooling. At altitude, those margins matter even more because the expected endpoint from a standard recipe may no longer be correct unless it is adjusted to your local boiling point.
There is also a safety and consistency angle. If you make preserves, fruit butters, syrups, or products that overlap with canning or candying techniques, correct temperature is tied to concentration and stability. A thermometer helps you avoid undercooking, which can leave too much water in the product, and overcooking, which can ruin texture and flavor. In practical terms, a thermometer turns guesswork into repeatable control, and that is the difference between hoping the batch is right and knowing it is.
How should I adjust caramel temperatures for altitude?
The most reliable way to adjust caramel temperatures for altitude is to first determine your actual local boiling point of water, then compare it with the standard sea-level boiling point of 212°F. For every degree that your local boiling point is below 212°F, you generally lower the recipe’s target temperature by about the same number of degrees. For example, if water boils at 208°F in your kitchen, that is 4°F below sea level, so you would typically reduce your caramel target by roughly 4°F. This method works because sugar stages are closely tied to the relationship between syrup temperature and water content, and your environment changes that relationship.
This matters especially for dairy caramels, soft caramels, fudges, and similar cooked sugar mixtures where precision determines final texture. A recipe that says to cook to 245°F at sea level may produce a much firmer result at altitude if you do not adjust. By lowering the target based on your boiling point, you are better matching the intended concentration rather than blindly chasing a sea-level number that does not fit your kitchen.
It is smart to think of this as a starting rule, not a rigid law. Different pans, burner strengths, batch sizes, humidity levels, and recipe compositions can slightly change results. That is why experienced candy makers often keep notes: the day’s boiling point, the adjusted target temperature, the final texture, and any corrections for the next batch. Over time, you build your own reliable altitude-specific range. But the foundation remains the same: measure your boiling point, adjust your candy target accordingly, and let temperature guide you more than time or appearance.
How do I know if my candy thermometer is accurate and properly calibrated?
The simplest way to check a candy thermometer is with a boiling-water test. Bring a pot of plain water to a full rolling boil and measure the temperature without letting the thermometer touch the bottom of the pan. Then compare the reading to your expected local boiling point, not automatically to 212°F. If you live at altitude, water will boil below 212°F, sometimes by several degrees. If your local boiling point should be 208°F and the thermometer reads 210°F, your thermometer is reading 2°F high. That means when you use it for caramel, you should mentally subtract 2°F from its readings, or recalibrate it if the model allows adjustment.
You can also test for consistency by repeating the boiling-water check on different days or by using an ice-water test if your thermometer is designed for broad-range calibration. Digital thermometers are often fast and precise, but they still need checking. Clip-on analog candy thermometers are useful because they stay in the pot, but they can drift over time, especially if knocked, overheated, or stored carelessly. Even a small inaccuracy matters in sugar work, where a difference of 2 to 4 degrees can noticeably change the final texture.
Good thermometer technique matters just as much as calibration. Place the sensor deep enough to be immersed in the syrup but not touching the pan, because contact with the metal can give a falsely high reading. Stir when the recipe calls for it so heat is distributed evenly. Read the temperature only after the number stabilizes. If your thermometer is slow, account for carryover cooking by removing the pan at the right moment. An accurate, well-used thermometer is one of the most valuable tools for successful caramel at altitude because it gives you a true reference point when the visual behavior of the batch is less trustworthy.
Does this altitude issue affect only caramel, or also other sugar cooking, preserves, and canning?
It affects far more than caramel. Any process that depends on boiling temperature, evaporation, sugar concentration, or heat penetration can be altered by altitude. That includes hard candy, fudge, toffee, marshmallow syrup, jams, jellies, fruit preserves, syrups, dulce de leche, and many canning applications. In all of these, lower boiling points change how quickly water leaves the food and what temperature corresponds to a given concentration or level of doneness. That can alter texture, spreadability, gel strength, shelf stability, and even safety if you are following preservation methods that require precise control.
For preserves and jams, reaching the proper set often depends on a balance of sugar concentration, pectin behavior, acidity, and temperature. At altitude, a standard endpoint may need adjusting because the boiling point is lower. Without that adjustment, a jam may stay runny or become over-reduced. In canning, altitude is especially important because lower atmospheric pressure affects the temperature reached during processing. That is why tested canning recipes include altitude adjustments for pressure or time. Those are not optional refinements; they are part of achieving safe preservation.
So while caramel is a very clear example of why a thermometer matters more at altitude, the bigger lesson is broader: when boiling behavior changes, temperature becomes your most dependable guide. Recipes written for sea level can still work beautifully in elevated kitchens, but they often need informed adjustments. A calibrated thermometer, an understanding of your local boiling point, and a willingness to trust measured temperature over traditional visual cues will improve results across candy making, preserves, and other heat-driven kitchen projects.


