The best layering system for big temperature swings in the mountains is a modular clothing strategy that manages sweat, traps warmth, blocks wind, sheds precipitation, and adapts fast as conditions change. Mountain weather can move from a freezing predawn start to intense midday sun, then back to sleet, graupel, or hard wind before sunset. I have managed trips where the difference between valley trailhead temperatures and exposed ridgeline conditions exceeded 30 degrees Fahrenheit in a few hours, and those swings punish hikers who rely on a single heavy jacket or fashionable but poorly planned kit. A proper system is not just about comfort. It protects pace, judgment, dexterity, sleep quality, and ultimately safety.
In mountain travel, layering means wearing multiple garments with distinct jobs rather than one do-everything piece. The standard layers are a moisture-managing base layer, an insulating midlayer, a weather-protective shell, and a stop layer for static warmth such as a puffy jacket. For this hub, clothing, sleep, and shelter belong together because they solve the same problem: maintaining a safe microclimate around the body across changing exertion levels and changing weather. The shirt you climb in, the puffy you throw on during a break, the sleeping bag temperature rating, the R-value of your sleeping pad, and the wind resistance of your shelter all interact. If one part fails, the others carry extra load.
This matters because mountain hypothermia rarely starts with dramatic collapse. It usually begins with sweat trapped under the wrong layer, a windy stop on an exposed pass, wet gloves, a delayed shell change, or an inadequate sleep system after a long day. Overheating matters too. If you sweat heavily into cotton or a thick fleece during a climb, that moisture later cools aggressively when you slow down. The best mountain layering system therefore prioritizes quick adjustment, broad operating range, and predictable performance when damp. It also supports decision-making across a full trip, from clothing selection to camp setup. Done right, this system reduces pack weight without sacrificing margin and gives you a reliable framework for every season except highly specialized winter mountaineering.
Build the clothing system around moisture management and rapid adjustment
The most effective mountain clothing system starts with a simple rule: avoid sweating into your insulation. In practice, that means beginning slightly cool, venting early, and carrying layers that can be added or removed in under two minutes. My most dependable three-season setup for big temperature swings uses a lightweight synthetic or merino base layer, an active insulation or light fleece, a breathable wind layer or waterproof shell depending on exposure, and a lofted puffy reserved mostly for stops and camp. Each piece has one primary job. Base layers move moisture and reduce clamminess. Midlayers provide active warmth while moving. Shells control convective heat loss and precipitation. Puffies create high warmth per ounce when you stop.
Fabric choice matters. Cotton is a poor mountain option because it absorbs water, dries slowly, and loses insulating value when soaked. Merino wool manages odor well and feels comfortable across a range of temperatures, which is why many backpackers like it for multi-day use. Synthetic polyester layers usually dry faster and cost less. For high-output climbs, grid fleece and lightweight active insulation pieces such as the Patagonia Nano-Air Light Hybrid, Arc’teryx Proton series, or Polartec Alpha Direct garments work because they breathe better than traditional puffies. On windy ridges, a simple nylon windshirt can outperform a heavier fleece in overall efficiency by cutting convective loss while adding minimal weight.
Fit is the underrated variable. Layers need enough room to stack without compressing loft, especially under a shell. If your rain jacket is trim enough to crush your puffy, your static warmth will be weaker than the insulation label suggests. Hoods are also strategic. A hooded sun shirt, fleece, shell, and puffy can create precise head and neck regulation without constant hat changes. I recommend building from thin to thick, with every piece usable on its own. If a layer only works in one narrow temperature window, it often becomes dead weight.
Choose base, mid, shell, and insulation pieces for specific mountain conditions
For large temperature swings, there is no single best garment, but there is a best system logic. A lightweight long-sleeve base layer around 120 to 180 grams per square meter suits most shoulder-season hiking. In hot, high-sun conditions, a UPF-rated sun hoodie often works better than a standard tee because it protects skin while remaining breathable. Over that, many hikers do best with either a 100-weight fleece or an active-insulation jacket rather than a heavy fleece. Traditional fleece is durable, insulates when damp, and remains one of the most reliable mountain fabrics ever made. Active insulation offers more warmth under wind resistance with similar breathability, but usually costs more and can be less durable under abrasion.
Your outer protection should usually include both a wind layer and a waterproof shell if you expect true mountain volatility. A 2 to 4 ounce windshirt handles cool starts, ridge gusts, and light spindrift with exceptional efficiency. A waterproof breathable shell handles prolonged rain, wet snow, and severe wind. Look for pit zips, adjustable cuffs, and a helmet-compatible hood if scrambling is involved. Durable water repellent finishes help light moisture bead off, but they are not substitutes for true waterproof membranes. For insulation at rest, down still leads in warmth-to-weight when conditions are cold and relatively dry, while synthetic puffies maintain performance better in persistent damp weather. On long shoulder-season trips in maritime ranges, I often favor synthetic stop layers because repeated condensation and mist steadily degrade untreated down.
| Layer | Primary job | Best materials | Typical mountain use |
|---|---|---|---|
| Base layer | Move moisture, reduce chill | Merino, polyester | All-day next to skin |
| Midlayer | Active warmth | Grid fleece, active insulation | Climbing in cool air |
| Wind layer | Block convective heat loss | Light nylon | Ridges, descents, cool mornings |
| Rain shell | Weather protection | Waterproof breathable laminate | Storms, sleet, prolonged wind |
| Static insulation | Trap loft at rest | Down or synthetic fill | Breaks, camp, emergencies |
For legs, many people overdress. In most three-season mountain travel, lightweight soft-shell pants or nylon hiking pants are enough while moving. Add long underwear for cold starts and carry waterproof overpants when exposure or forecast justifies them. For hands, use a system rather than one glove: thin liner gloves for movement, soft-shell or fleece gloves for cool weather, and waterproof shell mitts or insulated gloves for storms. Headwear should include a brimmed cap for sun, a warm beanie, and possibly a buff or neck gaiter. This modular approach gives more control than a single bulky piece.
Extend the same layering logic to sleep systems and shelters
Clothing cannot be separated from sleep and shelter in a mountain hub because nighttime recovery depends on the same thermal principles. A sleeping system has three major parts: insulation above you, insulation below you, and protection from moving air and moisture around you. The sleeping bag or quilt provides top insulation, but the sleeping pad often determines whether the system actually works. Pad R-value is the measure of resistance to conductive heat loss into the ground. For many three-season mountain trips, an R-value around 3 to 5 is appropriate. In colder shoulder-season conditions, especially on snow or frozen ground, values above 5 become important. I have seen strong hikers with expensive sleeping bags shiver all night because they paired them with an ultralight summer pad that leaked heat into the ground.
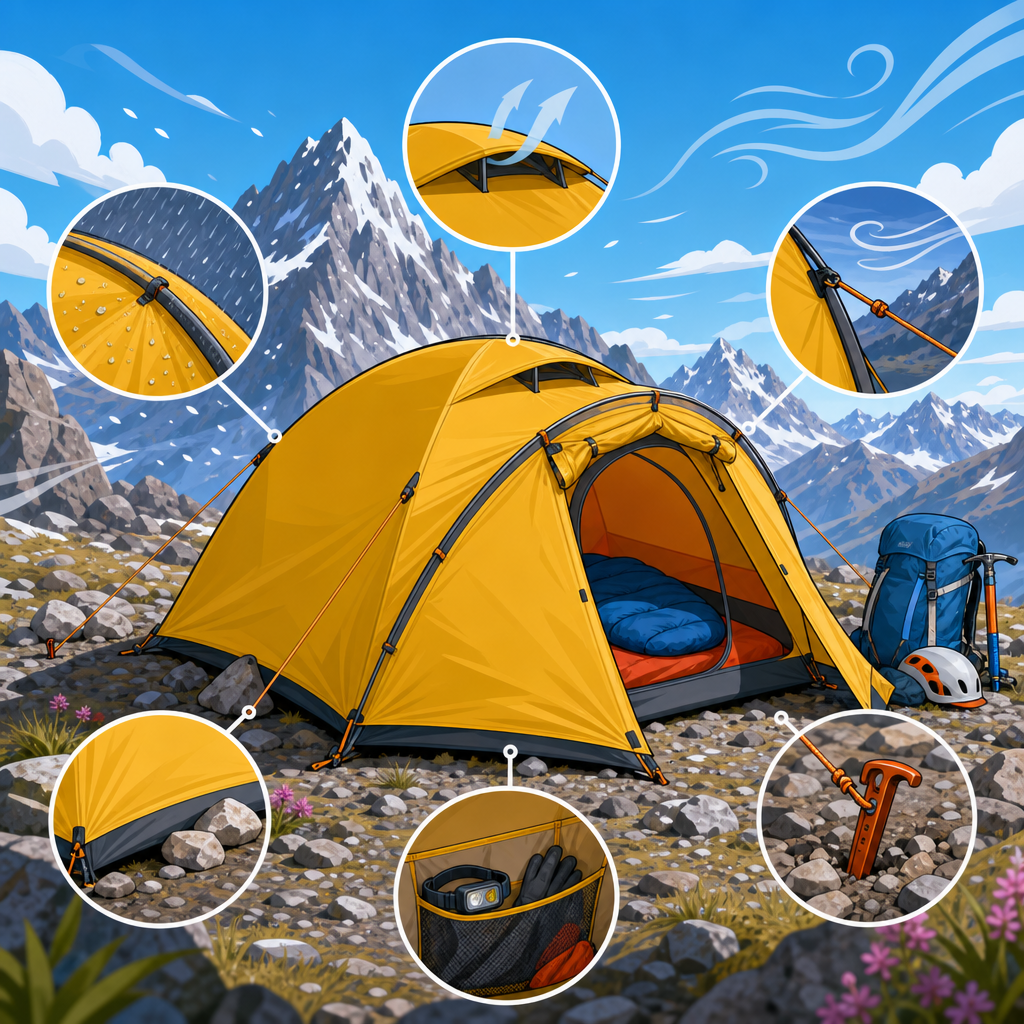
Shelter choice also changes how much clothing and bag warmth you need. A double-wall tent manages condensation better than many single-wall shelters, though modern trekking-pole shelters can be excellent when pitched well. Tarps offer ventilation and low weight but demand sharper site selection and weather judgment. Bivy sacks add splash and wind protection but can increase condensation if used carelessly. In exposed alpine camps, wind protection matters as much as temperature rating because moving air strips away warmth from both sleep systems and morale. Good camps are chosen, not found. Use terrain breaks, avoid cold-air drainages when possible, and keep distance from objective hazards such as rockfall paths and dead trees.
The strongest sleep strategy for mountain temperature swings is to treat camp clothing as an extension of the layering system. Keep one dry sleep base layer protected in a waterproof stuff sack. Use your puffy and warm hat to extend a quilt in colder-than-expected conditions. Eat before bed because digestion supports heat production. Vent the shelter enough to reduce internal condensation, but not so much that spindrift or wind erases the benefit. If your feet run cold, reserve dry socks for sleep only. These are small decisions, yet they consistently determine whether you recover well enough to move safely the next day.
Adapt the system by season, elevation, and trip style
The best layering system for big temperature swings in the mountains changes with climate and objective. A dry high-elevation range in the interior West allows more confidence in down insulation and lighter shells. A maritime range like the Cascades, Scottish Highlands, or coastal Norway demands stronger wet-weather performance and more respect for condensation. Day hiking allows narrower margins because retreat is simpler. Multi-day backpacking, trekking, hunting, or alpine approaches require more redundancy because drying opportunities are limited and shelter performance matters every night.
In summer, the biggest threats are often sun, thunderstorms, and abrupt wind exposure above tree line. A sun hoodie, light fleece, windshirt, compact shell, and light puffy can cover a huge range. In shoulder seasons, frost at dawn, wet snow, and longer stops make insulated jackets and glove systems more important. In winter, this hub logic still applies, but the details become more specialized. Vapor management, larger belay parkas, insulated pants, double gloves, and snow-suitable shelters enter the picture, especially in technical terrain. That is why hikers should think in ranges instead of absolutes. Ask what temperatures, precipitation types, wind speeds, exertion levels, and camp conditions your system must cover, then pack around those answers.
Monitoring conditions is part of the clothing system. Use mountain forecasts from sources such as the National Weather Service, Mountain Forecast, or the Met Office where relevant. Check hourly wind, freezing level, and precipitation timing rather than only the daily high. A 45-degree day with 35 mile-per-hour ridge wind behaves very differently from the same temperature in calm forest. Track your own body too. If you feel a sweat film building, vent immediately. If you stop for more than a minute in cold wind, add insulation before you chill. The most skilled mountain travelers are not the ones with the most expensive jackets. They are the ones who adjust early and consistently.
Common mistakes, packing priorities, and how to build your own hub system
The most common mistake is packing too much heavy insulation for movement and too little weather protection for stops. Another is buying technical pieces without understanding their roles. A thick insulated jacket is not a substitute for a shell, and a premium shell is not a substitute for active insulation. Many people also ignore legs, hands, and sleep system balance. Cold hands can end a day long before core temperature becomes dangerous, especially when navigation, poles, stoves, or tent setup require dexterity. Likewise, cutting pad warmth to save weight often backfires harder than trimming a few ounces from clothing.
When building your own system, start with the conditions that are hardest to fix in the field: prolonged rain, strong wind, and a cold camp after sweat-heavy effort. Then choose a base layer you genuinely like wearing all day, a breathable midlayer for movement, a shell with proven ventilation, and a puffy sized to fit over everything. Add leg, hand, and head components with the same modular logic. For sleep and shelter, match pad R-value to the coldest realistic ground conditions, then pair it with a bag or quilt rating that assumes some fatigue and moisture, not perfect laboratory comfort. This page should connect naturally to deeper guides on rain gear, insulated jackets, backpacking sleep systems, tent types, glove systems, and mountain weather monitoring because those choices work best when treated as one integrated safety framework.
The best layering system for big temperature swings in the mountains is not the heaviest kit or the most expensive brand lineup. It is the system that lets you move without soaking your clothes, stop without losing heat, sleep without surrendering recovery, and respond quickly when mountain weather shifts. Build around moisture control, breathable active warmth, real wind and rain protection, dependable static insulation, and a sleep setup matched to ground and shelter conditions. Keep at least one dry reserve for camp and treat hands, head, and feet as core priorities rather than afterthoughts. Most importantly, practice using the system before a serious trip. Test combinations on local hikes, note what you wear at different temperatures, and refine the kit until each piece has a clear purpose. If you do that, your clothing, sleep, and shelter choices will support better comfort, better decisions, and safer mountain days in every changing season.
Frequently Asked Questions
What is the best overall layering system for big temperature swings in the mountains?
The most effective system is a modular five-part setup built around moisture control, insulation, and weather protection. Start with a moisture-managing base layer, usually a lightweight or midweight synthetic or merino wool top that moves sweat away from your skin and helps regulate body temperature. Add an active insulation or light midlayer such as a fleece grid hoodie or breathable synthetic jacket for cool starts and steady movement in wind. Carry a dedicated warmth layer for rest stops, summit breaks, or emergencies, typically a puffy jacket with synthetic or down insulation depending on forecast and moisture exposure. Over all of that, keep a wind or rain shell ready to block convective heat loss, precipitation, and ridgeline gusts. Finally, manage your lower body, head, and hands with the same modular thinking: breathable hiking pants or soft shell pants, optional thermal bottoms, a warm hat, sun hat, liner gloves, insulated gloves, and dry spare socks.
The reason this system works so well in the mountains is that it separates functions instead of asking one garment to do everything. Mountain conditions often change faster than your body can adapt. A valley start may be cold enough for a light fleece and gloves, then an exposed climb may generate so much heat that you are comfortable in only a base layer and wind shirt, while an afternoon squall may suddenly require a waterproof shell and insulated jacket. If each layer has a clear job, you can add or remove pieces quickly without getting soaked in sweat or chilled by wind. In practice, the best layering system is not the warmest one; it is the one that lets you stay slightly cool while moving, warm when stopped, and protected when weather turns rough.
How do I choose base layers and midlayers so I do not overheat on the climb and freeze later?
Choose base layers based on how hard you move and how quickly you sweat, not just the morning temperature. For most mountain days with major temperature swings, a lightweight or light-midweight base layer is the most versatile option. Synthetic fabrics dry quickly and perform well during repeated sweat cycles, making them a strong choice for steep ascents and back-to-back high-output days. Merino wool offers a broader comfort range and resists odor well, which many hikers and climbers appreciate on longer trips, though it usually dries more slowly than synthetic. The key is avoiding cotton, which holds moisture and dramatically increases chilling risk once wind, shade, or elevation enter the picture.
For the midlayer, think in terms of breathability first. A fleece, especially a grid fleece or lightweight technical fleece, is often one of the smartest mountain pieces because it insulates modestly, vents moisture well, and still performs if damp. That makes it ideal for cold starts, shaded forest climbs, or breezy traverses where a base layer alone is not enough but a puffy would be too hot. Many people make the mistake of starting the day wearing too much insulation. If you are warm and cozy at the trailhead, you may be overdressed for the first climb. A better strategy is to begin slightly cool, then warm up through movement. Save high-loft insulation for stops, exposed ridges, and sudden weather shifts. This approach reduces sweat buildup early, which is one of the main reasons people later feel chilled when conditions worsen.
Do I need both a wind layer and a waterproof shell for mountain trips with changing weather?
In many mountain environments, yes, carrying both is the most adaptable setup. A dedicated wind layer, such as a lightweight wind shirt or highly breathable soft shell, is incredibly useful during big temperature swings because wind can make moderate temperatures feel cold very quickly, especially above treeline. Wind layers are usually more breathable and comfortable during movement than waterproof shells, so they help you stay protected without trapping as much heat and sweat. On ridgelines, saddles, and open faces, they can dramatically reduce heat loss while adding very little weight to your pack.
A waterproof shell serves a different purpose. It is your protection against sustained rain, wet snow, sleet, graupel, and cold storm-driven wind. It is not always the most comfortable layer to hike in hard because many rain shells trap moisture during intense exertion, but when precipitation arrives or exposure becomes severe, it becomes essential. If you are trying to streamline your kit, the choice depends on the objective, season, and forecast. For high-output day trips in drier climates, some people rely heavily on a wind layer and carry an emergency waterproof shell. In wetter, more volatile mountain ranges, a reliable rain shell is non-negotiable. The best answer for big temperature swings is usually to carry a very light wind layer for frequent use and a true waterproof shell for storms and extended exposure.
What insulation piece is best for stops, summit breaks, and sudden temperature drops?
A dedicated static insulation layer, often called a belay or rest-stop layer, is one of the most important parts of a mountain layering system. This is the jacket you put on the moment you stop moving, before you start to lose heat. In many cases, that means a hooded puffy jacket. Whether you choose down or synthetic insulation depends on expected moisture, temperature, and trip style. Down offers the best warmth-to-weight ratio and packs very small, making it excellent for cold, dry mountain days where keeping gear dry is realistic. Synthetic insulation is bulkier for the same warmth but continues to insulate better when damp, making it a safer and often smarter choice in mixed weather, wet snow, repeated thaw-freeze cycles, or trips where your shell and pack may not keep everything fully dry.
The most common error is trying to use a hiking midlayer as a true stop layer. A fleece that feels adequate while climbing can become completely insufficient the moment your body stops generating heat on a windy summit. A proper insulation piece should be warm enough to throw over your base and midlayers during breaks without needing a full clothing overhaul. Features like a helmet-compatible or insulated hood, adjustable cuffs, and hem drawcords can make a major difference in holding warmth when wind picks up. On trips with extreme temperature swings, this layer is not just a comfort item; it is part of your safety margin. If an injury, navigation delay, or weather hold forces you to stop longer than planned, your insulation layer becomes critical.
How should I adjust layers throughout the day to stay comfortable and avoid sweat-related chilling?
The best mountain travelers treat layering as an ongoing process, not a one-time decision made at the trailhead. Start a little cool, especially if the first hour includes uphill movement. As your effort increases, vent early and often by opening zippers, pushing up sleeves, removing hats or gloves, or swapping a shell for a wind layer before you are drenched in sweat. It is much easier to prevent overheating than to reverse it after your base layer is soaked. Whenever terrain, wind exposure, precipitation, or sun angle changes, reassess quickly. A shady basin, gusty pass, or cloud-covered ridge can drop your effective temperature fast even if the air temperature has not changed much.
During long mountain days, think in transitions. Climbing in the cold predawn often calls for a base layer plus light midlayer or wind layer. Once the sun hits and your effort rises, you may strip down to a base layer or base layer plus wind shirt. When you stop for food, photos, or navigation, immediately add insulation before you feel cold. If weather builds, deploy the shell before you are fully chilled or wet. As evening approaches and your pace slows, expect to add layers again even if the forecast looked warm earlier. This constant adjustment is what makes a modular system superior in the mountains. It lets you respond to real conditions, manage moisture proactively, and preserve a dry, warm reserve for when the day becomes colder, windier, or more serious than expected.