Sugar work at high altitude demands tighter temperature control than almost any other kitchen task, because boiling points drop as elevation rises and candy stages shift faster than most recipes admit. In practical terms, “sugar work” includes syrups, caramel, fondant, fudge, brittle, marshmallow, jams, jellies, fruit preserves, and some canning preparations where dissolved sugar concentration determines texture, shelf stability, and finish. The core tool is a thermometer, but the best thermometer use for sugar work at high altitude is not simply clipping one to a pot and waiting for a printed number. It means calibrating for your local boiling point, choosing the right thermometer design, placing the probe correctly, and interpreting temperatures as part of a wider system that includes pan shape, batch size, humidity, and timing. I have tested sugar batches in mountain kitchens where water boiled around 202°F instead of 212°F, and that ten-degree difference changed everything from soft-ball syrup to jam set. For anyone working through candy, preserves, and canning in elevated climates, precise thermometer use is the difference between repeatable success and expensive frustration.
Altitude matters because atmospheric pressure falls as elevation increases, lowering the temperature at which water boils. A useful rule of thumb is a drop of about 2°F for every 1,000 feet, though exact conditions vary. Since many classic sugar stages are based on how much water has evaporated from a syrup, reduced boiling temperatures alter the endpoint. If you follow a sea-level recipe exactly at 7,000 feet, fudge may stay loose, caramel may be undercooked, and jelly may refuse to gel cleanly. This hub article explains how to use thermometers accurately across candy, preserves, and canning tasks at altitude, and it also points you toward the broader decisions that make those readings meaningful. If you want dependable candy texture, proper preserve consistency, and safer process timing, start by understanding what your thermometer is really telling you in your kitchen, on your stove, at your elevation.
Why thermometer calibration matters before any candy or preserve batch
The first step in high-altitude sugar work is calibration. Every sugar thermometer, whether digital instant-read, digital probe, infrared, or classic glass style, should be checked in boiling water before you trust it. At sea level, that test should read 212°F, but at elevation it will be lower. In Denver, many cooks see around 202°F to 203°F. In Santa Fe, readings near 200°F to 202°F are common depending on weather. I recommend bringing a deep pot of plain water to a full rolling boil, inserting the thermometer without touching the bottom, and holding the reading until it stabilizes. Write that number down and keep it on the fridge or inside a recipe notebook.
Once you know your local boiling point, use it to adjust candy targets. If your boiling water reads 204°F, subtract 8°F from sea-level candy-stage temperatures as a starting point. For example, a sea-level soft-ball target of 235°F becomes roughly 227°F. This is a practical adjustment used by experienced confectioners, extension sources, and mountain cooks, but it is still a starting point rather than a guarantee. Pot diameter, dissolved solids, and sensor lag can shift results slightly, so calibrating both the thermometer and your finished texture matters. For preserves, calibration helps when recipes mention sheeting, gel points, or finishing temperatures around 220°F. At altitude, 220°F may be impossible or may indicate overcooking depending on your boiling point. The right interpretation is often “8°F above your water boiling point,” not a fixed universal number.
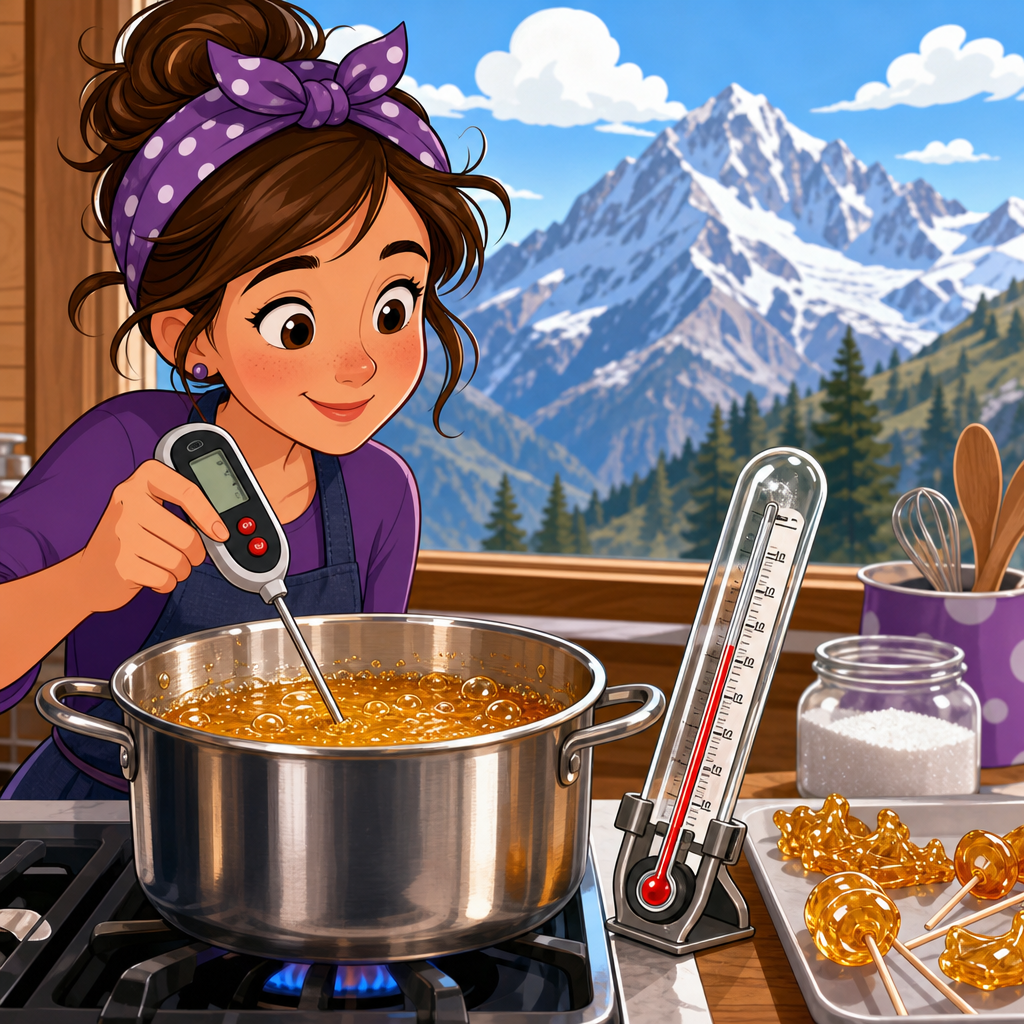
Choosing the best thermometer for sugar work at high altitude
Not all thermometers perform equally well in sugar work. For most home cooks, the best setup is a fast digital probe thermometer paired with a pot clip, or a dedicated digital candy thermometer designed for continuous monitoring. Models from ThermoWorks, Taylor, and CDN are common because they read quickly, tolerate high heat, and are easy to verify. A traditional glass candy thermometer can still work well, especially for deep pots and larger batches, but many are slow to respond and harder to read accurately through steam. Bimetal dial thermometers are serviceable, yet they often lag behind rapid temperature climbs, which matters when syrup races from thread stage to hard crack.
Infrared thermometers are useful for checking pan surfaces, sheet pans, or cooling slabs, but they are not reliable as the primary tool for sugar syrup because they measure surface temperature, not the temperature in the syrup mass. In caramel, the surface can be cooler than the center; in a narrow pot, reflective steam can distort readings. For marshmallow syrup, nougat, fudge, praline, toffee, and high-sugar preserves, immersion measurement is the standard. Look for a thermometer with an operating range to at least 400°F, a thin probe tip for faster response, and a stable clip that positions the sensor in the liquid but off the pan base. Water resistance matters too. Sugar batches splash, steam, and crystallize, and a delicate consumer probe often fails early in real production use.
| Thermometer type | Best use | Strengths | Limitations at altitude |
|---|---|---|---|
| Digital probe with clip | Candy syrup, caramel, marshmallow, jam | Fast, accurate, easy to calibrate | Needs correct probe depth and battery maintenance |
| Digital candy thermometer | Continuous monitoring in deep pots | Clear display, alarms, stable mounting | Some probes drift if repeatedly overheated |
| Glass candy thermometer | Traditional candy and preserves | No batteries, good for long boils | Slower response, harder to read through steam |
| Dial candy thermometer | General sugar cooking | Durable, familiar format | Can lag during fast temperature changes |
| Infrared thermometer | Pan surface and cooling checks | No contact, quick spot checks | Not suitable for internal syrup temperature |
Correct probe placement, pan choice, and reading technique
Even an accurate thermometer gives wrong answers if it is placed badly. The sensing area must sit fully in the syrup, ideally in the lower third of the liquid, without touching the pan bottom or sidewall. Contact with metal creates artificially high readings, a common reason brittle scorches before the stated target. In small batches, especially preserves cooked in wide pans, the syrup depth may be too shallow for some clip-on thermometers. In that case, a fast instant-read probe used repeatedly by hand is often more accurate than leaving a long candy thermometer clipped into barely covered syrup.
Pan selection changes thermometer behavior. Heavy-bottomed stainless steel or copper preserving pans distribute heat more evenly than thin aluminum, reducing localized overheating around the sensor. Narrow, deep pots provide better immersion for candy syrups and marshmallow bases, while wide preserving pans speed water evaporation in jams and fruit but demand more frequent stirring and more careful thermometer checks. I usually tell altitude cooks to match the thermometer to the vessel: use a clip-on thermometer in deep sugar syrups and a quick digital probe plus visual gel tests in low-depth fruit preserves. Readings should be taken after stirring, because unmixed syrup can stratify slightly. Also remember that carryover heat is real. Removing a pan from the burner at target temperature does not stop cooking instantly, especially in cast aluminum or enameled iron.
Applying thermometer adjustments to candy stages
Candy stages remain useful at altitude, but only after adjustment. The standard sea-level stages are roughly thread at 230°F to 234°F, soft ball at 234°F to 240°F, firm ball at 244°F to 248°F, hard ball at 250°F to 266°F, soft crack at 270°F to 290°F, and hard crack at 300°F to 310°F. At high altitude, reduce those targets by the difference between 212°F and your measured local boiling point. If your water boils at 203°F, subtract about 9°F from each stage. A hard-crack candy that would normally finish at 305°F may be done closer to 296°F in your kitchen.
This adjustment works because candy stages track sugar concentration, and the concentration needed for a given texture occurs at a lower observed temperature when water boils earlier. That said, thermometer readings should be confirmed with physical tests when possible. For soft-ball syrup, drop a little into cold water and feel for a pliable ball. For brittle and toffee, observe color and test a cooled shard for snap. For fudge, the cooking temperature and the cooling temperature before beating both matter. At altitude, I often see cooks correct the boil temperature but forget the cooling phase, then blame the recipe when crystal structure goes wrong. The thermometer is central, but sugar work is not only about one final number.
Using thermometers for jams, jellies, preserves, and fruit butters
Preserve making at altitude exposes one of the biggest myths in home cooking: that all jams set at 220°F. The actual gel point is typically about 8°F above the boiling point of water at your location, not 220°F as a universal law. If water boils at 204°F in your kitchen, many pectin-balanced jams will set near 212°F. If you continue cooking to 220°F, you may drive off too much moisture, darken fruit flavor, and end with a stiff, sticky preserve. This is why thermometer calibration is especially valuable for jams and jellies.
Still, temperature is only one indicator. The USDA Complete Guide to Home Canning and state extension programs consistently recommend using the recipe’s pectin system, solids ratio, and process instructions rather than improvising. For high-methoxyl pectin, sugar concentration and acidity are crucial. For low- or no-sugar pectin, the endpoint may rely less on the old 220°F rule and more on package directions. In practice, I use a thermometer with spoon sheeting tests, cold-plate wrinkle tests, and observation of bubble structure. Fruit type matters too. Apple butter, quince paste, and marmalade all thicken differently because pectin, fiber, and dissolved solids vary. A thermometer helps you avoid undercooking or scorching, but texture judgment remains part of professional preserve work.
Where thermometer use fits into safe canning at altitude
In canning, thermometer use supports quality more than core safety in most home systems. For boiling-water canning, the critical altitude adjustment is processing time, not trying to force jars to a higher boiling temperature. Water still boils lower at elevation, so tested recipes increase time to compensate. For pressure canning, safety comes from achieving the correct pressure for your altitude, as outlined by the USDA and the National Center for Home Food Preservation. A candy thermometer is not a substitute for a pressure canner gauge, and preserve temperature during cooking does not replace tested jar processing instructions.
Where thermometers are genuinely helpful is in preparing syrups for canned fruit, monitoring jam concentration before filling jars, and reducing the risk of overcooked preserves that siphon or gel poorly. They also help when making fruit spreads intended for refrigerated or frozen storage, where final soluble solids affect spoonability and weeping. If you can under one set of conditions and make candy under another, keep separate notes. Seasonal weather shifts can nudge your boiling point slightly, and preserving success improves dramatically when you treat temperature as recorded kitchen data, not as a generic cookbook assumption.
Common mistakes and the most reliable workflow
The most common high-altitude mistakes are skipping calibration, trusting factory accuracy indefinitely, clipping the probe against the pot, using a thermometer that cannot read shallow batches, and chasing sea-level target temperatures after moving to a mountain climate. Another frequent error is relying on one metric alone. Good sugar work combines calibrated temperature, visual change, timing, and texture tests. In my own workflow, I calibrate monthly during heavy candy season, test before major holiday production, and replace any probe that drifts more than 2°F from a known boiling-water check.
The most reliable workflow is simple. Measure your local boiling point. Adjust recipe targets. Select a thermometer suited to the batch size and vessel. Position the sensor correctly. Stir and verify readings as the syrup thickens. Confirm with a physical doneness test when possible. For preserves and canning, follow a tested formula from a trustworthy source such as the USDA, Ball, Bernardin, university extension programs, or a well-validated pectin manufacturer. That system prevents the two outcomes mountain cooks fear most: candy that fails in texture and preserves that waste fruit, sugar, and time.
Best thermometer use for sugar work at high altitude comes down to calibration, tool choice, and disciplined interpretation. When you know your local boiling point, the numbers in candy and preserve recipes finally make sense. When you use an immersion thermometer correctly, you stop guessing and start producing repeatable fudge, caramel, brittle, jam, jelly, and syrup. And when you pair thermometer readings with tested canning guidance, you protect both quality and safety.
As the hub for candy, preserves, and canning within altitude cooking, this topic connects every subskill that mountain kitchens demand: adjusted sugar stages, gel-point logic, pan selection, pectin behavior, and processing changes. Master the thermometer first, and the rest of the category becomes far easier to control. Use this page as your starting point, then build your own altitude notes batch by batch so every future recipe reflects the conditions in your kitchen.
Frequently Asked Questions
What type of thermometer works best for sugar work at high altitude?
The best thermometer for sugar work at high altitude is usually a fast, accurate digital thermometer designed for high-heat cooking, ideally with a clip or probe that can sit securely in the pan without touching the bottom. At elevation, sugar stages can arrive sooner and at lower temperatures than many standard recipes suggest, so speed and precision matter more than ever. A thermometer that reads quickly, updates in real time, and gives dependable measurements within a narrow range is far more useful than an old-style dial model that reacts slowly or drifts out of calibration.
For most home cooks, a high-quality digital candy thermometer or a digital probe thermometer with a heat-resistant cable is the most practical option. These models make it easier to monitor changing syrup temperatures continuously, which is especially important when you are moving from thread stage toward soft-ball, hard-ball, soft-crack, or hard-crack. A glass candy thermometer can still work well if it is well made and easy to read, but digital tools tend to offer better responsiveness, which helps prevent overshooting a target stage in dry, high-altitude kitchens.
Look for a thermometer with a temperature range that comfortably covers candy and caramel work, a clearly readable display, and a secure attachment method so the sensing area stays immersed in the syrup. Durability also matters, because sugar work is messy, sticky, and often done at sustained high heat. If you regularly make caramel, brittle, marshmallow, fudge, jams, or preserves, investing in a thermometer built specifically for confectionery and preserving work is usually worth it. The best model is not simply the one with the highest maximum temperature; it is the one that stays accurate, responds quickly, and is easy to position correctly in a bubbling pan.
Why does high altitude change sugar temperatures and candy stages?
High altitude changes sugar work because water boils at a lower temperature as elevation increases. Since many sugar stages are defined by how much water has evaporated from a syrup, any change in the boiling point affects the temperature at which a given texture develops. In lower-altitude kitchens, recipes often assume water boils at about 212°F (100°C). At higher elevations, the boiling point drops, which means syrup concentration and finished candy texture may be reached at temperatures lower than those listed in many standard recipes.
That matters because sugar work is really a controlled evaporation process. As syrup cooks, water leaves and the sugar concentration rises. The thicker the syrup becomes, the more its behavior changes: bubbles get slower and heavier, the texture shifts, and eventually the mixture reaches recognizable candy stages. At altitude, those stage temperatures can be offset from sea-level numbers, sometimes enough to ruin a batch if you follow a recipe blindly. A fondant may turn too firm, caramel may go too dark too fast, fudge can become grainy, and brittle may harden beyond the intended snap.
This is why experienced candy makers at elevation treat printed temperatures as starting points rather than absolute truth. They often calibrate their thermometer against local boiling water, note the difference from 212°F, and use that difference to guide sugar-stage targets. The thermometer remains essential, but at high altitude it becomes part of a system that includes calibration, observation, and recipe adjustment. Understanding that boiling point is lower where you live is the first step toward more consistent syrup, caramel, preserves, and confectionery results.
How do you calibrate a thermometer for sugar work at high altitude?
The most reliable way to calibrate a thermometer for sugar work at high altitude is to test it in boiling water before you begin cooking. Bring a pot of plain water to a full rolling boil and check the temperature with the thermometer you plan to use. At sea level, the reading should be close to 212°F, but at higher elevations it will naturally be lower. That local boiling point becomes your practical reference point for adjusting candy temperatures.
For example, if water boils in your kitchen at 206°F instead of 212°F, you are working with a 6-degree difference. In many cases, you can use that number as a correction factor when judging sugar stages. If a recipe calls for cooking syrup to 240°F for a soft-ball stage, you may need to think in terms of approximately 234°F in your kitchen, depending on the recipe, your actual elevation, ambient humidity, and the style of thermometer you are using. This is not a rigid rule for every confection, but it is a strong baseline and much better than relying on unadjusted sea-level instructions.
Some thermometers allow manual calibration, while others do not. If yours can be adjusted, follow the manufacturer’s instructions after the boiling-water test. If it cannot, simply keep a written note of the offset and apply it every time you make candy, caramel, jam, or syrup. It is also wise to repeat calibration checks periodically, especially if the thermometer has been dropped, exposed to steam repeatedly, or stored carelessly. In sugar work, a few degrees can make the difference between glossy caramel and burnt bitterness, or between smooth fudge and a dry, crumbly batch. Regular calibration is one of the most effective habits for successful high-altitude candy making.
What thermometer mistakes cause the most problems in high-altitude sugar work?
One of the biggest mistakes is placing the thermometer incorrectly in the pan. The sensing tip should be immersed in the syrup but not resting against the bottom of the pot, where it can read hotter than the liquid itself. This issue becomes especially problematic in sugar work because direct contact with the pan can create falsely high readings, leading you to pull the syrup too early or panic that it is overcooking. At high altitude, where stage temperatures are already shifted and timing is tighter, poor placement can ruin consistency very quickly.
Another common mistake is trusting recipe temperatures without checking local boiling point first. Many cooks assume that if a recipe says 250°F, that exact number applies everywhere. In reality, high altitude changes the relationship between temperature and sugar concentration. If you do not adjust for your environment, your fudge, marshmallow syrup, caramel, or preserves may finish with the wrong texture even if the thermometer itself is working perfectly. The tool is only as useful as the interpretation behind it.
Slow-reading or poorly maintained thermometers also cause trouble. In candy making, sugar can climb several degrees in a short time, especially near the final stages. A sluggish thermometer may leave you reacting too late. Likewise, failing to clean sticky residue from the probe can affect readability and performance over time. Steam buildup on digital displays, loose clips, and ignored calibration drift all contribute to inaccurate measurements. Finally, many cooks rely on temperature alone and ignore visual cues such as bubble size, syrup thickness, color, aroma, and how quickly the mixture darkens after the heat is turned down. At high altitude, the best results come from combining a calibrated thermometer with attentive observation.
How can you use a thermometer more effectively for caramel, fudge, brittle, jams, and other sugar recipes at altitude?
The most effective approach is to treat the thermometer as a continuous guide rather than a last-minute checkpoint. Start monitoring temperature early, especially once the syrup has fully dissolved and begins boiling steadily. Use a heavy saucepan for even heat, attach the thermometer securely, and keep the sensing area in the liquid throughout cooking. At altitude, sugar mixtures can move through critical stages faster than expected, so watching the temperature trend is often more useful than waiting for a single target number to appear.
For caramel, this means paying close attention as the syrup approaches color development, because caramelization and residual heat can continue changing the batch even after you remove it from the burner. For fudge and fondant, accurate temperature control is crucial because the final texture depends on both concentration and controlled crystallization. If the syrup goes too high, the result may be dry or overly firm; too low, and it may never set properly. For brittle and hard-crack candies, a thermometer helps you hit the point where enough moisture has evaporated to create the right snap without pushing into bitterness or scorching.
In jams, jellies, fruit preserves, and some canning preparations, thermometer use is equally valuable because sugar concentration affects gel structure, shine, spreadability, and shelf stability. At high altitude, relying only on sea-level finishing temperatures can lead to under-set or overcooked preserves. A calibrated thermometer, used alongside other signs such as sheet tests, bubble behavior, and cold-plate checks, gives you a far better chance of getting the texture you want. The most skilled high-altitude sugar cooks do not simply chase a number; they use the thermometer to understand what the syrup is doing in real time and make better decisions from start to finish.


