Roasting meat at altitude is less about watching the clock and more about measuring what is happening inside the roast. That shift matters because the higher you cook above sea level, the lower the boiling point of water, the drier the air, and the less reliable standard roasting times become. In practical terms, a beef rib roast that finishes predictably in a low-elevation test kitchen may cook unevenly, lose moisture faster, or stall at an unexpected point in a mountain kitchen. A thermometer solves that problem by telling you the true internal temperature, which is the only number that directly reflects doneness and food safety.
For cooks working through the broader challenge of cooking and baking at altitude, roasting is one of the most misunderstood methods. People often know that cakes need adjustment and that water boils sooner, but they still trust recipe timing for turkey, lamb, pork loin, and prime rib. After years of testing savory dishes in high-elevation kitchens, I have found that timing is the first variable to break. Oven thermostats cycle, roast shapes differ, pans conduct heat differently, and altitude compounds all of it by changing evaporation and surface cooling. A meat thermometer, especially a calibrated digital probe, removes guesswork and gives you a repeatable method.
This hub page covers cooking methods for roasting meat at altitude and connects the core ideas that support every related technique. You will see why altitude changes roasting conditions, how thermometers improve results, what target temperatures matter for different meats, and how to manage carryover cooking, resting, pan selection, convection, and moisture retention. You will also learn where timing still has a role. Timing helps plan dinner; it does not determine doneness. If you remember one principle from this guide, make it this: at altitude, roast by temperature, verify by feel and appearance, and use time only as a rough scheduling tool.
Why altitude changes roasting results
Altitude affects roasting because atmospheric pressure drops as elevation rises. As pressure drops, water evaporates more readily and boils at a lower temperature. At sea level, water boils at 212 degrees Fahrenheit. At 5,000 feet, it boils at roughly 203 degrees Fahrenheit, and in higher mountain towns it drops further. Roasting is not boiling, but the same physics influences how moisture behaves in and around meat. Surface moisture evaporates faster, the oven environment tends to feel drier, and the roast can lose water before the center reaches the target doneness you want.
This matters most with large cuts cooked for a long time, such as brisket finished uncovered, pork shoulder started in a hot oven, leg of lamb, whole poultry, and standing rib roast. In my own tests at elevations above 5,000 feet, the visual cues many cooks trust at sea level become less dependable. Skin can brown quickly while the interior still lags. A roast can seem “done” because the exterior looks dark and the pan juices have reduced aggressively, yet the center may still be below the ideal pull temperature. Conversely, some cuts can hit target temperature earlier than expected because lower ambient humidity speeds surface drying and changes heat transfer at the exterior.
Altitude does not automatically mean meat cooks slower or faster in every case. That oversimplification causes mistakes. The more accurate statement is that altitude makes cooking time less predictable. Roast geometry, fat content, bone structure, starting temperature, oven calibration, cookware, and whether you tent or baste all interact with elevation. That is why published minutes per pound should be treated as broad estimates only. The dependable variable is internal temperature measured in the thickest part of the meat without touching bone or the pan.
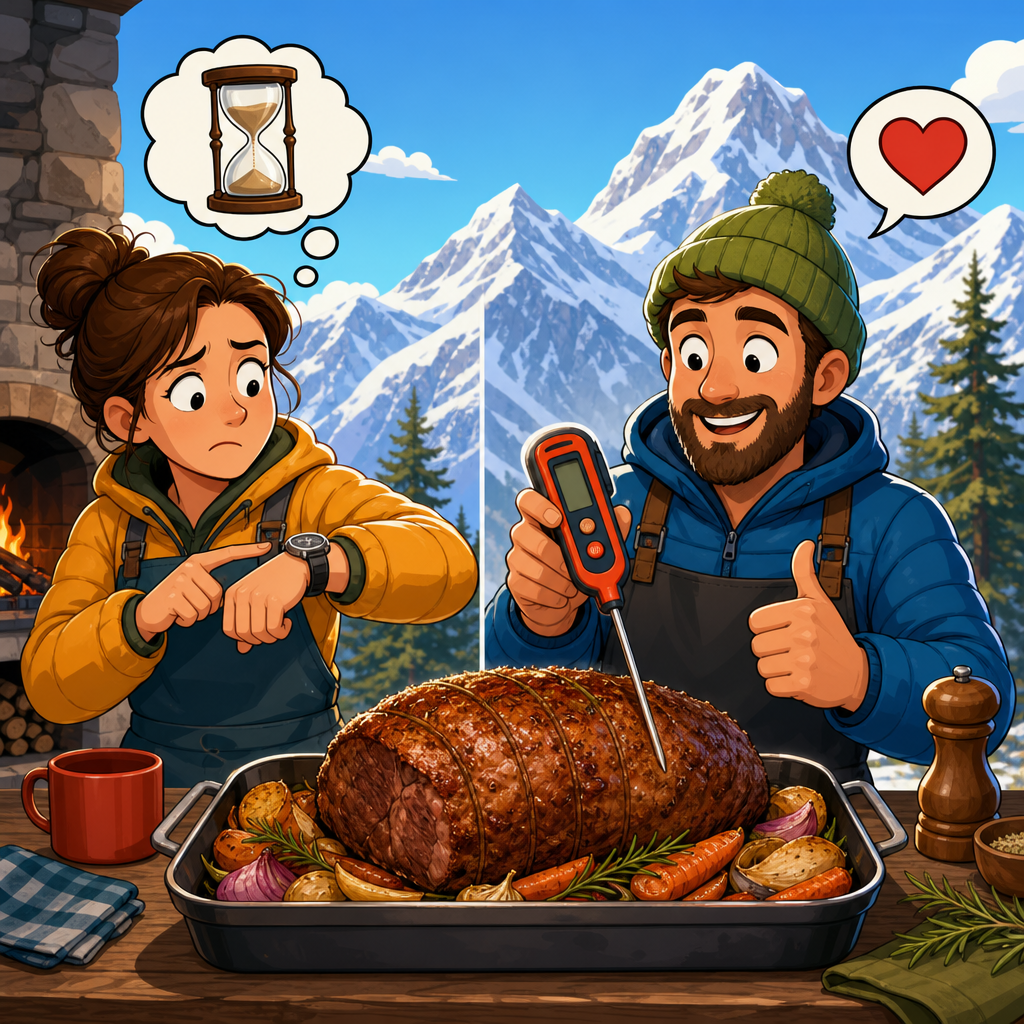
Why thermometers beat timing every time
A thermometer beats timing because time is indirect and temperature is direct. A recipe can say “roast for 18 minutes per pound,” but that estimate assumes a specific oven, pan, roast shape, and starting temperature. Real kitchens rarely match those conditions. When you insert a quality thermometer probe into the center of the meat, you stop inferring doneness and start measuring it. That is the difference between hoping and knowing.
Digital instant-read thermometers from ThermoWorks, Thermapen, and similar professional-grade brands are the best tools for spot-checking. Leave-in probe thermometers are even better for large roasts because they let you monitor the internal temperature without opening the oven repeatedly. Opening the door drops oven heat and can stretch cooking time, especially in cold, dry high-altitude kitchens during winter. With a probe in place, you can watch the roast climb steadily and make decisions based on actual data rather than on a timer and intuition alone.
Thermometers also help with food safety. The USDA recommends minimum safe temperatures such as 145 degrees Fahrenheit for whole cuts of beef, pork, veal, and lamb, followed by a rest, and 165 degrees Fahrenheit for poultry. Safety is the floor, not always the ideal serving point. A pork loin pulled at 145 degrees can be juicy and faintly pink in the center, while chicken breast is usually best pulled a little before 165 and allowed to coast upward during rest. At altitude, where moisture loss happens faster, hitting the right pull temperature matters even more because overcooking by just five to eight degrees can noticeably dry the meat.
| Meat or Cut | Common Pull Temperature | Typical Finished Temperature After Rest | Why It Works at Altitude |
|---|---|---|---|
| Beef rib roast, medium-rare | 120 to 125°F | 130 to 135°F | Limits moisture loss while allowing carryover to finish gently |
| Pork loin | 140 to 145°F | 145 to 150°F | Prevents the dry texture common in lean pork at elevation |
| Leg of lamb | 125 to 130°F | 135 to 140°F | Preserves tenderness in a roast that can tighten quickly |
| Turkey breast | 158 to 160°F | 162 to 165°F | Uses carryover instead of over-roasting the exterior |
| Whole chicken | 160 to 162°F in breast | 165°F | Balances safety with better breast meat juiciness |
How to roast meat at altitude with consistent results
Start by choosing the right thermometer and calibrating it. An ice bath should read 32 degrees Fahrenheit, and boiling-water tests must be adjusted for your elevation because water will not read 212 degrees at altitude. Next, bring the roast out of the refrigerator long enough to lose its chill on the surface, not to reach room temperature throughout. Pat it dry, season thoroughly, and place it on a rack so hot air circulates around the meat. A heavy pan, preferably light-colored metal, promotes even heat and makes drippings easier to read than a dark nonstick pan, which can over-brown.
Set the oven based on the cut and the result you want. Large tender roasts do well with a high-heat start followed by moderate heat, or with steady moderate heat throughout. Tougher cuts intended to slice rather than shred may need lower temperatures for longer periods, while collagen-rich braises belong to a moist-heat method instead of classic roasting. If your oven has convection, reduce the set temperature by about 25 degrees Fahrenheit and monitor the roast early. Convection increases surface evaporation and browning, which can be useful for crisp skin but risky for lean meats in dry mountain air.
Insert the probe into the thermal center, usually the thickest part of the roast. Avoid bone, large fat seams, and cavities. If the roast is irregular, verify in more than one spot near the end. Begin checking well before the recipe says it should be done. For a prime rib or pork loin, I often start checking 20 to 30 percent earlier than a standard timing chart suggests. That practice has saved more holiday meals than any altitude rule of thumb. Once the roast is within 10 degrees of the target, watch closely. Temperature rise can accelerate near the finish, especially with smaller cuts.
Timing still matters, but only for planning
Rejecting timing as a doneness tool does not mean ignoring time completely. Timing is useful for kitchen management. It tells you when to preheat, when side dishes should start, and whether a roast is generally on track. It helps answer practical questions such as whether a 12-pound turkey should go into the oven before dawn or whether a pork rib roast will be ready before guests arrive. What timing cannot do is tell you that the roast is finished correctly. Internal temperature does that job.
A smart approach is to build a schedule around a wide time window. Estimate generously, start early, and rely on thermometer readings to decide when to pull the roast. Resting gives you flexibility. Many large cuts can rest 20 to 45 minutes and still serve beautifully, especially if lightly tented and held in a warm spot. At altitude, this buffer is valuable because oven performance can swing more than expected during storms, cold snaps, or heavy holiday use. If the roast finishes early, rest and hold. If it runs late, your thermometer will show whether you need to raise the heat slightly or simply wait.
This is also why minutes-per-pound charts should live in the margin, not at the center of your method. They are historical planning aids, not precision cooking tools. Different shapes prove the point. A long, narrow pork loin and a compact crown roast may weigh the same, but they cook differently because thickness controls how long heat takes to reach the center. A thermometer captures that reality instantly. Timing cannot.
Managing moisture, browning, and carryover cooking
The biggest quality challenge when roasting meat at altitude is preserving moisture without sacrificing browning. Faster evaporation can leave the surface leathery before the center is ready, particularly on poultry and lean pork. Brining or dry-brining helps because salt improves seasoning and changes how muscle proteins retain water. Dry-brining a turkey or chicken one to two days ahead often produces better skin and juicier meat than frequent basting, which repeatedly opens the oven and softens the surface. For beef roasts, salting ahead improves flavor and helps create a more even interior color.
Carryover cooking is the second concept every altitude cook must master. After a roast leaves the oven, the outer layers remain hotter than the center and continue transferring heat inward. The internal temperature rises, often by 5 to 15 degrees Fahrenheit depending on size and structure. Large roasts, bone-in cuts, and densely shaped pieces usually carry over more than small fillets or thin tenderloins. At altitude, cooks who wait for the roast to reach the final serving temperature in the oven often overshoot badly, because the roast keeps climbing while resting in an already dry environment.
Resting is not optional. It reduces the pressure gradient inside the roast so juices redistribute instead of spilling onto the cutting board. Slice too early and you lose moisture you cannot recover. Rest too loosely in a cold kitchen and the roast may cool faster than ideal. The balance is light tenting with foil when needed, not tight wrapping that traps steam and ruins crisp skin. For poultry, I rest uncovered or very loosely tented. For beef and lamb, a light tent works well. These details sound small, but together they are the difference between a good roast and one people remember.
Common mistakes and the best next steps
The most common mistake is trusting visual cues alone. Brown skin, sizzling drippings, or a firm exterior do not guarantee a properly cooked center. The second mistake is using an inaccurate thermometer or placing it incorrectly. Test your thermometer regularly, and check the center, not the edge. A third mistake is failing to account for carryover, especially on expensive holiday roasts. Pulling a rib roast at the final target instead of below it is one of the fastest ways to turn medium-rare into medium-well.
Another frequent problem is choosing the wrong method for the cut. Not every piece of meat should be roasted dry at altitude. Brisket, chuck, and many shoulder cuts often perform better with covered roasting or full braising because connective tissue needs time and moisture to convert to gelatin. Tender cuts like strip loin, rib roast, and pork tenderloin benefit most from thermometer-led roasting. If you are building skill within cooking methods at altitude, that distinction is foundational: match the method to the anatomy of the cut, then use temperature to control doneness.
As the hub for this cooking-methods topic, this page gives you the framework to approach every roast with confidence. Use it as your starting point, then apply the same principle across related guides on poultry, beef, pork, lamb, convection roasting, reverse searing, and low-and-slow oven methods. The payoff is simple: better texture, better juiciness, less waste, and far fewer holiday surprises. The next time you roast meat at altitude, ignore the clock until you need to plan service. Trust the thermometer, pull with carryover in mind, rest properly, and build your method around measured temperatures instead of guesswork.
Frequently Asked Questions
Why is roasting meat at high altitude less predictable than roasting at sea level?
At higher elevations, several cooking variables change at once, and that is exactly why standard roast charts and “minutes per pound” rules start to break down. The most important shift is that water boils at a lower temperature as altitude increases. That affects how heat moves through the meat, how moisture behaves on the surface, and how quickly juices evaporate during a long roast. Add in the drier air common in mountain climates, and the outside of the roast can lose moisture faster than expected before the center reaches the doneness you want.
Altitude can also affect the pacing of the cook in ways that are not obvious from the outside. A roast may brown well early on, then seem to lag internally, or it may cook unevenly from edge to center depending on oven performance, pan choice, roast size, and fat coverage. In other words, the roast may not follow the timing pattern you are used to from lower elevations. That is why watching the clock is a weak strategy at altitude. Time can only estimate what should be happening. A thermometer tells you what is actually happening inside the meat right now, which is far more useful when conditions make roasting behavior less predictable.
Why does a meat thermometer work better than cooking by time at altitude?
A thermometer is better because it measures the one thing that actually determines doneness: internal temperature. Cooking time is only a rough guideline based on assumptions about oven accuracy, roast shape, starting temperature, pan setup, and local conditions. At altitude, those assumptions become even less dependable. A beef rib roast that might finish on schedule in a test kitchen near sea level can cook faster, slower, or simply differently in a high-altitude kitchen. The clock does not know whether the roast is drying on the outside, heating slowly in the center, or approaching the exact doneness you want. A thermometer does.
Using a thermometer also gives you more control over quality, not just safety. For whole roasts, the difference between rare, medium-rare, and medium can be only a few degrees. If you rely on timing, it is easy to overshoot that window, especially when carryover cooking continues after the roast leaves the oven. A good probe or instant-read thermometer lets you pull the meat based on temperature, rest it properly, and land closer to your target result. At altitude, where timing is especially unreliable, that precision can mean the difference between a juicy roast and one that is disappointingly dry.
What kind of thermometer is best for roasting meat at altitude, and how should I use it?
For roasts, the most useful option is usually a leave-in probe thermometer that stays in the meat while it cooks. This allows you to monitor temperature trends without repeatedly opening the oven door and losing heat. A digital probe model with an external display or alarm is especially helpful because it tells you when the roast is nearing your target pull temperature. An instant-read thermometer is also valuable, particularly for double-checking the reading in a few spots near the end of cooking, but for larger cuts, a leave-in probe gives better continuous information.
Placement matters just as much as the thermometer itself. Insert the probe into the thickest part of the roast, aiming for the center of the muscle mass without touching bone, large pockets of fat, or the pan. Bone and fat can distort the reading, and a poorly placed probe can make you think the roast is done before it really is. If the roast is irregular in shape, verify doneness in more than one location with an instant-read thermometer before removing it from the oven. It is also smart to test your thermometer occasionally for accuracy according to the manufacturer’s guidance. At altitude, where every degree matters more than the clock, dependable readings are the foundation of consistent roasting.
Do I need to change oven temperature or roasting technique when cooking meat at high altitude?
Usually, the biggest adjustment is not a dramatic change in oven temperature but a change in mindset: stop treating timing as the primary indicator of doneness. That said, technique still matters. Because high-altitude air is often drier and moisture loss can be more pronounced, many cooks benefit from choosing a roasting setup that supports even cooking and better moisture retention. That can include starting with a well-tempered roast, using a sturdy roasting pan with a rack, avoiding excessive oven-door opening, and monitoring internal temperature closely so the meat is not left in the oven longer than necessary.
Some cooks prefer a moderate oven for more even heat penetration, while others use a higher initial temperature for browning and then reduce the heat to finish gently. Both approaches can work if internal temperature is guiding the process. The key is to avoid assuming that a familiar sea-level timetable will still apply. If your oven runs hot, if the roast is colder than expected when it goes in, or if your kitchen sits at significant elevation, the roast can drift from the script quickly. Thermometer-based roasting lets you adapt in real time. Pulling the meat at the correct internal temperature and allowing a proper rest is generally more important than making aggressive altitude-specific temperature changes.
How can I keep a roast juicy at altitude and avoid overcooking it?
The most effective way to keep a roast juicy at altitude is to avoid chasing a scheduled finish time and instead cook to temperature. Overcooking is one of the main reasons roasts dry out, and altitude makes that risk worse because surface moisture can disappear faster in dry air. Start with a roast that is as uniform in shape as possible, season it well, and use a reliable thermometer from the beginning or at least through the latter part of cooking. Pull the roast slightly before your final target temperature to account for carryover cooking during the rest. That rest is not optional; it gives heat time to redistribute and helps the roast hold onto more of its juices when sliced.
Other practical steps also help. Roasting on a rack promotes even air circulation, while not overcooking the exterior protects texture and moisture. If the surface is browning too quickly before the center is ready, tenting loosely with foil can help moderate the outside without trapping so much steam that you lose desirable roast character. Most importantly, slice only after resting and against the grain when appropriate for the cut. At altitude, juicy roasting is really about precision and restraint: monitor internal temperature carefully, trust the thermometer over generic timing charts, and remove the meat when it is actually done rather than when the clock says it should be.


