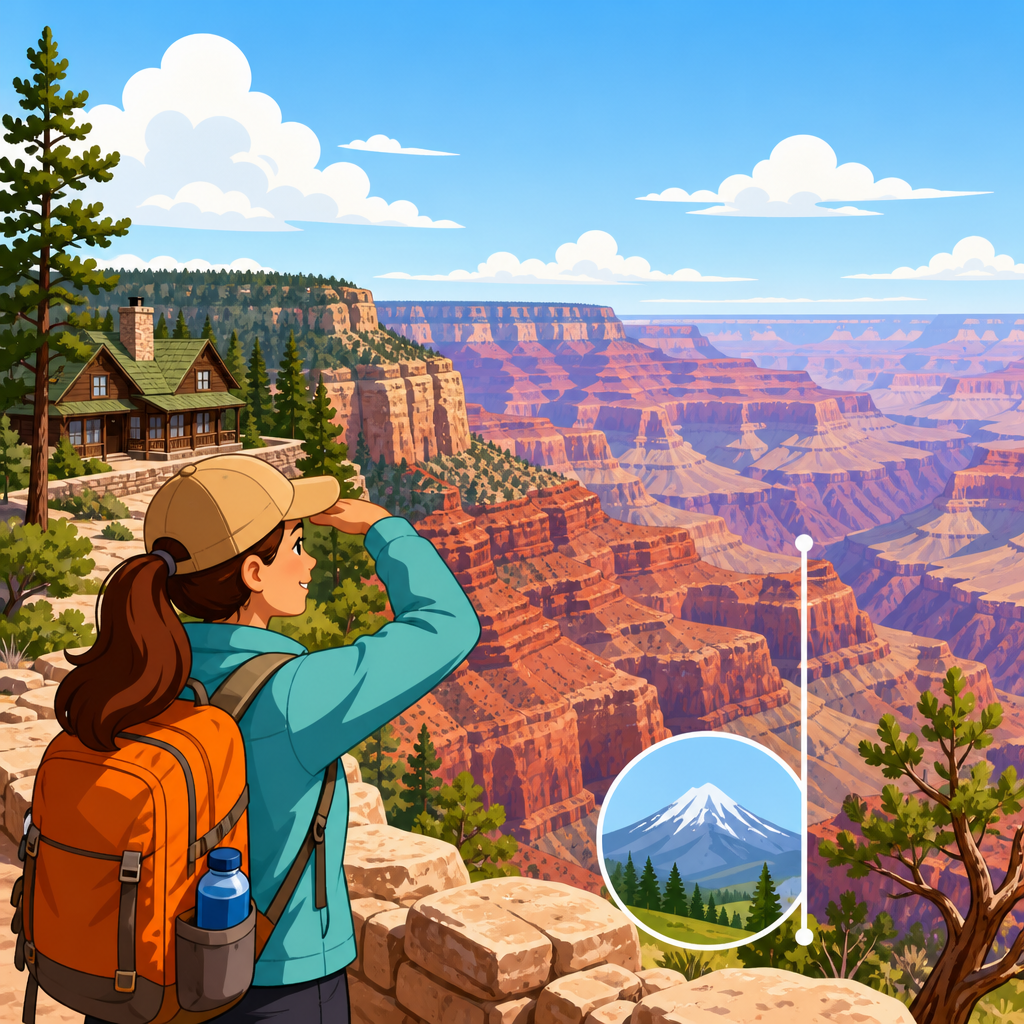
The Grand Canyon North Rim altitude guide for first-time visitors starts with one fact that shapes nearly every part of the trip: the North Rim sits high, cool, and remote, with the developed area around Grand Canyon Lodge averaging about 8,000 to 8,300 feet above sea level. That elevation affects how you breathe, sleep, hydrate, hike, drive, and pack. It also explains why the North Rim feels so different from the South Rim, despite overlooking the same canyon system. If you are planning a first visit, understanding altitude is not a minor detail; it is the framework for a safer, more comfortable, and more rewarding experience.
In practical terms, altitude means reduced air pressure and less available oxygen. You do not need mountaineering experience to notice it. Many first-time visitors feel winded after climbing a short staircase, carrying luggage, or walking briskly from the parking lot to Bright Angel Point. I have seen otherwise fit travelers arrive from low elevations, jump straight into a viewpoint walk, and wonder why their heart rate spikes so quickly. At 8,000 feet, that response is normal. The North Rim is not extreme alpine terrain, but it is high enough to matter, especially if you are sleeping overnight, taking medication that affects hydration, or attempting a strenuous canyon hike.
This guide also serves as a hub for National Park Guides, because altitude is one of the most overlooked variables in park planning. Visitors usually focus on scenery, lodging, and weather. Those matter, but elevation often determines whether you enjoy those things or spend the day with a headache, nausea, or fatigue. The North Rim magnifies that lesson. Roads are longer, services are fewer, cell coverage is inconsistent, and the season is shorter because snow can close access. When you combine high elevation with relative isolation, preparation becomes essential rather than optional.
For first-time visitors, the most useful approach is simple: know the key elevations, expect your body to work harder, pace your first day conservatively, and match your hike to the altitude rather than to your sea-level fitness. Do that well, and the North Rim rewards you with cooler summer temperatures, quieter viewpoints, outstanding forest scenery, and a sense of distance that many travelers never find on busier park routes.
Key elevations first-time visitors should know
The developed North Rim village area is generally a little above 8,000 feet, while Bright Angel Point is in that same range. The North Entrance near Jacob Lake is lower, and the inner canyon is dramatically lower and much hotter. This vertical range is why visitors can leave a cool lodge deck in the morning and descend into conditions that resemble desert heat by midday. The North Kaibab Trail begins near the rim at roughly 8,200 feet, drops steeply through Supai Tunnel and Roaring Springs, and eventually reaches Phantom Ranch near 2,500 feet. That descent feels easier than the climb back, but altitude and heat combine to make the return far more demanding than many expect.
If you only remember one principle, remember this: every Grand Canyon hike is optional on the way down and mandatory on the way up. On the North Rim, that warning carries extra weight because you start high, often after sleeping at altitude, and then recover elevation in long, steep stretches. Park rangers routinely caution against turning turnaround times into wishful thinking. A day hiker who feels strong at Coconino Overlook may still struggle badly above Supai Tunnel on the return if hydration, calories, and pacing were not handled well.
| Location | Approximate elevation | Why it matters |
|---|---|---|
| North Rim village and lodge | 8,000 to 8,300 feet | Main area where visitors sleep, walk, and first feel altitude effects |
| Bright Angel Point | About 8,100 feet | Short walk, but many visitors notice shortness of breath here |
| North Kaibab Trailhead | About 8,200 feet | Starting point for major elevation loss and later strenuous climbing |
| Supai Tunnel | About 6,800 feet | Common turnaround point for day hikers; water may be seasonal |
| Phantom Ranch | About 2,500 feet | Much hotter inner canyon environment with different risks |
How altitude affects your body at the North Rim
At North Rim elevation, the most common symptoms are mild headache, unusual fatigue, dry mouth, poor sleep, reduced appetite, and faster breathing during exertion. These usually begin within hours of arrival and often improve after rest and hydration. Acute mountain sickness can happen here, though it is more common at higher elevations. Warning signs include persistent headache not relieved by fluids and rest, nausea, dizziness, and unusual weakness. If symptoms worsen instead of improving, the safest response is to stop exerting yourself, hydrate carefully, eat lightly, and seek lower elevation or medical help if needed.
Altitude effects are not a judgment on fitness. I have worked with hikers who run marathons at sea level and still needed a slower first day on the North Rim. Aerobic conditioning helps, but it does not eliminate the physiological impact of thinner air. Age can matter, but so can sleep deprivation, alcohol intake, dehydration during the drive, and preexisting conditions such as asthma, anemia, or heart disease. Travelers coming from Phoenix, Las Vegas, or other hot low-elevation cities often underestimate how quickly altitude can compound fatigue from long travel days.
Hydration deserves precision. More water helps, but overhydration without electrolytes can create its own problems. A practical target is steady intake through the day, pale-yellow urine, and regular meals or salty snacks. The National Park Service consistently reminds hikers to replace both water and sodium, especially in canyon environments where sweat loss is significant. Caffeine is fine in moderate amounts if you are also drinking water. Alcohol is the bigger concern. At 8,000 feet, a drink can hit harder, worsen sleep, and contribute to dehydration, which is why I advise first-time visitors to keep the first evening light.
Why the North Rim feels different from the South Rim
The South Rim typically sits around 7,000 feet, while the North Rim is roughly 1,000 feet higher and receives much more snowfall. That difference sounds modest on paper, but in trip planning it is substantial. The North Rim season is shorter, commonly mid-May through mid-October for full services, because Highway 67 closes in winter. Summer days are often cooler than the South Rim, and nights can be cold even when lower-elevation forecasts look warm. First-time visitors who pack only for Arizona heat are often surprised by 30s or 40s overnight.
Access is different too. The drive to the North Rim is longer for most travelers, and there is no simple rim-to-rim shuttle between public viewpoints like many beginners assume. In mileage, the South and North rims are close across the canyon, but by road they are separated by several hours. That remoteness is a benefit if you want quieter overlooks, dark skies, and lodge character, but it raises the cost of mistakes. Forgetting a layer, running low on fuel, or relying on a weak phone signal can turn a simple oversight into a stressful detour.
For travelers exploring broader National Park Guides, this is the North Rim lesson that carries across the system: the most memorable parks often punish generic planning. Yellowstone requires wildlife distance discipline, Zion requires shuttle strategy, and the North Rim requires altitude awareness combined with logistical realism.
Best first-day strategies for altitude adjustment
The best first day on the North Rim is intentionally conservative. Arrive, check into lodging or campground, drink water, eat a full meal, and choose short, scenic walks before any big exertion. Bright Angel Point, portions of the Transept Trail, and short forest walks are ideal. They let you enjoy the scenery while gauging how your body responds. If you feel great, that is useful information. If you feel headachy or winded, you have learned something important before committing to a serious descent.
Sleep is often the hidden challenge. Many first-time visitors report waking during the night or feeling that they never slept deeply. That can happen at 8,000 feet even in healthy adults. Build margin into your plans. If you arrive late after a long drive, do not schedule an ambitious sunrise hike the next morning unless you already know you adapt well to elevation. Early starts remain smart for weather and trail safety, but they work best when paired with enough rest.
A good acclimatization tactic is staging your trip. Some visitors spend a night at a moderate elevation near Bryce Canyon, Kanab, or Jacob Lake before sleeping on the rim. Even a partial step-up can help. If your itinerary is fixed, then the next best tool is restraint: move slower than you think necessary, especially on stairs, inclines, and luggage carries.
Choosing hikes that match first-time fitness and elevation
For first-time visitors, the safest North Rim hiking plan is to separate viewpoint walking from inner-canyon hiking. Viewpoint walks along the rim are manageable for most people, though altitude may make them feel harder than expected. Inner-canyon hikes on the North Kaibab Trail are a different category. Even a modest descent to Coconino Overlook can be enough for travelers not yet adjusted. Supai Tunnel is a stronger objective for prepared hikers, but only with an early start, realistic turnaround time, food, layered clothing, and confirmed water status from the park before departure.
The park’s hiking guidance is conservative for good reason. Attempting rim to river and back in a day is dangerous for most hikers and strongly discouraged. Heat illness, dehydration, and overexertion are not rare edge cases in the canyon; they are recurring operational realities for rangers and medical responders. The North Rim’s higher starting elevation also means the return climb comes when many hikers are already depleted. Trekking poles, sun protection, and a pacing strategy based on heart rate and breathing, not ego, make a measurable difference.
If you want a simple rule, use this one: on day one, stay near the rim; on day two, consider a partial descent only if you slept well, woke without symptoms, and have the supplies and forecast to support it.
What to pack for North Rim altitude and weather
Layering is essential because high-elevation mornings can be cold, afternoons sunny, and thunderstorms sudden. A practical packing list includes a brimmed hat, sunglasses, sunscreen, insulating mid-layer, lightweight rain shell, refillable water containers, electrolyte packets or salty food, broken-in shoes, blister care, and a headlamp. I also recommend a simple pulse oximeter only for curious travelers who understand its limits; it can show lower numbers at altitude, but symptoms matter more than a gadget reading.
Weather awareness is especially important during the summer monsoon pattern, typically July into early September, when afternoon thunderstorms can develop quickly. Lightning risk on exposed overlooks is real. Temperature swings matter too. A traveler leaving Page or St. George in hot conditions may not expect fleece weather at sunset, yet that is common on the North Rim. In shoulder season, frost and even early snow are possible.
Fuel, food, and timing belong in your packing mindset as much as clothing does. Fill the tank before committing to the drive, download offline maps, and do not assume store hours or connectivity will rescue a weak plan. Good national park travel is often won before you ever step onto the trail.
Where this fits in a broader National Park Guides plan
As a hub for National Park Guides, this page anchors one of the most important patterns in park travel: local conditions change the meaning of basic advice. “Bring water” means one thing in Acadia and another at the Grand Canyon North Rim, where dry air, altitude, and steep terrain amplify risk. “Take a short walk” also changes meaning when that walk starts above 8,000 feet. The benefit of using park-specific guides is that they translate general travel habits into the realities of place.
For first-time visitors, the payoff is confidence. When you understand the North Rim’s altitude, you choose better arrival times, smarter hikes, more suitable lodging expectations, and safer pacing. You also enjoy the scenery more because your attention is not consumed by preventable discomfort. Start with elevation, build the rest of the itinerary around it, and the North Rim becomes far more accessible than its remote reputation suggests.
The key takeaways are straightforward. The Grand Canyon North Rim sits at roughly 8,000 to 8,300 feet, and that elevation affects breathing, energy, hydration, sleep, and hiking performance. First-day symptoms such as mild headache or shortness of breath are common, but they are manageable when you slow down, drink steadily, eat well, and avoid overcommitting. The North Rim is cooler, snowier, and more remote than the South Rim, so packing layers and planning logistics matter as much as trail choice. For most first-time visitors, short rim walks on arrival and a cautious approach to inner-canyon hiking are the smartest path.
The larger benefit is not just safety. It is quality of experience. Visitors who respect the altitude notice more: the quiet in the spruce-fir forest, the changing light on the canyon walls, the relief of cool evening air, and the satisfaction of finishing the day strong instead of depleted. That is what good park planning should deliver. Use this guide as your starting point for the wider National Park Guides collection, compare conditions park by park, and build your itinerary around how each landscape actually behaves. If the North Rim is next on your list, check current National Park Service conditions, confirm seasonal services, and plan your first day at elevation with room to breathe.
Frequently Asked Questions
What is the altitude of the Grand Canyon North Rim, and why does it matter so much for first-time visitors?
The developed North Rim area around Grand Canyon Lodge generally sits at about 8,000 to 8,300 feet above sea level, which is high enough to noticeably affect many first-time visitors. At that elevation, the air contains less available oxygen than at sea level, so normal activities can feel more tiring than expected. You may notice that walking uphill, carrying luggage, climbing stairs, or taking a short hike leaves you breathing harder and recovering more slowly. Even travelers who feel perfectly fit at home can be surprised by how quickly the elevation changes their energy level.
Altitude also shapes the entire North Rim experience beyond how you feel physically. It is one of the main reasons the area is cooler than the inner canyon and often cooler than the South Rim as well. Mornings and evenings can feel crisp even when lower-elevation desert areas are hot. That means packing for the North Rim is less about desert heat alone and more about temperature swings, sun exposure, and the physical stress that comes with being at elevation. In practical terms, the altitude affects how you sleep, how much water you need, how fast you should hike, and how carefully you should plan your arrival day.
For first-time visitors, the key takeaway is that the North Rim is not just another scenic overlook at a national park. Its elevation makes it a mountain environment overlooking a desert canyon. If you understand that from the start, you are much more likely to pace yourself well, stay comfortable, and enjoy the trip instead of spending your first day wondering why everything feels harder than expected.
Can you get altitude sickness at the Grand Canyon North Rim?
Yes, some visitors can experience mild altitude-related symptoms at the North Rim, especially if they arrive from low elevation and begin exerting themselves immediately. Common symptoms can include headache, unusual fatigue, lightheadedness, mild nausea, poor sleep, shortness of breath with effort, and a general feeling of being “off.” For many people, these symptoms are manageable and improve with rest, hydration, lighter activity, and time to adjust. Others may feel almost no effect at all. The important point is that the elevation is high enough for symptoms to be possible, particularly on the first day.
What often catches people off guard is that altitude sickness does not always feel dramatic at first. It may begin as a headache you assume is caused by travel, dehydration, or too much sun. Sleep can also be disrupted at elevation, which can make you feel worse the next day and lead you to overestimate how much activity your body can handle. Alcohol, inadequate hydration, heavy meals, and pushing too hard on a hike can all make altitude adjustment more difficult. Visitors with heart or lung conditions should be especially thoughtful and may want to check with a medical professional before the trip.
If symptoms remain mild, the usual first response is to slow down, drink water steadily, eat something light, avoid strenuous activity, and rest. If symptoms become more severe, such as worsening headache, vomiting, confusion, chest pain, or serious difficulty breathing, that is not something to ignore. In those cases, seek medical help right away. For most first-time visitors, though, the best strategy is simple: treat arrival day gently, avoid trying to “conquer” the rim immediately, and let your body acclimate before doing anything demanding.
How should first-time visitors adjust their hiking plans because of the North Rim altitude?
The smartest adjustment is to be more conservative than you think you need to be. At 8,000-plus feet, even easy walking can feel more strenuous, and the Grand Canyon adds another challenge: trails often begin by going downhill, which feels deceptively easy at first. Many inexperienced visitors descend too quickly, use up energy faster than expected, and then face a much harder climb back to the rim in thinner air. Altitude does not just affect summit-style hikes; it changes how your body handles every level of exertion, including short scenic walks.
For a first visit, it is usually better to spend the first day on rim viewpoints, short nature trails, and low-intensity exploration rather than committing to a major inner canyon hike right away. If you do hike below the rim, start early, move slowly, take frequent breaks, and turn around sooner than you would at lower elevation. A useful rule of thumb is to judge your hike by how strong you feel on the uphill return, not by how easy the downhill start seems. Bring more water than you think you will need, along with salty snacks or food that helps maintain energy.
It is also important to remember that weather and elevation work together. Cool morning temperatures can make a hike feel pleasant, but sun exposure becomes intense quickly, and the inner canyon can warm dramatically as you descend. That means your hike can combine thin air at the rim with rising heat below. First-time visitors do best when they choose realistic distances, give themselves extra turnaround time, and focus on enjoying the scenery rather than covering maximum miles. A shorter, comfortable hike is far better than a long one that becomes unsafe or miserable.
What should you pack for the Grand Canyon North Rim because of the altitude and cooler temperatures?
Packing for the North Rim should be approached like packing for a high-elevation national park rather than a typical desert stop. Start with layers. Even in the warmer season, mornings and evenings can be chilly at 8,000 to 8,300 feet, while afternoons in the sun may feel much warmer. A light insulated layer, fleece, or warm sweatshirt is useful for dawn, dusk, and stargazing, and a shell or rain jacket can be helpful if weather shifts quickly. During the day, breathable clothing, sun protection, and comfortable walking shoes are essential.
Hydration gear matters more here than many first-timers expect. Bring a reusable water bottle or hydration pack and use it consistently. Dry mountain air can increase water loss without making you feel especially sweaty, so it is easy to become mildly dehydrated before you realize it. Lip balm, moisturizer, and eye drops can also be useful because high-elevation air often feels drier. Sunglasses, sunscreen, and a brimmed hat are important too, since sun intensity can feel stronger at altitude even when the air temperature is cool.
It is also wise to pack with energy management in mind. Snacks, electrolytes, personal medications, and anything you need for headaches or minor altitude discomfort should be easy to access. If you are camping or spending long hours outdoors, add extra layers for nighttime and be prepared for bigger temperature drops than you might expect from an Arizona trip. The overall goal is flexibility: the North Rim’s altitude creates a mix of cool air, strong sun, physical exertion, and changing conditions, so the best packing list is one that prepares you for all of those at once.
How is the North Rim different from the South Rim when it comes to altitude, weather, and overall trip planning?
The North Rim and South Rim overlook the same canyon system, but they feel very different in practice, and elevation is a major reason why. The North Rim is generally higher, with the main developed area averaging around 8,000 to 8,300 feet. That extra elevation usually means cooler temperatures, more forested surroundings, and a mountain-like atmosphere. The South Rim, while still elevated, is typically lower and often feels more accessible, more built up, and somewhat easier for visitors to navigate on a quick trip. First-time visitors are often surprised by how distinct the two rims feel even though they are part of the same national park landscape.
The higher altitude at the North Rim affects weather patterns, road access, seasonal operations, and how you should schedule your days. Because it is cooler and more remote, the North Rim has a shorter main visitor season and requires more deliberate planning. Services can be more limited, driving distances can be longer than they appear on a map, and weather changes may be more noticeable. That remoteness is part of its appeal, but it also means you should arrive with a clearer plan for fuel, food, lodging, and activity levels. You do not want to assume the same convenience and flexibility many people associate with the South Rim.
From a visitor experience standpoint, the North Rim often feels quieter, calmer, and more immersive, but it rewards preparation. If your goal is a cooler environment, forest scenery, and a less crowded canyon visit, the North Rim can be an outstanding choice. If your goal is maximum services, easier logistics, and a faster introductory visit, the South Rim may feel simpler. For first-time travelers choosing the North Rim, the most important planning mindset is to respect the altitude, expect cooler conditions, and treat the trip as a high-elevation, remote park visit rather than a casual roadside stop.